Key Takeaways
- Start with simple, straight lines to build a strong foundation for your skills.
- Treat mistakes as opportunities to grow and learn, much like pruning a plant.
- Master the basic mechanics of your tools before rushing into complex patterns.
- Choose sturdy, stable fabrics like cotton that behave predictably under your hands.
- Consistent, short practice sessions yield better progress than exhausted marathons.
Sowing the First Seeds of Creativity
Embarking on your first beginner sewing projects is much like planting a vibrant new garden. Therefore, you begin with a tiny seed of inspiration. With patience, gentle care, and daily tending, that seed sprouts. Soon, it blooms into something beautiful, tangible, and entirely your own. Working with fabric requires this same nurturing mindset. Furthermore, you are learning a tactile, grounded craft that connects you to generations of makers. It is completely normal to feel slightly hesitant when looking at a fresh piece of cloth. Consequently, think of that fabric as fertile soil, waiting for you to shape it into something wonderful. We will explore how to take those vital first steps calmly and confidently. Ultimately, by focusing on foundational techniques, you will build robust skills.
Gathering Your Gardening Tools: Essential Supplies
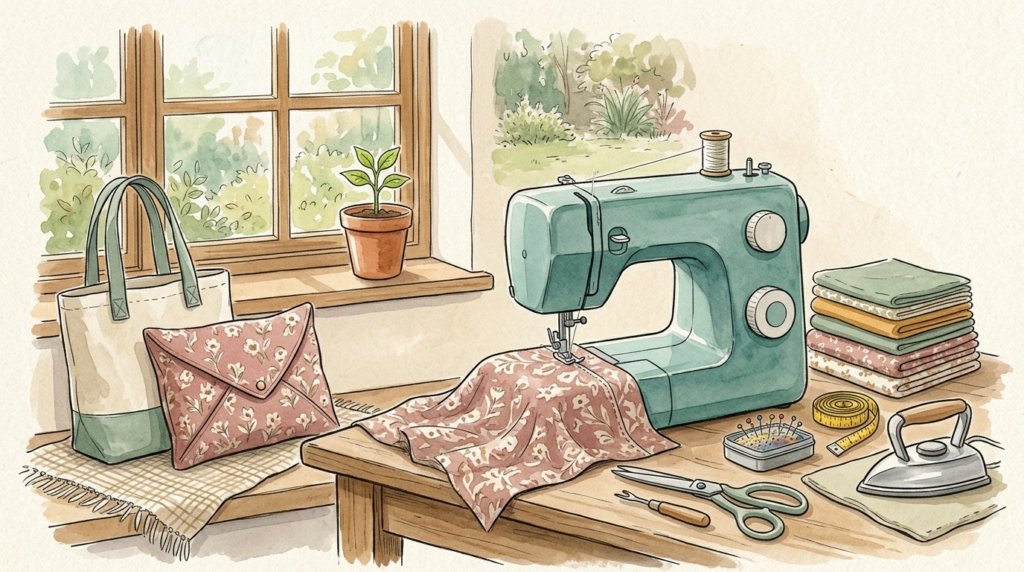
Before you can plant seeds, you need the right tools for the job. Similarly, preparing your workspace correctly prevents frustration later on. Firstly, you must acquire a good pair of fabric shears. Never use these precious scissors to cut paper, as this will dull the blades rapidly. Dull blades chew the fabric rather than slicing it cleanly. Secondly, invest in sharp, glass-headed pins and a reliable measuring tape. These items act as your gardening implements, helping you measure and shape your materials accurately. Moreover, keep a small seam ripper close at hand. This tiny tool is essential for unpicking stitches when things occasionally go awry. Indeed, having everything neatly arranged before you begin creates a calm, focused environment for your creativity to thrive.
Choosing the Right Fabric for Early Success
Selecting the correct material is vital for a smooth start. Therefore, I always encourage new stitchers to begin with medium-weight cotton. Cotton is incredibly forgiving and behaves wonderfully under the needle. Furthermore, it holds a crisp fold when you press it with a hot iron. Avoid slippery silks or highly stretchy knit fabrics during your early days. Consequently, these materials behave like unruly vines, twisting and slipping out of place. Stick to sturdy cottons until your confidence blossoms fully. Additionally, always remember to pre-wash your fabric before cutting into it. This prevents unexpected shrinkage when you eventually launder your finished masterpiece.
The Gentle Art of Pressing Your Fabric
Many newcomers underestimate the sheer power of a good iron. However, pressing your seams is the secret to a truly professional finish. It trains the fibres of the fabric to lie exactly where you want them. Consequently, this ensures neat, crisp edges on all your projects. Keep your ironing board set up right next to your workspace. Treat the iron as an equal partner to your needle and thread. Furthermore, press every single seam immediately after you stitch it. This small habit acts like sunlight on a seedling, encouraging the project to take on a beautiful, structured shape. Ultimately, skipping this step often results in a wilted, messy appearance.
What to Make as a Beginner Sewer
When considering what to make as a beginner sewer, it is wise to start with items that rely on straight seams. Therefore, straight lines are the neat, orderly rows of your new creative garden. They teach you how to guide the material gently. Consequently, you avoid the added pressure of navigating tricky curves or complex garment darts. If you seek in-person guidance, you might explore creative studio spaces in the capital where patient tutors can guide your hands. Choose simple shapes first. These quick wins act as vital nourishment for your growing confidence. They provide immediate, practical results that you can proudly use in your home.
Crafting a Simple Cushion Cover
An envelope-style cushion cover serves as a brilliant starting point. Firstly, it uses overlapping panels of fabric at the back. Therefore, it completely eliminates the need for inserting zips or buttons. You simply cut your square shapes, hem the raw edges, and stitch around the outer perimeter. Turning that flat square right-side out to reveal a perfectly plump cushion feels incredibly rewarding. Furthermore, it allows you to practise stitching in a continuous straight line. You can easily complete this project in a single, relaxed afternoon. Indeed, it is a wonderful way to add a pop of colour to your living room while practicing fundamental techniques.
Growing Your Skills with a Tote Bag
A classic tote bag serves as another exceptional first harvest. Consequently, it requires only large rectangles of fabric, simple hemming, and straight topstitching for the sturdy handles. As you guide the thick cloth under the needle, you learn to manage the speed of your machine. Furthermore, you learn to watch the seam allowance guide rather than staring directly at the needle itself. This builds fantastic muscle memory. Once you master the basic tote, you can begin adding lovely pockets or colourful contrasting handles. Therefore, the simple tote bag acts as a versatile canvas for your blossoming creativity.
Our Unique Insight: The Seedling Approach to Crafting
Many new students feel tempted to immediately tackle complex tailored garments. However, we call this trying to harvest the fruit before the tree has grown. Our unique insight is the undeniable power of the ‘Seedling Approach’. This strategy occurs when a student completes a series of very small, highly achievable items in quick succession. Therefore, each finished item acts as a tiny blossom, boosting morale and solidifying practical skills. The joy of completion outweighs the complexity of the task. Ultimately, we believe that frequent, small successes build a much stronger foundation than one large, frustrating struggle.
Why Small Items Create Strong Roots
Consider crafting simple drawstring bags, cloth napkins, or fabric coasters. Firstly, these items require minimal materials. Consequently, they can often be completed in a single session. When you finish a fabric coaster, your brain registers a complete cycle of creation. You measured, you cut, you stitched, and you pressed. Furthermore, you successfully navigated the entire process from start to finish without becoming overwhelmed. This builds a deep, resilient confidence that prepares you for heavier branches of tailoring later on. When you finally move on to formal introductory sessions for new stitchers, you arrive with hands that already speak the language of fabric fluently.
Actionable Strategy: Setting Up Your Sewing Garden
Your physical environment heavily influences your ability to learn and thrive. Therefore, you do not need a massive studio, but you do need a thoughtfully prepared space. Find a sturdy table where your equipment will not bounce or vibrate. Ensure you have ample natural light to prevent eye strain. Treat this space as your personal greenhouse. It is a quiet sanctuary dedicated entirely to your growth. Furthermore, keeping your space tidy prevents tangles and lost tools. When you sit down in a prepared, welcoming environment, your mind naturally calms. Consequently, you are fully ready to absorb new techniques and enjoy the rhythmic process of making.
A Beginners Guide to Sewing Machine Basics
Understanding your equipment is paramount for success. A beginners guide to sewing machine basics always starts with learning the anatomy of your specific model. Firstly, locate the power switch, the handwheel, and the spool pin. Next, find the presser foot lifter at the back. The presser foot holds your fabric flat against the metal feed dogs below. Always ensure the presser foot is lowered before you begin stitching. Otherwise, you will end up with a tangled nest of thread. If you feel overwhelmed, mastering mechanical basics through structured reading or gentle practice runs on scrap fabric will quickly dispel any anxiety.
Easy Ways to Thread a Sewing Machine Needle
Many people find the initial setup process incredibly intimidating. However, there are remarkably easy ways to thread a sewing machine needle without frustration. First, always ensure your machine is completely turned off. This prevents any accidental stitching while your fingers are near the moving parts. Raise the needle to its highest position using the handwheel on the side. Furthermore, most modern machines have a printed diagram right on the casing. Simply follow those instructional arrows precisely. When you reach the needle, snip the end of your thread with sharp scissors. This creates a clean, unfrayed edge. Hold a piece of white paper behind the needle to highlight the eye. Finally, guide the thread directly through from front to back smoothly.
Returning to the Roots of the Craft
There is a quiet, rhythmic beauty to stepping away from modern machinery entirely. Therefore, exploring traditional techniques connects you to the deep history of this lovely craft. Hand stitching forces you to slow down and breathe. It connects your fingers directly to the textured weave of the cloth. Consequently, it is a highly meditative practice, perfect for quiet evenings by the fire. You can repair beloved clothing or add intricate decorative embroidery to plain items. If you enjoy discovering these traditional methods, our collection of creative tutorials offers many inspiring ideas for analogue crafting.
What Can You Make With a Needle and Thread
When exploring what can you make with a needle and thread, the possibilities are surprisingly vast. Firstly, start by mastering the simple running stitch and the strong backstitch. A basic running stitch is perfect for gathering fabric gently. The backstitch is incredibly robust, mimicking the durability of a machine seam. Furthermore, you can use these basic stitches to mend holes, attach loose buttons, or piece together beautiful patchwork squares. Many historic garments were constructed entirely without electricity. Therefore, your own two hands are fully capable of producing sturdy, beautiful, and lasting items using just these fundamental stitches.
How to Sew Apron With Needle and Thread
Creating a functional garment by hand is deeply satisfying. Learning how to sew apron with needle and thread is an excellent weekend endeavour. Begin by choosing a sturdy cotton canvas. Cut a large rectangle for the main body of the protective apron. Next, fold the raw edges over twice to enclose the fraying threads. Press these folds firmly with a hot iron. Thread your hand needle with a length of strong cotton thread. Furthermore, use a sturdy backstitch to secure these folded hems along all four sides. Finally, cut long strips of fabric for your waist ties. Fold the edges inward, stitch them closed, and attach them securely to the apron body. You have just grown a practical garment from a simple length of cloth.
Nurturing Your Craft Over Time
As your skills take root, maintaining good habits ensures a continuous, bountiful creative harvest. Therefore, take your time when pinning your paper pattern pieces to your fabric. Place your pins perpendicular to the raw edge. Consequently, this holds the layers securely and allows you to easily slip the pins out as they approach the presser foot. Never stitch directly over a metal pin. Doing so can violently snap your needle and damage your internal mechanics. Furthermore, accuracy during the early cutting and pinning stages acts as the strong trunk of your project. It fully supports everything that follows it.
Pruning Mistakes and Fostering Growth
Every single gardener occasionally prunes away a dead branch. Similarly, every experienced seamstress has unpicked hundreds of crooked seams. Therefore, do not panic when a seam goes slightly wrong. Simply take a deep breath and grab your handy seam ripper. Unpick the errant stitches gently and try the section again. Fabric is remarkably resilient and forgives many mistakes. Furthermore, we view errors not as failures, but as essential lessons on the path to true mastery. If you are ever unsure of your path, finding the right educational path can provide the exact support structure you need. Keep practicing, and your results will soon flourish beautifully.
Expanding Your Creative Horizons
Once you feel comfortable with basic rectangles and straight lines, it is time to branch out. You might wish to explore the process of modifying existing garments to fit you perfectly. Alterations teach you how clothing is constructed from the inside out. Furthermore, you can start incorporating gentle curves, simple darts, and even basic zips into your repertoire. Remember to never rush this natural growth phase. Breathe deeply, enjoy the tactile sensation of the material, and allow your understanding to unfold leaf by leaf. As you naturally progress to more complex techniques, you will marvel at how capable your hands have become.
Frequently Asked Questions (FAQ)
Which fabric should I choose first?
I highly recommend starting your journey with medium-weight cotton. Consequently, cotton is incredibly forgiving, much like rich, fertile soil. It holds a crease beautifully when you press it with an iron. Furthermore, it rarely slips out of place under your presser foot. Avoid slippery silks or stretchy knits during your early days. These fabrics behave like unruly vines and can cause unnecessary frustration. Ultimately, stick to sturdy cotton until your confidence blossoms fully.
Must I buy an expensive machine immediately?
You absolutely do not need to purchase a top-tier model straight away. Therefore, a basic, mechanical model provides everything you require to establish strong roots. Look for a machine that offers a simple straight stitch and a zigzag stitch. Moreover, many excellent secondhand options exist online or at local repair shops. As your skills naturally grow and branch out over time, you can always upgrade your equipment to match your flourishing new talents.
How often should I practise my new skills?
Consistency acts as the vital sunlight for your growing abilities. Consequently, aim to spend about twenty minutes at your workstation a few times a week. Short, regular sessions prevent fatigue and keep your mind fresh. Furthermore, trying to marathon a complex pattern over ten hours usually leads to mistakes and wilted enthusiasm. Gentle, consistent nurturing yields the best harvest. Indeed, you will marvel at how quickly your muscle memory develops with regular tending.
What if I make a mistake and ruin the fabric?
Mistakes represent vital growth rings in your creative tree. Therefore, every experienced tailor or seamstress has unpicked hundreds of seams. When a stitch goes wrong, simply take a deep breath and grab your seam ripper. Unpick the threads gently and try again. Furthermore, fabric is remarkably resilient. We view errors not as failures, but as essential lessons on the path to mastery. Keep trying, and your beautiful results will soon flourish beautifully.
Conclusion
Embarking on this creative path is a wonderfully enriching choice. You are learning a tactile, grounded skill that will serve you faithfully for the rest of your life. Therefore, remember to treat yourself with immense patience and kindness. You are actively planting seeds of knowledge that require time, gentle practice, and a calm environment to truly thrive. Do not let minor thread tangles or slightly wonky seams discourage you. Consequently, these moments are simply part of the natural growing process. Keep your scissors sharp, your workspace bright, and your heart fully open to learning. As you complete each small item, you will feel your confidence take root and stretch upward. Soon, you will look around at the beautiful items you have crafted, marvelling at the bountiful harvest your own hands have cultivated. If you would like company at the machine, the new class venue in Edmonton Green is where Grace teaches this month.
About the Author: Grace, Founder of London Sewing Courses
Grace is the heart and hands behind London Sewing Courses. A passionate and experienced sewing instructor, she founded the studio with a unique mission: to create a calm, friendly space for adults to learn and connect, while using the profits to fund free sewing classes for local children in need. Her personal expertise and commitment to community building are at the core of every class and every stitch.
Sources
39 Hand Sewing Projects You Can Make With Fabric Scraps