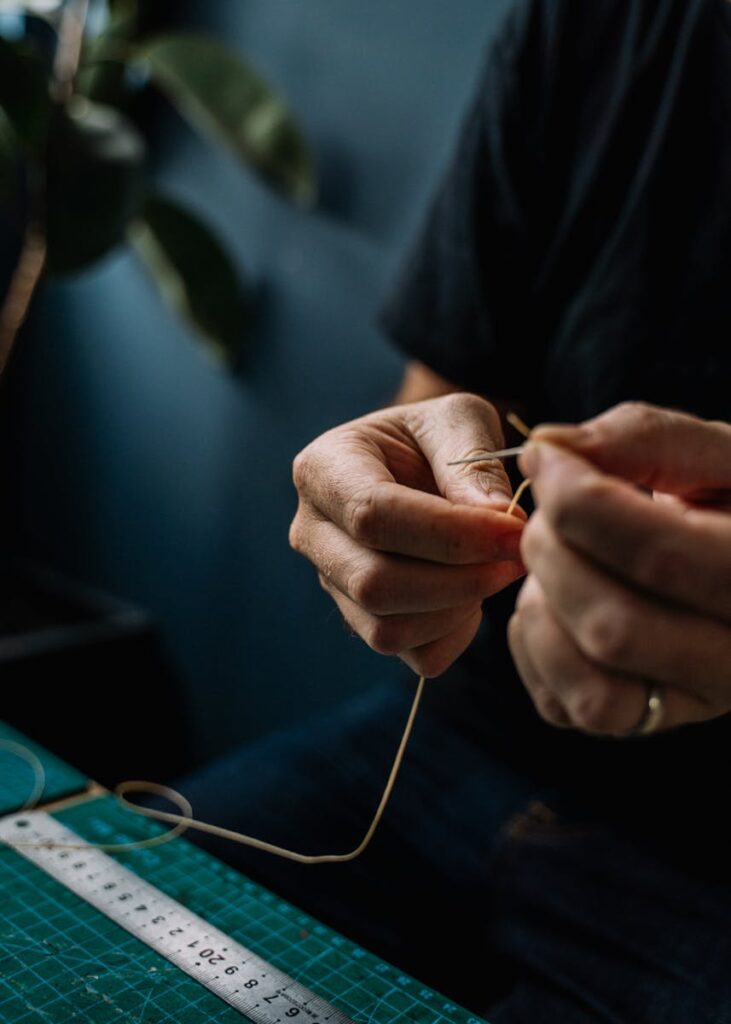
Key Takeaways
- Prep is Everything: Trimming the thread end cleanly at an angle and wetting or stiffening the tip are the most effective ways to prevent fraying and make threading easier.
- Needle Still, Thread Moves: For the traditional hand method, holding the needle still and pushing the thread eye-first through is more successful than trying to guide a tiny, floppy piece of thread.
- Know Your Tools: Basic wire loop threaders are perfect for small hand-sewing needles, while automatic threaders are a fantastic aid on most modern sewing machines.
- Specialist Help: Self-threading or ‘calyx eye’ needles are a simple solution for those with dexterity challenges or poor eyesight, allowing you to slip the thread through a notch at the top.
- The Next Step: Once you master how to thread a needle, the next crucial skill is securing a perfect knot to ensure your stitches hold firm.
The Foundation: Why Learning how to thread a needle is Your First Step
Welcome, dear student. If you’ve ever felt a pang of frustration trying to coax a delicate strand of thread through the minuscule eye of a needle, know that you are in good company. This tiny, seemingly simple step is where every great sewing journey truly begins. Mastering how to thread a needle isn’t just about getting the job done; it’s about building the patience, precision, and confidence that underpin all skilled tailoring. Think of it as your foundation—the quiet moment of preparation before the beautiful, creative work begins.
We often see students falter here, feeling defeated before their project even starts. But we believe that with the right guidance, this can become a quick, stress-free part of your process. This comprehensive guide, written by our expert tutors, will patiently walk you through every method, from the classic hand-sewing technique to using specialist tools. When you master this foundational skill, you build the confidence to continue your journey and one day, maybe even join us to start their creative journey here in London.
The Traditional Method: How to Thread a Sewing Needle by Hand
To truly become a confident seamstress or tailor, you must first master the classic method: how do you thread a sewing needle using only your hands. This skill is vital for mending, hand finishing, and all the essential details that give your creations a professional polish. The key is to prepare both the thread and the needle properly.

Preparing the Thread and Needle
Before you even attempt to put thread in a needle, you need to set yourself up for success. This preparation process is the secret many overlook. First, cut a manageable length of thread—around 45 to 60 centimetres is ideal. A longer piece will twist, tangle, and fray much faster, leading to headaches later.
Next, you must sharpen and stiffen the end of your thread. Use a sharp pair of scissors to cut the thread at a crisp, diagonal angle. This creates a fine point, significantly smaller than the blunt end a dull pair of shears might leave. Then, dampen the thread end with a tiny bit of moisture, or, better yet, apply a small amount of thread wax or clear nail polish to the last few millimetres. This simple act will stop the thread from fraying and help you develop your fundamental skills for all your future projects. Finally, ensure you are in a well-lit area where you can clearly see the eye of the needle.
Essential Hand-Threading Techniques
Once your thread is perfectly prepped, it is time to tackle the actual threading. Forget trying to poke the thread through while holding the needle in mid-air—that is a common mistake that leads to frustration. Instead, follow this simple, two-step process:
- Hold the Needle Still: Place the needle horizontally on a flat, light surface, or simply pinch the shaft firmly between the thumb and forefinger of your non-dominant hand. Hold it close to the eye. The needle must not move.
- Push the Thread In: Hold the prepared thread end with your other hand. Bring the thread up to the needle eye and push it through. By keeping the needle perfectly still and focusing on moving the stiff, tiny thread tip, you increase your chances of success dramatically. This technique is easier than trying to align a moving needle with a wobbly thread. If you find yourself needing more guided instruction in a supportive environment, consider one of our beginner courses.
Our Unique Insight: Overcoming the Fraying Frustration
The most common point of failure when you try to put thread in a needle is fraying. You cut the thread, you aim for the eye, and the end seems to instantly bloom into a cotton fluffball, making the task impossible. This is where a change of technique, rather than sheer luck, saves the day.
We teach our students a unique tip: hold the thread end right next to the needle’s eye, then press the thread against the needle with your thumb, effectively folding the thread over the needle shaft. When you pull the needle away, you leave behind a sharp, tiny loop of thread that is already oriented in the direction you need. Then, you simply pinch the loop firmly between your fingers and push it straight through. This trick allows you to present a more substantial and less-frayed point to the needle’s eye.
If you struggle with hand strength or have difficulty keeping the thread perfectly stiff, remember that practice is the master key. This small hurdle is worth overcoming, especially as you move onto more complex garments that require fine finishing work.
Effortless Threading: How to Use a Threader to Thread a Needle
While mastering the hand-threading technique is a mark of a skilled seamstress, there is absolutely no shame in turning to modern aids! Sometimes the needle eye is simply too small, the thread too thick, or the light is just not quite right. Using a needle threader is a practical, clever way to conserve your eyesight and your patience. If you’ve ever wondered how do you use a threader to thread a needle, you’ll be pleased to know it’s incredibly simple.
The Simple Wire Threader
The most common tool is the inexpensive, diamond-shaped piece of metal or plastic with a tiny, delicate wire loop attached. This is often found in basic sewing kits and is perfect for hand-sewing needles.
- Insert the Wire: Push the fine wire loop through the eye of the needle, going from the side you want the thread to come out of. The wire is much thinner and stiffer than the thread, making this step easy.
- Thread the Loop: Once the wire is through, pass your main sewing thread through the large, accommodating opening of the wire loop.
- Pull Back: Gently hold the needle in one hand and pull the threader back out of the needle eye. As the wire comes through, it drags a loop of your thread cleanly and seamlessly with it.
This tool is a lifesaver for people with a reduced range of motion or simply for those who prefer a simple, fuss-free technique.
Mastering Automatic Machine Threaders
Moving from hand-sewing to a machine brings its own set of challenges, especially for beginners learning how to thread a needle on a new model. Most modern sewing machines come equipped with a built-in automatic needle threader, often a tiny lever or mechanism next to the needle bar.
While the exact steps vary by machine brand, the principle is the same: the mechanism uses a tiny hook or pin to draw the thread through the machine needle eye. You typically hook the thread around a small guide and lower the lever, which performs the fiddly work for you. Always consult your machine’s manual, but embracing this feature can dramatically speed up the setting-up process. If you’re struggling with machine basics, our London sewing courses for adults include dedicated lessons on machine setup and use.
Specialist Needles: how do you thread a self threading needle
For many years, some students assumed that if you couldn’t easily thread a traditional needle, your sewing days were limited. Thankfully, technology has given us a superb alternative: the self-threading needle. These needles, sometimes called calyx-eye or easy-thread needles, are brilliant if you struggle with fine motor skills or have visual impairment.
So, how do you thread a self threading needle? It couldn’t be simpler:
- Find the Groove: Look closely at the top of the needle eye. You will see a small ‘V’ shaped groove or slot that opens into the eye.
- Slip the Thread: Take your prepared thread and press it down and across this groove. You don’t push it through the traditional way; you just press it into the channel.
- The Click: With gentle pressure, the thread will snap or ‘click’ into the needle eye, held securely by the pressure of the metal.
This instantaneous method is a fantastic way to keep your focus on the creative work of sewing rather than the preparatory steps, making it perfect for quick repairs or for those getting started in beginner seamstress courses.
The Next Step: how do you sew with a needle and thread
Once your thread is secured in the needle, you’re ready for the exhilarating part: creating! Knowing how do you sew with a needle and thread shifts the focus from preparation to technique. Every stitch you take relies on that strong connection between the needle and the thread, so it’s essential to secure it first.
Securing the Thread: The Perfect Knot
A perfect knot is a stitch’s anchor; without it, all your beautiful work will simply pull out. We recommend the simple, yet reliable, “wrap and roll” knot method:
- The Wrap: Hold the needle between your thumb and forefinger. Lay the end of the thread against the needle shaft, and use your other hand to wrap the thread end around the needle two or three times.
- The Roll and Pull: Pinch the wrapped thread tightly against the needle and slide your thumb and forefinger down the needle, rolling the wraps off the end of the needle.
- The Tighten: Pull the thread taut as the loop slides off the tip. The wraps will gather into a neat, firm knot at the very end of the thread. Trim any long tail close to the knot.
Getting Started on Your Project
With the knot secured, you can begin the stitching process. For hand-sewing, you’ll typically start your first stitch by pushing the needle into the fabric from the back (or ‘wrong side’) to the front (or ‘right side’). The knot will catch on the back, anchoring your work. Whether you are doing a running stitch, a backstitch, or a simple hem, that perfectly threaded needle is now your artistic tool. If you are learning how to sew and alter clothes, this simple act of anchoring your thread is the difference between a secure garment and a loose seam.
Actionable Strategy: Three Tricks to Try Today
Here are three simple, low-effort tricks you can implement right now to make your threading experience better and faster:
- The Hairspray Hack: If you don’t have thread wax, a tiny spritz of cheap hairspray on the last centimetre of the thread will stiffen it instantly. Let it dry for two seconds, and you’ll have a sharp, durable point.
- Use Contrast: If you’re using dark thread, place a piece of white paper or a light-coloured mat underneath your needle. If you’re using light thread, use a dark surface. The increased contrast makes the needle eye far easier to see.
- Invest in a Good Thimble: A thimble might seem unrelated, but it’s part of the process. If your fingers are struggling to push the needle through thick fabric, they’ll quickly tire, and your precision for threading will suffer. A thimble helps you maintain control and accuracy throughout your sewing session.
Frequently Asked Questions (FAQ)
How long should I cut my thread?
For hand-sewing, aim for a length between 45 to 60 centimetres, or approximately the length from your hand to your elbow. A shorter length is much less likely to twist, tangle, or knot prematurely while you are stitching, which saves time and prevents frustrating snarls. If you are working on a very long seam, it is always better to re-thread the needle a few times than struggle with an unwieldy, overly long piece of thread.
What should I do if my thread keeps falling out?
The most likely culprit is that you have not pulled enough thread through the needle eye after threading it. When you thread the needle, pull at least 10 to 15 centimetres through to the other side. This longer tail prevents the thread from slipping back out as you start your first few stitches. Alternatively, try a small overhand knot around the eye of the needle shaft itself to temporarily secure the thread for extra thick or slippery fabrics.
Can I thread a needle with two strands?
Absolutely, and it is common practice, particularly for buttons, upholstery, or any stitching that requires extra strength and durability. To do this, simply thread your needle with a single strand, but instead of knotting the tail, bring both ends of the thread together and knot them. This creates two working strands, resulting in a much stronger line of stitching. Just ensure the needle eye is large enough to accommodate the doubled thickness of your thread without difficulty.
Conclusion
The simple act of learning how to thread a needle is the gatekeeper skill for all other forms of sewing, mending, and creative work. Whether you are using the traditional hand-sewing technique, employing the clever mechanism of a threader, or utilising the convenience of a self-threading needle, the principles of preparation and patience remain your greatest assets.
We hope this detailed guide has given you the confidence to conquer this essential first step. Remember, every master tailor, seamstress, and crafter started exactly where you are today. With practice, threading will become a quick, automatic action that allows you to move swiftly onto the satisfying, rewarding work of stitching itself.
If you have any questions about the techniques we have discussed, or if you feel ready to take the next step and learn how to learn to use a sewing machine or learn advanced skills, we are here to help. Please feel free to visit our Contact page to ask a question or book your next class with us.
About the Author: Grace, Founder of London Sewing Courses
Grace is the heart and hands behind London Sewing Courses. A passionate and experienced sewing instructor, she founded the studio with a unique mission: to create a calm, friendly space for adults to learn and connect, while using the profits to fund free sewing classes for local children in need. Her personal expertise and commitment to community building are at the core of every class and every stitch.
Sources
Threading Needles and Knotting Thread
How to Thread a Needle for Sewing
How to Thread a Needle and Tie a Knot
How to Thread an Automatic Needle Threader on a Sewing Machine
Keep learning
When you want a teacher in the room, see the free children’s programme.