The Ultimate Sewing Machine Guide
Welcome, budding creators and curious crafters! Have you ever dreamt of mending your own clothes, crafting unique gifts, or even designing your very own garments? Perhaps you’ve acquired a sewing machine, still gleaming in its box, or dusted off a beloved hand-me-down, and found yourself asking, “how do I learn to use a sewing machine?” You’re not alone! Many aspiring sewists look at their machine and feel a mix of excitement and apprehension, thinking, “is learning to use a sewing machine hard?”. Let us reassure you right from the start: learning to use a sewing machine is a wonderfully rewarding and entirely achievable journey, especially with the right guidance.
Introduction to Sewing for Beginners
The enduring appeal and practical benefits of learning to sew. Sewing for beginners opens up a world of possibilities, transforming simple fabric into something truly personal and practical. It’s a skill that lasts a lifetime, allowing you to create beautiful items for your home, craft unique garments, or simply mend and alter existing pieces, giving them a new lease of life. Imagine the satisfaction of seeing your creative visions come to life, stitch by stitch! Beyond the joy of creation, sewing is incredibly practical, helping you save money on alterations and repairs, and even contributing to a more sustainable lifestyle by extending the life of your textiles.
Why a sewing machine is a fundamental tool for various crafting and repair tasks. While hand sewing has its place for delicate finishes or quick mends, the sewing machine is truly the workhorse of the modern sewist. It allows you to produce strong, consistent stitches at a much faster pace, making larger projects manageable and professional-looking. Whether you’re crafting a sturdy tote bag, assembling a flowing dress, or adding decorative flair to a cushion, your machine will be your most valuable companion. Its efficiency and versatility make it an indispensable tool for almost any fabric-based project you can imagine.
Reassure prospective learners that mastering a sewing machine is a straightforward process with the right guidance. It’s completely normal to feel a little daunted by the array of dials, levers, and mechanisms on a sewing machine. Many people ask, “is it easy to learn to use a sewing machine?” and the answer is a resounding yes! While there’s a learning curve, much like learning to drive a car, it quickly becomes intuitive with practice. You don’t need to read every single page of the manual before you start; many prefer to jump in and learn as they go, referring to the manual for specific instructions. Think of this guide as your patient, skilled tutor, here to walk you through each step of your creative journey, demystifying the process and building your confidence.
Overview of what this comprehensive guide will cover to help readers effectively learn to use a sewing machine. This comprehensive guide is designed to help you confidently learn to use a sewing machine, from the very first plug-in to completing your first project. We’ll delve into the sewing machine basics, including its essential parts and how they work together to create magic with thread. We’ll then provide precise, step-by-step instructions on how to operate a sewing machine, covering everything from winding a bobbin to mastering different stitch types. You’ll also discover fundamental sewing techniques for beginners, helpful troubleshooting tips for common issues you might encounter, and inspiring beginner sewing patterns to get you started. Finally, we’ll guide you on where to learn to use a sewing machine further, from online resources to local sewing workshops near me. So, take a deep breath, embrace your curiosity, and let’s unlock the wonderful world of sewing together!
Start Learning to Sew Today
Discover the best sewing classes North London and beyond, perfect for beginners and adults alike. Our sewing classes London for adults and sewing classes London for beginners offer friendly, supportive lessons to help you grow your skills. Try free sewing classes London or book private sewing lessons London for a personal touch. Whether you want sewing classes near me for adults or step-by-step guidance, our courses help you bloom with confidence.
Sewing Machine Basics
Before you begin stitching, it’s incredibly helpful to familiarise yourself with the different parts of your sewing machine and understand their purpose. Think of it as getting to know your new creative companion!
Understanding Your Machine’s Anatomy
Every sewing machine, whether a classic mechanical model or a modern computerised one, shares core components that work in harmony to create stitches.
Main Components: Detailed explanation of the handwheel, bobbin winder, spool pin, thread guides, tension dial, stitch length/width selectors, pattern selector, reverse lever, presser foot lifter, needle clamp, presser foot, needle plate, feed dogs, and foot pedal.
- Power Switch and Cord: This is your machine’s lifeline. It’s normally found on the right side or back of the machine. Some models power on immediately when plugged in, while others have a dedicated switch.
- Spool Pin: Located on the top of your machine, this small pin holds your spool of top thread. It might be horizontal or vertical, depending on your machine’s design. Some machines also come with caps or holders to secure the spool.
- Bobbin Winder: Typically to the right of the spool pin, this is where you load an empty bobbin to fill it with thread from your main spool. There’s often a stopper or lever that disengages the needle when winding the bobbin.
- Thread Guides: These are a series of hooks, grooves, and channels that guide the top thread from the spool pin all the way down to the needle. Following the numbered path on your machine is crucial for correct threading.
- Tension Dial: A small numbered wheel, usually near the thread take-up lever. This controls the amount of pressure applied to the top thread as it feeds through, ensuring balanced stitches. Incorrect tension can lead to looping or puckering stitches. We’ll discuss this in more detail later.
- Stitch Adjustment Buttons/Dials: These controls allow you to select your desired stitch type (such as a straight stitch or zigzag), adjust the stitch length (how far apart each stitch is), and the stitch width (for zigzag or decorative stitches). Computerised machines often have screens, while mechanical ones use dials.
- Pattern Selector: This allows you to choose from the various stitch patterns your machine offers, from basic straight stitches to more elaborate decorative ones.
- Reverse Lever/Button: An essential feature that allows you to stitch backwards, typically used at the beginning and end of a seam to secure your stitches and prevent them from unravelling. You might need to hold it down or press it once to engage.
- Handwheel: Located on the side of the machine, this large wheel allows you to manually raise and lower the needle. Always turn it towards you (counter-clockwise) to avoid tangles or timing issues.
- Presser Foot Lifter/Lever: Usually a lever located behind or to the right of the needle assembly. It raises and lowers the presser foot, which holds your fabric in place while sewing. You must lower it before you start stitching.
- Needle Clamp Screw: This metal screw securely holds the sewing machine needle in place. You’ll loosen it with a screwdriver or your fingers to change needles.
- Presser Foot: This metal attachment sits just below the needle and looks somewhat like a small ski. It applies pressure to the fabric, keeping it flat against the needle plate and allowing the feed dogs to move it smoothly. Different feet are available for various tasks, like zippers or buttonholes.
- Needle Plate (or Throat Plate): The flat metal plate directly beneath the needle. It often features measurement markings or guidelines to help you maintain a consistent seam allowance.
- Feed Dogs: These are small, serrated metal “teeth” that emerge from slots in the needle plate, just under the presser foot. Their primary job is to grip the fabric and move it forward at a steady pace as you stitch.
- Foot Pedal: This pedal sits on the floor and connects to your machine by a cord. It controls the speed of your stitching; pressing harder makes the needle move faster. It’s widely recommended to use the foot pedal for better control.
- Bobbin Cover: A movable cover, usually near the needle plate, that provides access to the bobbin compartment.
Safety Features: Emphasise proper plugging/unplugging, keeping fingers clear of the needle. Safety is paramount when learning to use a sewing machine. Always ensure your machine is unplugged before you begin any setup, threading, or needle-changing tasks. This prevents accidental power-ons and potential injury from a sharp, moving needle. Keep your fingers well clear of the needle area while sewing. Your hands are for guiding the fabric, not pushing or pulling it directly under the needle. Develop the habit of keeping your foot off the pedal when your hands are near the needle area.
Types of Sewing Machines for the New Seamster
When embarking on your sewing journey, you’ll encounter various types of machines, each with its own advantages. Understanding these can help you decide which is the best sewing machine for me.
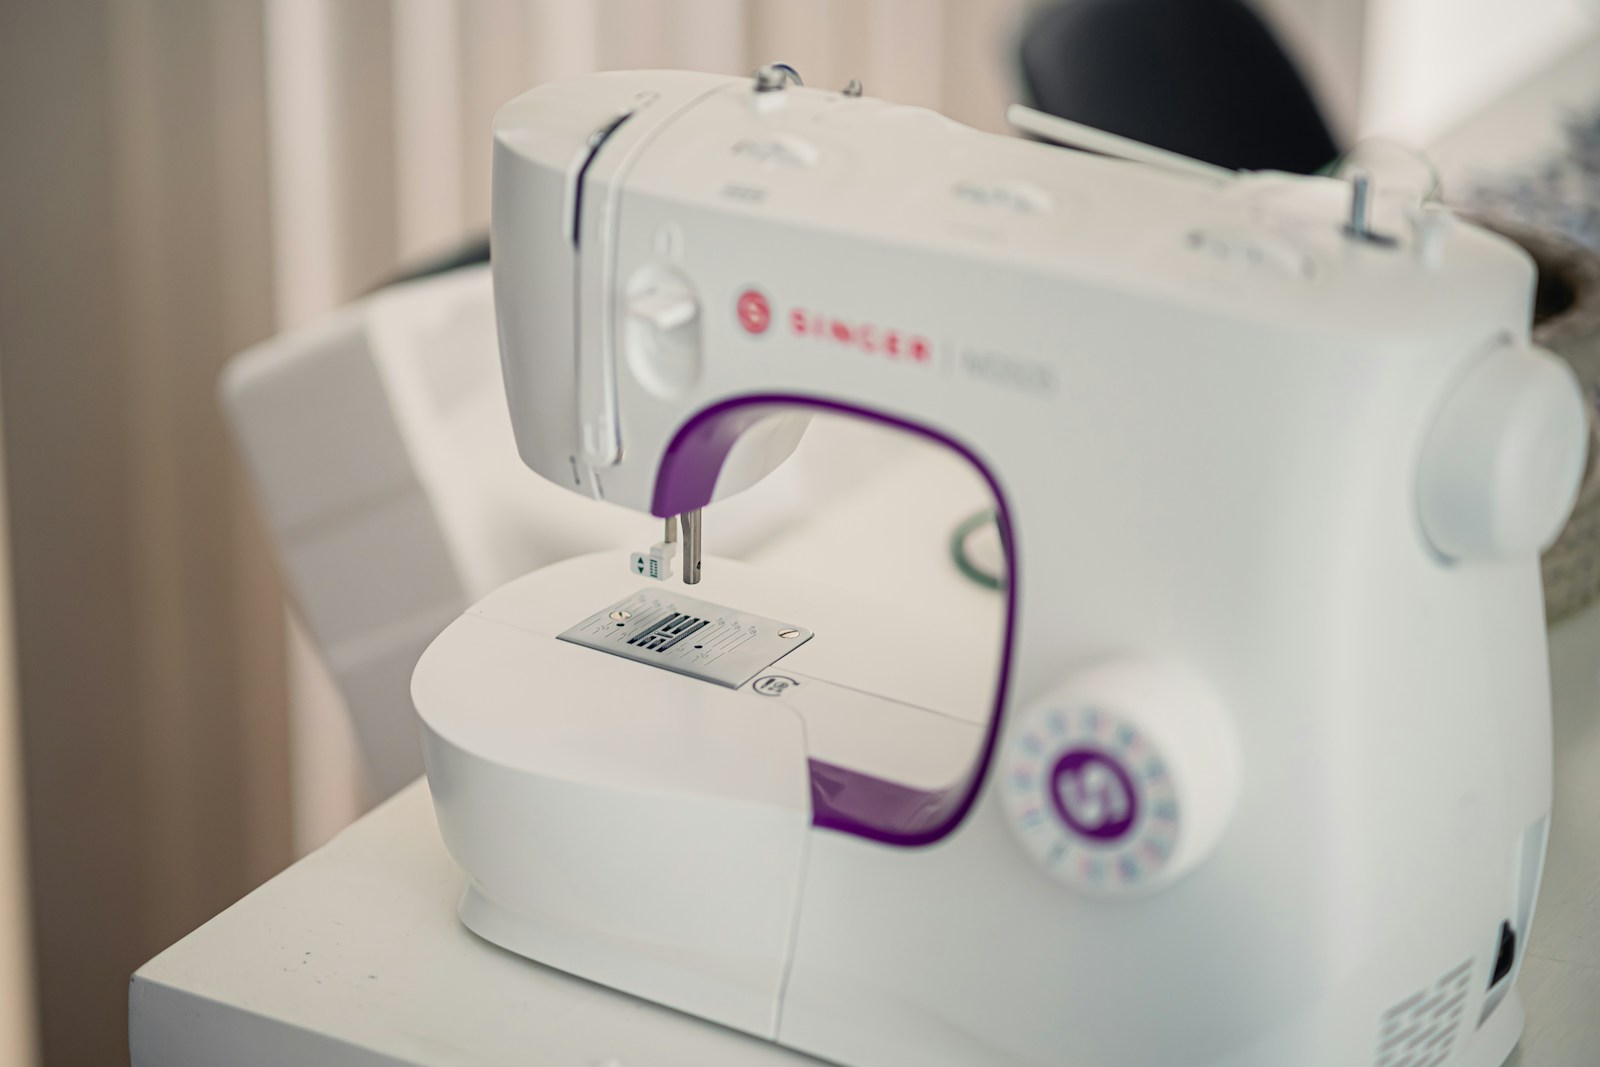
Mechanical Machines: Simple, durable, and often recommended for sewing for beginners due to their straightforward operation. Mechanical machines are often the traditional choice for sewing for beginners. They typically feature manual dials and levers for stitch selection, length, and width. Their simpler mechanics make them durable and often easier to troubleshoot basic issues. If you’re looking for a workhorse machine that focuses on fundamental stitches without too many bells and whistles, a mechanical model can be an excellent starting point. They are robust and reliable, often lasting for decades with proper sewing machine maintenance.
Computerised Machines: Offer more features, stitches, and often automated functions; discuss their benefits and potential for growth. Computerised machines, as the name suggests, incorporate electronic components and often have a digital display. These machines tend to offer a wider variety of stitches, including decorative and stretch options, and may have automated features like needle threaders or stitch memory. While they might seem more complex initially, their user-friendly interfaces and automated functions can greatly enhance your sewing experience and offer more room for growth as your skills develop. Many even feature speed control sliders to help you ease into stitching.
Overlockers (Sergers): Briefly mention their purpose (finishing seams) as a potential future upgrade. While primarily focusing on standard sewing machine basics for beginners, it’s worth noting that an overlocker (often called a serger in other regions) is a different type of machine entirely. Overlockers use multiple threads (typically 3-5) and a cutting blade to simultaneously sew, trim, and finish fabric edges, creating very neat and professional-looking seams, especially on knit fabrics. They are fantastic tools for garment sewing but are generally not recommended for true beginners as a first machine due to their complexity. Consider an overlocker as a future upgrade once you’ve mastered your basic sewing machine skills.
Considerations for Choosing Your First Machine (Best Sewing Machines for Beginners) Choosing your first sewing machine is an exciting step! The best sewing machine for beginners isn’t necessarily the most expensive or feature-rich one, but rather one that aligns with your initial goals and comfort level.
- Prioritise Basic Stitches: For starters, you primarily need a machine that can perform a straight stitch and a zigzag stitch. A buttonhole feature is also highly beneficial. These foundational stitches will enable you to tackle a vast array of projects. Don’t be swayed by machines offering hundreds of decorative stitches if you’re just beginning; you’ll likely use only a handful.
- Ease of Threading: A machine that is intuitive to thread, often with clear numbered guides or even an automatic needle threader, will save you a lot of frustration. This is a common pain point for new sewists, so a user-friendly threading system is a big plus.
- Robust Build: While cheaper machines might be tempting, investing in a quality machine, perhaps one with more metal parts, can lead to a much more satisfying experience in the long run. Durable machines are less prone to issues like poor stitch tension or thread breakage, which can quickly discourage a beginner. Look for models known for their reliability rather than just a multitude of functions.
- Suitable Price Points: Entry-level machines are perfectly adequate for learning to use a sewing machine. You don’t need to spend a fortune to get started. However, be wary of extremely cheap machines that might offer a frustrating experience. If possible, try out a machine before buying it.
- Common Beginner-Friendly Brands: Brands like Brother and Singer often offer excellent beginner models. Many users recommend these for their reliability and ease of use. Researching reviews and asking other sewists in online forums or local fabric shops for recommendations can be very helpful.
- Portability: Consider where you’ll be sewing. If space is limited or you plan to attend sewing classes for adults, a lighter, more portable machine might be a good choice.
- Machine Manual: Ensure the machine comes with a clear, comprehensive manual, or that one is readily available online. This will be your primary guide as you learn how to use a sewing machine.
Remember, the goal is to find a machine you’re comfortable and happy with, one that encourages you to keep coming back to your creative projects. If you find yourself eager to sew, you’ve made a great choice!
Explore Embroidery and Quilting
Get creative with embroidery classes near me and learn about the rich craft through our hand embroidery history and embroidery London UK. If quilting is your passion, find quilting near me workshops designed to inspire. Our welcoming classes are perfect for all levels, helping your stitching skills grow naturally.
How to Operate a Sewing Machine
Now that you’re familiar with your machine’s anatomy, it’s time to delve into the practical steps of how to operate a sewing machine. This is where the real fun begins, and we’ll break it down into manageable steps to ensure a smooth and enjoyable learning to use a sewing machine experience.
Setting Up Your Workstation
A well-organised and comfortable workspace is key to enjoyable and efficient sewing.
Placement and Lighting: Ensure a stable surface and adequate light. Place your sewing machine on a sturdy table or desk that can handle the machine’s vibrations. A dining room table can work, but ensure the machine is near a leg for extra stability. The surface should also be non-slippery to prevent your machine from “travelling” as you sew. Sit in a chair that allows you to be comfortable, with your arms and shoulders relaxed, and your machine at a height similar to a computer keyboard. Good lighting is crucial for precise stitching and reducing eye strain. Most machines come with a built-in sewing light, which is a good start. However, consider supplementing this with a gooseneck lamp directed at the presser foot area, positioned so it illuminates your work without shining directly into your eyes. A well-lit room overall will also help reduce harsh contrasts.
Power Connection: Safe plugging in of the machine and foot pedal. Before connecting any power, ensure the machine’s power switch is off. If your machine has a detachable power cord and foot pedal cord, locate their respective ports on the side or back of the machine. Plug them in securely. Position the foot pedal comfortably on the floor where you can easily control it with your dominant foot. Only once everything is connected and your workstation is ready should you turn on the power switch or plug the machine into the mains.
Threading the Machine: Step-by-Step Mastery
Threading your sewing machine might seem complex at first glance, but it’s a foundational skill for learning to use a sewing machine. All machines have a top thread (from the spool) and a bottom thread (from the bobbin), both essential for forming a stitch.
Winding the Bobbin: Detailed instructions on how to wind a bobbin evenly and correctly, ensuring proper tension. This is the first crucial step in getting your machine ready.
- Place the Spool: Position your main spool of thread onto the spool pin. Pay attention to how the thread comes off the spool – for cross-wound threads (most common, zigzagging pattern), it should come off the end. For stacked threads (older method, smooth windings), it should unwind from the side, often requiring a vertical spool pin. Some machines have an accompanying cap to hold the spool in place.
- Guide the Thread: Follow your machine’s specific diagram or arrows (often numbered) for bobbin winding. This typically involves guiding the thread around a small tension disc or guide near the spool pin, ensuring it’s pulled tightly between any discs to ensure proper tension when winding. If you don’t hear a “clicking” noise when pulling the thread through the tension gauge, your bobbin might not wind with good tension.
- Prepare the Bobbin: Take an empty bobbin (ensure it’s compatible with your machine). Feed the thread through one of the small holes in the bobbin, from the inside out, leaving a few inches of tail.
- Place on Winder: Put the bobbin onto the bobbin winder pin.
- Engage Winder: Slide the bobbin winder to the right (or engage a lever/pull out the handwheel). This action typically disengages the sewing needle, preventing it from stitching while the bobbin winds.
- Wind: While holding the thread tail initially for a few rotations, gently press the foot pedal. The bobbin will begin to fill. Most machines automatically stop when the bobbin is full.
- Finish: Once wound, slide the bobbin winder back to its original position. Snip the thread connecting the bobbin to the spool.
Inserting the Bobbin: Guidance for both top-loading (drop-in) and front-loading bobbin systems. How you insert the bobbin depends on your machine’s system. Always refer to your manual for precise instructions.
- Top-Loading (Drop-in) Bobbins: These are often found under a clear cover on the needle plate, allowing you to see when you’re running low on thread. You typically drop the bobbin in so the thread unwinds in a specific direction (usually counter-clockwise). Then, you pull the thread through a designated notch or guide, often hearing a click as it secures. Leave a few inches of thread hanging out.
- Front-Loading Bobbins: These are inserted into a bobbin case, which then slots into the machine behind a small door, usually at the front. The bobbin thread needs to be seated correctly in the bobbin case for proper tension. After inserting the bobbin, close its cover.
Threading the Upper Thread (How to Thread a Sewing Machine / How to Put Thread into Sewing Machine): A precise, step-by-step walkthrough, highlighting the importance of following the machine’s numbered path and lifting the presser foot to engage tension discs. Mention specific threading techniques for popular UK brands if widely relevant (e.g., “how to thread a Singer sewing machine” or “how to thread a Brother sewing machine” as general examples of machine-specific instructions). This is arguably the most critical step for smooth stitching. Incorrect upper threading is a common cause of stitch problems.
- Needle Up: Ensure your needle is in its highest position. This aligns the take-up lever correctly for threading. You can achieve this by turning the handwheel towards you or pressing a needle-up button if your machine has one.
- Spool Pin: Place your main spool of thread on the spool pin, ensuring the thread comes off correctly.
- Follow the Path: Most machines have numbered guides and arrows printed on their body. You’ll typically guide the thread:
- Through the first thread guide at the top.
- Down the main channel (often numbered “2” or “3”).
- Around the bottom of this channel, making a U-turn.
- Back up the second channel to the take-up lever.
- Engage Take-Up Lever: This is a crucial step. The thread must go through the eye or hook of the take-up lever, often from right to left. If the lever isn’t visible, turn the handwheel towards you until it comes up.
- Down to the Needle: Guide the thread back down the machine, through any remaining hooks or guides just above the needle.
- Thread the Needle: The final step is to pass the thread through the eye of the needle. Most machines thread from front to back, but check your manual. If you have an automatic needle threader, follow its specific instructions; these are wonderful time-savers. If threading by hand, a clean, moist end of the thread can make it easier. Pull several inches of thread through to the back. For common machines, such as when you learn how to thread a Singer sewing machine or how to thread a Brother sewing machine, the general path is often similar to the one described, but always defer to your specific model’s manual for accuracy.
Bringing Up the Bobbin Thread: The final crucial step before you begin stitching. Now that both your top thread and bobbin are in place, you need to bring the bobbin thread up to meet the top thread.
- Hold Top Thread: Hold the tail of your top thread (the one coming from the needle) with your left hand, gently pulling it away from the machine.
- Turn Handwheel: With your right hand, slowly turn the handwheel towards you (counter-clockwise). The needle will go down into the needle plate, catch the bobbin thread, and then come back up.
- Pull Up Loop: As the needle rises, you should see a loop of the bobbin thread appear through the needle plate. Tug gently on the top thread you’re holding, and the bobbin thread loop will emerge.
- Free the Thread: You can then use scissors or a pointed tool to pull the bobbin thread fully free.
- Position Threads: Pull both the top and bobbin threads to the back of the machine, under the presser foot, leaving about 4-6 inches of excess. This prevents them from being pulled back into the machine when you start sewing. You are now ready for your first stitch!
Controlling the Stitch: Your First Seams
With your machine threaded, it’s time to start sewing! This section focuses on the practical application of how to operate a sewing machine to create your first seams.
Lowering the Presser Foot: Why this is essential before you begin to sew. Before you even touch the foot pedal, always lower your presser foot onto the fabric. The presser foot applies the necessary pressure to the fabric, allowing the feed dogs to grip and move it evenly. If the presser foot is up, your fabric won’t feed properly, and you’ll end up with a tangled mess or stitches that don’t form correctly. It’s a habit you’ll quickly develop.
Foot Pedal Control: Learning to start slowly and gradually increase speed; practising consistent speed. The foot pedal is your accelerator. The more pressure you apply, the faster your machine will stitch. As a beginner, it’s paramount to start slowly and gently. Just a little pressure is enough to get the needle moving at a controlled speed. Practise maintaining a consistent speed throughout your stitch. This creates even, beautiful stitches. It’s perfectly fine to stop and start again as you get a feel for the pedal. Many machines also offer a speed control slider, allowing you to limit the maximum speed, which can be incredibly helpful when you’re learning how to use a sewing machine. Don’t “floor it” until you feel completely comfortable.
Guiding Fabric: How to guide fabric without pushing or pulling, letting the feed dogs do the work. This is one of the most important aspects of mastering your sewing machine. Your hands are there to guide the fabric, not to push or pull it through the machine. The feed dogs beneath the presser foot are designed to move the fabric along at the correct speed. Pushing or pulling can distort your fabric, break the needle, or cause stitches to jam. Position your hands lightly on the fabric, one to the left and one in front of the presser foot, keeping them well clear of the needle. Your fingertips should slide easily over the fabric as the machine feeds it through. If the fabric isn’t moving fast enough, increase your foot pedal pressure, rather than forcing the fabric. This takes practice, but once mastered, it will make your sewing much smoother and more enjoyable.
Backstitching: Explaining its purpose for securing seams at the beginning and end, and demonstrating the technique. Backstitching is a fundamental technique for securing your stitches. Without it, your seams could easily unravel, especially at the start and end of a stitching line.
- Start of Seam: Begin by sewing a few stitches (typically 2-5) forward.
- Reverse: Then, hold down your reverse lever or button and sew backwards over those same few stitches.
- Continue Forward: Release the reverse control and continue sewing forward along your seam. This creates overlapping stitches that lock the thread in place.
- End of Seam: When you reach the end of your seam, stop a few stitches from the edge. Engage the reverse control again and sew backwards for 2-5 stitches. Then, release and sew forward again until you reach the fabric edge or beyond.
The only time you might not backstitch is for temporary stitches, like basting, which are designed to be removed later. Getting into the habit of backstitching will ensure durable, professional-looking projects.
Pivoting: How to turn corners neatly by stopping with the needle down. When sewing square or rectangular shapes, you’ll often need to turn a corner. Pivoting allows you to do this neatly without breaking your stitching line.
- Sew to Corner: Sew along your seam line until you reach the point where you want to turn the corner.
- Needle Down: Stop with the needle down in the fabric. If your needle isn’t down, turn the handwheel towards you until it is.
- Lift Presser Foot: Raise the presser foot using its lever. Keeping the needle down acts as an anchor, holding your fabric in place.
- Rotate Fabric: With the needle still in the fabric, gently pivot or turn your fabric to align with the new stitching direction.
- Lower Presser Foot: Lower the presser foot back down onto the fabric.
- Continue Sewing: Resume sewing in the new direction.
This technique ensures sharp, crisp corners, greatly enhancing the finish of your projects. For tight curves, you can use a “stop-and-go” method, taking a few stitches, lifting the presser foot, turning slightly, lowering, and repeating.
Adjusting Stitch Settings
Beyond the basic operation, learning to use a sewing machine also involves understanding how to adjust your stitch settings to suit different fabrics and purposes.
Stitch Length: Understanding how to adjust it for different fabrics and purposes (e.g., longer for basting, shorter for stronger seams). Stitch length refers to how long each individual stitch is. On your machine, this is typically controlled by a dial or buttons.
- Standard Length: For most general sewing on woven fabrics, a standard stitch length of 2.5 to 3.5 millimetres (mm) is common. This provides a strong, neat seam.
- Shorter Stitches: You’ll want a shorter stitch length (e.g., 1.5-2mm) for very thin, lightweight fabrics, loosely woven materials, or when working with stretchy fabrics. Shorter stitches create a denser, stronger seam. They are also used for securing high-stress areas like corners.
- Longer Stitches: A longer stitch length (e.g., 4-5mm) is used for thicker fabrics, sewing through multiple layers, or when you need a basting stitch. Basting stitches are temporary and easily removed, as their longer length makes them less secure. Longer stitches are also suitable for materials like leather or vinyl, where needle marks can easily damage the fabric.
Always adjust your stitch length with the needle up and out of the fabric, as it can sometimes cause the needle to move.
Stitch Width: Primarily for zigzag stitches, explaining how to adjust it for finishing raw edges or decorative work. Stitch width primarily applies to zigzag and other decorative stitches. It controls how far the needle moves from side to side. For straight stitches, the width setting often controls the needle position (left, centre, or right), rather than actual width.
- Zigzag Stitch: The zigzag stitch is incredibly versatile. A narrow zigzag stitch can act as a makeshift stretch stitch for knit fabrics if your machine doesn’t have a dedicated one. A wider zigzag stitch is excellent for finishing raw edges of fabric to prevent fraying. It’s also used for decorative purposes or appliqué.
- Adjusting Width: On computerised machines, you’ll typically use buttons to increase or decrease the width. On mechanical machines, a dial controls it. Experiment on scrap fabric to see how different widths look.
Tension: A comprehensive explanation of thread tension, how to test for balanced stitches, and basic adjustments to resolve common issues like looping thread. Thread tension is crucial for strong, balanced stitches. It controls how much thread passes through the machine for each stitch. Both the top thread and the bobbin thread have tension settings, though the bobbin tension is usually preset and rarely needs adjustment.
Troubleshooting Tip: If you’re having persistent issues with thread tension, such as the thread not laying close to the fabric or knotting up, check the “Thread Bunching Solution Guide” (if you have one) or consult your machine’s manual. Often, the problem lies not in the tension dial itself but in incorrect threading of the upper thread or bobbin.
Balanced Stitch: The ideal stitch looks the same on both the top and bottom of your fabric, with the threads locking neatly in the middle of the fabric layers. You should see one thread on each side.
Too Loose (Top Tension): If the top tension is too loose, the top thread will appear wavy or loose on the top of the fabric, and the bobbin thread will lie flat on the bottom, often looking messy or like loops. This is commonly referred to as a “bird’s nest” on the underside of your fabric. To fix this, you need to increase the top tension using the tension dial.
Too Tight (Top Tension): If the top tension is too tight, the top thread will appear very straight, almost like one line, pulling the bobbin thread up to the top side of the fabric. The bottom side of the fabric might show gaps or pulls. To correct this, you need to decrease the top tension.
Default Setting: Many machines recommend a default tension setting, often around 4 or 4.5. This is a good starting point for most fabrics.
Testing Tension: The best way to learn how to use a sewing machine for tension is to test it. Always sew a few test stitches on a scrap piece of the actual fabric you’ll be using, folded in half to mimic two layers. This allows you to fine-tune the tension before you begin your project.
Get Inspired and Stay Updated
Visit our sewing blog for helpful tips on how to sew and alter clothes, discover dress design classes, and explore answers to questions like how can I make clothes? Find the best sewing shop London guides and learn more about us at London sewing courses. Stay connected and inspired on your sewing journey.
Sewing Techniques for Beginners

Once you’re comfortable with the basics of operating your machine, it’s time to explore fundamental sewing techniques for beginners that will form the backbone of your sewing skills.
Foundational Stitches and Seams
Straight Stitch: The most common stitch; importance of consistent seam allowance. The straight stitch is your go-to stitch for most construction seams. It creates a sturdy, straight line of stitching, perfect for joining two pieces of fabric together. For most projects, you’ll be using this stitch almost exclusively. A key concept when working with the straight stitch is seam allowance. This is the distance from the raw edge of your fabric to your line of stitching. Sewing patterns will specify a seam allowance (e.g., 1.5 cm or 5/8 inch), and it’s vital to maintain this consistently. Your machine’s needle plate often has guidelines marked in centimetres or inches to help you align your fabric and maintain an even seam allowance. Practising sewing straight lines, focusing on keeping your fabric edge aligned with these guides, is excellent practice for consistency.
Zigzag Stitch: For preventing fabric fraying and sewing stretch fabrics. The zigzag stitch is incredibly versatile and a must-know for any beginner.
- Finishing Raw Edges: Its primary use for beginners is to prevent raw fabric edges from fraying. Instead of leaving a raw edge that can unravel, you can sew a zigzag stitch along the edge, effectively encasing the threads and creating a neat finish. Many inexpensive machines even offer an overlock stitch setting, which is a variation of the zigzag stitch for edge finishing.
- Sewing Stretchy Fabrics: Crucially, the zigzag stitch is also used when sewing stretchy fabrics like jersey knit. Unlike a straight stitch, which can cause seams to pop when stretched, the zigzag stitch has inherent give, allowing the seam to stretch with the fabric. For a more subtle look, a narrow zigzag stitch or a dedicated stretch stitch (which is a very narrow zigzag) can mimic a straight line while retaining stretch.
- Decorative Use: Of course, the zigzag stitch can also be used for decorative purposes or appliqué.
When using a zigzag stitch on stretchy fabrics, ensure you’re also using the correct needle, such as a ballpoint or jersey knit needle, which has a rounded tip to prevent tearing the fabric’s elasticity.
Pressing Techniques: Emphasise the importance of pressing seams as you go for a professional finish. Often overlooked by beginners, pressing is as important as stitching for a professional finish. It’s not just about removing wrinkles; it’s about shaping your fabric and creating crisp, flat seams.
Seam Direction: Seam allowances are typically pressed open (flat on both sides of the seam) for garment sewing, or pressed to one side (usually towards the darker fabric or as per pattern instructions).
Pressing as You Go: Get into the habit of pressing your seams after each significant step of sewing, rather than waiting until the end. This is sometimes referred to as “ironing every seam”.
How to Press: Use an iron and ironing board or mat. Press by lifting and replacing the iron onto the fabric, rather than sliding it, to avoid distorting the fabric.
Find the Perfect Sewing Equipment
Choosing the right machine is easy with our guides on the learn to use a sewing machine, tips for your portable sewing machine, and the novice sewing machine. We also review the best rated sewing machines for quilting and offer a sewing machine beginner’s guide. Equip yourself with the best tools to nurture your craft.
Conclusion
Final Stitch: Your Confidence Unlocked
Congratulations, you’ve embarked on a fantastic journey of creativity and skill! We’ve walked through the sewing machine basics, demystified how to operate a sewing machine, explored essential sewing techniques for beginners, and discovered inspiring beginner sewing patterns to get you started. From understanding the handwheel to mastering the perfect zigzag stitch, every step you’ve taken brings you closer to unlocking your full potential.
Remember, the true mastery of learning to use a sewing machine comes with consistent practice. Each stitch, whether perfect or slightly wobbly, is a valuable learning experience.
Embrace the process, be patient with yourself, and celebrate every small victory. The possibilities are truly endless once you can confidently learn to use a sewing machine. You can mend, create, and customise to your heart’s content.
We hope this guide has inspired you to explore more sewing crafts for beginners and confidently tackle your next project. Keep on stitching, keep on learning, and most importantly, keep enjoying the wonderful world of sewing!
About the Author: Grace, Founder of London Sewing Courses
Grace is the heart and hands behind London Sewing Courses. A passionate and experienced sewing instructor, she founded the studio with a unique mission: to create a calm, friendly space for adults to learn and connect, while using the profits to fund free sewing classes for local children in need. Her personal expertise and commitment to community building are at the core of every class and every stitch.