Tag: lessons

  • Guide to Beginner Seamstress Courses

    Guide to Beginner Seamstress Courses

    Introduction to Seamstress Courses: Unlocking Your Sewing Potential

    There’s a unique charm and enduring appeal to sewing and dressmaking that has captivated hearts for centuries. From the practical necessity of creating and mending clothes in ancient times to the artistic expression of haute couture today, sewing has always been a vital craft. In a world increasingly dominated by fast fashion, the desire to reconnect with our creative spirit and embrace sustainability has led to a wonderful resurgence in the art of sewing. You might already be familiar with the therapeutic rhythm of needle and thread, but have you considered turning that passion into a fulfilling hobby or even a career?

    So, what exactly does a seamstress course entail? At its heart, a seamstress course is designed to guide you through the intricate world of textile arts, offering everything from foundational skills to advanced garment creation. These courses move far beyond basic mending, teaching you how to transform flat pieces of fabric into beautifully constructed, three-dimensional garments. You’ll delve into the nuances of various fabrics, learn to master your sewing machine, and understand the art of fitting and finishing. The goal is to equip you with the knowledge and techniques to craft bespoke couture garments, whether it’s for your own wardrobe or for others.

    The benefits of structured learning are immense for both hobbyists and those considering a professional career path. While self-teaching through online tutorials and videos is certainly possible, a structured environment, whether in-person or online, ensures you build a strong foundation, learn proper techniques, and avoid developing bad habits. It’s like building a house: you wouldn’t start by picking out the paint; you’d focus on laying a strong foundation first. A well-designed seamstress course will provide that robust framework, leading to successful projects and growing confidence. This guide aims to be your compass in navigating the wide array of seamstress courses UK offers, helping you identify the perfect fit for your aspirations. We’ll cover everything from beginner-friendly options to more specialised and professional programmes, ensuring you find the right support for every step of your creative journey.

    Overview of Sewing Classes for Beginners

    Embarking on your stitching journey is an exciting prospect, and choosing the right entry point is crucial. Sewing classes for beginners are specifically designed to demystify the craft, breaking down complex processes into manageable, bite-sized lessons. These introductory courses are perfect for those just starting their sewing adventure or returning to the craft after a long break.

    Starting Your Stitching Journey: Why Formal Instruction Matters

    Many beginners might feel overwhelmed by the sheer volume of information available, from countless YouTube tutorials to an array of unfamiliar terminology in sewing books. This abundance can lead to confusion, frustration, or the feeling of being stuck. This is precisely why formal instruction matters. In a structured sewing classes for beginners environment, you receive expert guidance that prevents bad habits from forming and instils proper technique from the outset. This foundational knowledge is invaluable, allowing you to build confidence with each stitch and truly master the essential skills.

    These courses move beyond basic mending, teaching you the principles of actual garment creation and design. While knowing how to sew a button or fix a hem is incredibly useful, seamstress courses expand your capabilities to drafting patterns, understanding fabric properties, and constructing entire pieces from scratch. They address the common misconception that sewing is overly complicated or exclusively for professionals, demonstrating its accessibility to anyone with enthusiasm and a willingness to learn. As Dressmaking Academy notes, their courses are designed to support everyone, from beginners to seasoned professionals, empowering you to create stunning couture with confidence. Similarly, Sew It Academy prides itself on helping absolute beginners master essential skills and build confidence, even making complex techniques manageable through step-by-step video instructions.

    Importance of Seamstress Skills: A Valuable Craft

    The skills gained through seamstress courses are not just practical; they are a valuable craft that offers numerous personal and potential professional benefits.

    Personal Benefits: Creativity, Customisation, and Well-being

    On a personal level, learning to sew allows for incredible creative expression. You gain the power to create unique garments that reflect your personal style, free from the limitations of mass-produced clothing. Imagine building an all-linen wardrobe or crafting pieces in a particular colour palette that truly strikes your fancy – it’s all possible when you’re the one making the decisions. You can customise clothing to achieve a perfect fit, which is especially beneficial for those who struggle with ready-to-wear sizes. This ability to tailor garments to your body ensures comfort and confidence. Beyond clothing, you can explore creative projects like bags, home decor, and accessories, infusing your personal touch into your surroundings.

    Furthermore, sewing can be a deeply therapeutic and relaxing activity. The mindful act of working with your hands, focusing on each stitch, can be incredibly calming and a wonderful creative outlet away from the demands of a 9-5 job. Many find immense satisfaction in seeing a project come to life, from the first stitch to the final embellishment.

    Potential Professional Avenues: Building a Sewing Career

    For those with entrepreneurial aspirations, seamstress courses can open doors to exciting professional avenues. You could pursue opportunities in:

    • Alterations: Becoming a skilled seamstress or tailor involves meticulously transforming fabrics into perfectly fitted garments. This includes mending, resizing, and customising clothes, a much-needed service for ensuring clothes fit impeccably.
    • Bespoke Dressmaking: Specialising in crafting unique pieces like wedding dresses, suits, or costumes allows you to showcase creative talents in the fashion world. Dressmaking Academy, for instance, focuses specifically on bridal and formal couture.
    • Costume Design: If you have a flair for storytelling through apparel, costume design for theatre, film, or television is an exciting path, involving research, sketching, and overseeing costume fittings.
    • Fashion Production: This can range from operating industrial sewing machines for mass production in factories to becoming an upholsterer, restoring and enhancing furniture.
    • Sewing Instruction: If you love to teach, becoming a sewing instructor allows you to share your passion and skills with new generations of sewists.
    • Embroidery Specialist: Bringing decorative and intricate designs to life on fabrics using specialised machines or hand techniques.
    • Sewing Blogger/Influencer: Leveraging your sewing expertise to create online content, tutorials, and reviews, potentially monetising through collaborations and sales.

    Stratford Career Institute’s Sewing & Dressmaking course, for example, explicitly covers “sewing for profit,” indicating its potential as a stepping stone towards a new career. The U.S. Department of Labor notes that the median annual salary for tailors, dressmakers, and custom sewers can be around $37,230, with higher earnings for those with specific expertise or a loyal clientele.

    Sustainability Aspect: Contributing to a More Sustainable Wardrobe

    In an era of growing environmental consciousness, learning to sew also contributes to a more sustainable wardrobe by enabling you to make, mend, and upcycle. Instead of discarding clothes, you can repair them, adapt them, or transform them into new items, reducing textile waste and promoting a more mindful consumption. This aligns with the wider movement against fast fashion, empowering you to create durable, cherished pieces.

    Types of Seamstress Courses Available

    The learning landscape for sewing is wonderfully diverse, offering options to suit every preference, schedule, and budget. Whether you prefer the direct interaction of an in-person class or the flexibility of learning from home, there’s a seamstress course for you.

    In-Person Seamstress Courses

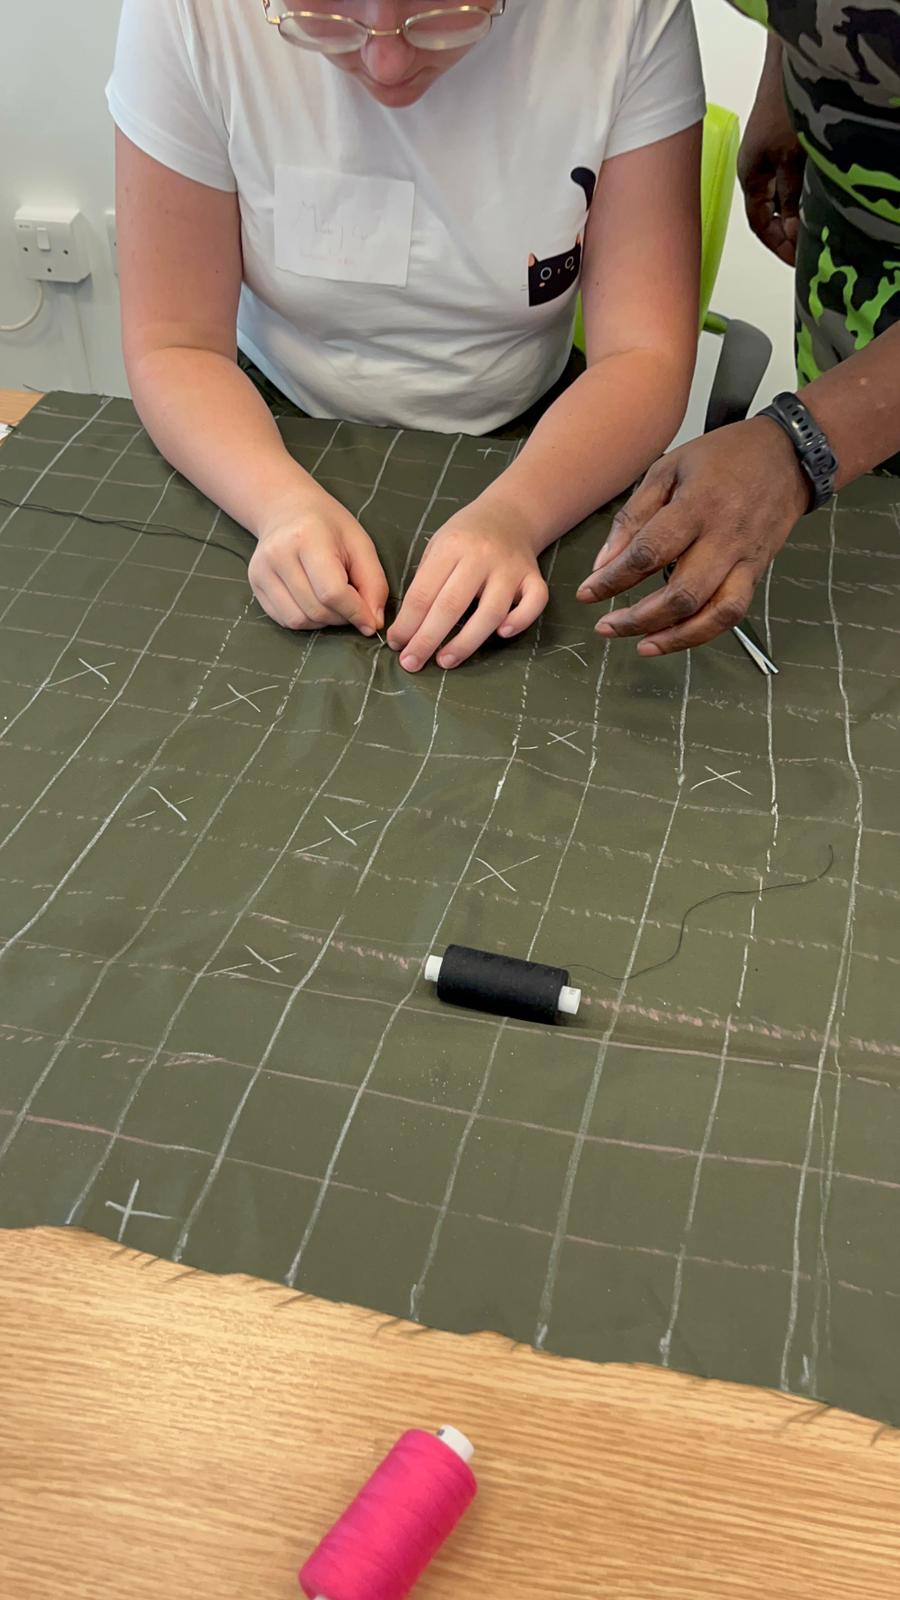
    Many learners thrive in an environment where they can receive direct, hands-on guidance. In-person seamstress courses offer this invaluable benefit, fostering a collaborative and supportive atmosphere.

    Benefits of Hands-On Learning

    The advantages of in-person instruction are numerous. You receive direct feedback from instructors on your technique, helping to correct mistakes in real-time and refine your skills instantly. This immediate troubleshooting is incredibly beneficial, as a teacher can identify and rectify errors as soon as they occur, which is a powerful learning tool. You often gain access to studio equipment, including industrial machines or specialised tools that might be too costly or impractical for home use. The collaborative environment of a group class can be incredibly motivating, allowing you to meet like-minded individuals, share ideas, and learn from more experienced sewists.

    Typical Structure

    In-person courses come in various formats:

    • Group classes: These are a popular choice for sewing classes for beginners, providing a shared learning experience and the opportunity to interact with peers.
    • One-to-one private lessons: For highly personalised instruction, private tutors offer tailored guidance, focusing on your specific needs and pace. Websites like Superprof allow you to find private sewing teachers who offer both online and face-to-face lessons at a reasonable price, often with a free first lesson to ensure a good fit.
    • Intensive workshops: These focused sessions delve deep into a single technique or project, offering concentrated skill-building over a shorter period.
    Finding Local Options

    If you’re searching for seamstress courses near me, there are several avenues to explore. You can begin by searching online by city or region, for example, “seamstress courses London,” “seamstress course Milton Keynes,” or “seamstress course Peterborough”. Local community centres often host a variety of hobby classes, including sewing. Independent sewing schools, such as those mentioned in the brief like Bristol Sewing School or The Stitch Sisters, are dedicated to teaching the craft. Many fabric shops also offer classes, providing a convenient way to learn where you purchase your materials.

    Considerations for In-Person Courses

    While highly beneficial, in-person courses do come with considerations. You’ll need to factor in travel time to and from the venue and adhere to fixed schedules, which may not always align with a busy lifestyle. Class sizes can vary, and while smaller classes often mean more individual attention, larger ones can offer a broader peer group for interaction. Remember to weigh these factors against the invaluable benefits of direct, in-person interaction and hands-on guidance.

    Online Seamstress Courses

    For many, the flexibility and accessibility of online seamstress courses make them an ideal choice. These virtual sewing classes allow you to learn at your own pace, from anywhere in the UK or indeed, globally.

    Benefits of Flexibility

    The primary advantage of online seamstress courses is their incredible flexibility. You can learn from the comfort of your own home, eliminating travel time and allowing you to fit lessons around your existing commitments. This self-paced approach means you can start, pause, or rewatch lessons as often as you like, ensuring thorough understanding before moving on. Dressmaking Academy offers unlimited access to their bite-sized lessons, watchable on a computer, phone, or tablet. Sew It Academy operates on a similar model, offering access to over 90 courses with new content added monthly, available for as long as you maintain your membership.

    Variety of Platforms

    The range of online platforms offering seamstress online courses is vast. You can find:

    • Dedicated online sewing schools: Platforms like Dressmaking Academy and Sew It Academy specialise purely in sewing and fashion design, offering comprehensive curricula. Dressmaking Academy, for instance, focuses on high-end fashion design, bridal and formal couture, with over 50 sewing and design classes. Sew It Academy boasts over 800,000 students and 100+ hours of content.
    • Craft learning platforms: Larger platforms often host a variety of craft courses, including sewing. While not explicitly mentioned in the sources as “Craftsy” or “Skillshare,” Alison is an example of a platform offering free online courses, including sewing, with CPD accredited certificates.
    • YouTube tutorials: While useful for quick tips or specific techniques, YouTube can also be overwhelming for beginners due to the sheer volume and lack of structured progression. However, some channels offer excellent, detailed guides.
    • Online clubs and memberships: Many platforms, like Seamwork and Sew It Academy, offer membership plans that provide unlimited access to a library of courses, patterns, and community support.
    Key Features of Online Courses

    Look for online courses that provide helpful resources to enhance your learning. This often includes pre-recorded video lessons, which allow for repeated viewing. Many platforms offer downloadable patterns and resources in PDF format, optimised for easy printing, ensuring you have tangible materials to work with. Crucially, access to online community forums for support can be a game-changer. Platforms like Dressmaking Academy offer an exclusive community and personal support, while Seamwork members can ask questions and get expert help. Stratford Career Institute offers a distance learning course with a comprehensive outline.

    Considerations for Online Courses

    While the flexibility is a major draw, online learning does require self-discipline. You are in charge of your learning pace, which requires dedication to stay on track. A reliable internet connection is essential for streaming video lessons. While many platforms offer community support, there can sometimes be less immediate feedback compared to in-person classes. However, some, like Seamwork, provide direct access to expert help for members.

    Hybrid Models

    Some courses combine the best of both worlds, offering hybrid models that blend online learning with occasional in-person sessions or workshops. This can be a fantastic option for those who appreciate the flexibility of online access but also benefit from periodic face-to-face interaction and hands-on guidance. These models are not explicitly detailed in the provided sources, but the concept of combining self-paced learning with occasional structured support aligns with the benefits of both in-person and online approaches.

    Course Content and Structure

    A good seamstress course will guide you through a logical progression of skills, building your abilities from the ground up. Let’s delve into the core techniques and specialised areas you can expect to learn.

    Core Sewing Techniques

    Mastering fundamental sewing techniques forms the bedrock of your abilities. These are the “80/20 skills” – the core group of skills you’ll use repeatedly, no matter the project.

    Machine Mastery

    This is often the starting point for sewing classes for beginners. You’ll learn how to thread your sewing machine, wind the bobbin, and select basic stitches like straight and zigzag. Understanding tension adjustment is key to achieving even and balanced stitches, and courses will also cover troubleshooting common machine issues. It’s about becoming comfortable with your machine, treating it as an indispensable tool for your craft. Stratford’s course, for example, starts with “Your Sewing Machine” and “Sewing Machine Operation”. Sew It Academy’s free mini-course dives into conquering the sewing machine in its first few lessons, even recommending sewing machines as low as $149.

    Fabric Knowledge

    A deep understanding of fabrics is a lifelong journey in sewing, but courses will introduce you to the essentials. You’ll learn about different fabric types, broadly classified as woven and knits. Woven fabrics (like lawn, twill, double gauze) are generally more beginner-friendly, while knits (with their stretchy quality) are often best tackled after gaining some experience. Crucially, you’ll learn about grainlines – the direction of the threads – and how they influence fabric drape and how to orient your pattern pieces correctly. Understanding fabric weight and material (e.g., lightweight cotton batiste for linings, medium-weight chambray for tops, or hard-wearing denim for jackets) is also vital for choosing the right fabric for your projects. Dressmaking Academy offers a “Guide to Fabrics and Materials” class.

    Seam Finishes

    Once you start sewing, you’ll quickly learn that the edges of your fabric need attention to prevent fraying and ensure longevity. Courses will teach you various seam finishes, such as French seams (where edges are sewn twice and enclosed for a polished look), flat-felled seams, and zigzag stitches (a basic machine setting that helps prevent unravelling). You may also be introduced to overlocking or serging basics, although a serger is a separate machine used for cutting and enclosing edges speedily. The importance of neat finishes for a professional result cannot be overstated.

    Pressing Techniques

    Often overlooked by beginners, the crucial role of pressing for professional results is emphasised in good courses. Pressing, distinct from ironing, involves lifting and placing the iron to set seams and shape garments as you sew. Essential pressing aids like a seam roll or tailor’s ham help in shaping curved seams and specific garment areas. The Good Trade article highlights the importance of giving fabric a quick press if it wrinkles after washing, using appropriate settings on your iron.

    Basic Hand Stitches

    While a sewing machine is efficient for most tasks, basic hand stitches remain essential for closures, hems, and fine detailing. Learning hand-sewing stitches like the backstitch, running stitch, or buttonhole stitch can elevate the quality of your finished garments.

    Zippers and Closures

    Adding functional and aesthetic closures is a significant skill. You’ll learn to install various types of zippers (such as concealed or lapped), sew buttonholes, and attach buttons, snaps, and hooks and eyes. These elements are crucial for making wearable garments that fit well and look professional. Dressmaking Academy includes “Belts and Zippers” and “Buttonholes and Button Selection” in its course outline.

    Hemming Techniques

    Finishing the raw edges of your garment, particularly at the bottom, is vital. You’ll explore different hemming techniques suitable for various fabric types and garment styles, from simple turned hems to more elaborate finishes. This is part of giving your garment a clean, professional look.

    Couture Sewing Techniques

    For those who aspire to create high-end, exquisitely crafted garments, couture sewing techniques offer a deep dive into meticulous handwork and internal construction.

    Introduction to High-End Finishes

    Couture sewing techniques are defined by their meticulous handwork, internal construction, and often invisible finishes. This level of sewing prioritises precision and artistry, resulting in garments that are beautiful both inside and out. These are typically advanced topics, often introduced in intermediate or specialist courses. Dressmaking Academy focuses on “bespoke couture garments” and has a “Bespoke Couture Accelerator” learning path. Tailor Academy’s “Perfect Fit Mastery” and “Sewing Masterclass” also suggest a focus on high-quality tailoring.

    Underlining and Interlining

    These techniques involve adding extra layers of fabric to give structure, body, and opacity to garments. Understanding how to incorporate underlining (a foundational layer sewn to the fashion fabric) and interlining (a layer for warmth or additional support) is key to achieving a professional, tailored finish.

    Tailoring Methods

    Traditional tailoring involves specific methods like hand-pad stitching (used to shape collars and lapels), working with horsehair canvas for structure, and precise pressing for tailored garments. These skills are essential for creating structured pieces like jackets and coats.

    Bound Buttonholes and Bespoke Details

    Bound buttonholes are an example of advanced closures that demonstrate a high level of skill, creating a clean, finished opening without visible stitching. Learning these and other bespoke details elevates a garment from ready-to-wear to truly custom-made.

    Garment Construction Courses

    Once you have a handle on core techniques, garment construction courses focus on bringing various components together to create specific types of clothing. This is often taught through project-based learning, where you create items like skirts, trousers, blouses, dresses, or jackets.

    Pattern Interpretation

    A crucial part of garment construction is learning to read commercial patterns. These patterns, often printed on large tissue paper, come with a wealth of information: tiny symbols, jargon, and instructions that can be puzzling until you learn their meaning. A good course will teach you how to interpret these symbols, understand sizing, and follow the instructions confidently. Companies like Simplicity, Butterick, McCall’s, Vogue, and Burda are popular sources for home sewing patterns.

    Fitting and Alterations

    No two bodies are exactly alike, so learning basic pattern adjustments for a better fit is incredibly valuable. Courses will teach you how to lengthen or shorten patterns, add or remove fullness (using techniques like darts, gathers, tucks, and easing), and adjust seams to achieve a custom fit. You might also learn simple garment alterations for ready-made clothing. Seamwork offers a class called “How to Fit With Confidence,” which teaches how to diagnose fit issues and make adjustments.

    Order of Construction

    Learning the logical steps to assemble a garment is essential for efficiency and a professional finish. This involves understanding the sequence in which different pattern pieces are sewn together, from preparing the fabric to adding closures and finishing edges.

    Specialised Classes

    Beyond general garment construction, many seamstress courses offer specialised training in niche areas, allowing you to explore specific interests or deepen your expertise.

    Pattern Making Classes

    For those who want to move beyond commercial patterns and create their own designs, pattern making classes are indispensable.

    • Fundamentals: These courses typically start with creating basic blocks (also known as slopers) for bodice, skirt, and trousers. These are foundational patterns from which many other designs can be derived.
    • Pattern Manipulation: You’ll learn how to alter existing patterns and draft new designs from scratch. This includes understanding techniques like dart manipulation, slash and spread, and pivot methods to create different silhouettes and styles. Dressmaking Academy offers courses specifically on “Pattern Making” and “How to draft custom patterns,” including “Corset Pattern Making” parts 1 and 2. Sew It Academy also covers patternmaking.
    • Computer-Aided Design (CAD): Some advanced sewing pattern drafting courses may offer a brief introduction to digital pattern drafting software like CLO3D, Marvelous Designer, or Optitex, which allow sewists to draft patterns on a computer and visualise designs virtually.
    Quilt Making Classes

    Quilt-making classes venture beyond garments, focusing on the art of piecing together fabric to create decorative and functional textiles like quilts.

    • Techniques: These classes cover techniques such as piecing (joining fabric shapes), appliqué (attaching fabric pieces to a background), layering, basting, and quilting (stitching through layers, either by hand or machine).
    • Fabric Selection for Quilting: Specific considerations for quilting cottons are also usually taught, as the fabric choice is crucial for the success and durability of a quilt. Stratford Career Institute’s course covers “Patchwork and Quilting.”
    Textile Art Courses

    For those with an artistic inclination, textile art courses focus on using fabric and thread as a medium for creative exploration, often less focused on functional garments.

    • Creative Exploration: These courses encourage experimentation with fabric and thread to create unique artistic pieces.
    • Techniques: You might learn about fabric manipulation, embellishment (such as embroidery), dyeing, printing, and mixed media applications. Dressmaking Academy offers “Embroidery and Finishes” classes, including “Beaded Embroidery Dress” and “Luneville (Tambour) Embroidery,” and “Professional Decorations and Finishes.”
    Accessory Making

    Many schools offer courses dedicated to making accessories like bags, hats, or soft furnishings for the home. These can be excellent project-based classes for building skills with achievable outcomes. Stratford’s course includes “Home Accessories” and “Window Treatments, Curtains and Draperies,” and “Slipcovers.”

    Workshops and Short Courses

    Workshops and short courses provide intensive skill-building opportunities, often focusing on a single technique or a mini-project.

    Trial Sessions: These can be a fantastic way to experience a teacher’s style or a school’s approach before committing to a longer course.

    Intensive Skill Building: Examples include workshops on zipper insertion, specific collar construction, or fabric manipulation workshops exploring techniques like pleating, gathering, ruching, or smocking to add texture and form to fabric. Seamwork offers “Mini-Classes” on specific skills like “Hemming Knits Skills Workshop” and “Invisible Zippers Skills Workshop.”

    Choosing the Right Course

    With so many options available, finding the best seamstress courses UK for you can feel like a daunting task. However, by considering a few key factors, you can confidently choose a class that matches your learning style and goals.

    Factors to Consider: Your Perfect Fit

    Matching your learning style to an online or in-person class is essential for a rewarding experience.

    Your Current Skill Level

    The first step is to honestly assess your current skill level. Are you a complete beginner needing sewing classes for beginners, or do you have some experience? Classes are often tailored to specific levels:

    • Beginner: Perfect for learning the absolute basics, like threading your machine, understanding basic fabric types, sewing straight stitches, and simple shaping methods such as darts and gathers. Dressmaking Academy caters to beginners, offering courses like “Sewing 101: The Ultimate Beginners Guide”. Sew It Academy was specifically founded for beginners with little to no experience.
    • Advanced Beginner: Expands on foundational skills, building confidence and range. This level might introduce simple knitwear, bias tape finishing, and basic closures.
    • Intermediate: Focuses on more precision sewing, specialty closures (like zippers), and skills needed for more complex garments like simple lingerie or athletic wear.
    • Advanced: For those who want to refine their expertise, exploring advanced fitting techniques, pattern making, or couture sewing techniques.

    It’s important to remember that skill level ratings aren’t standardised across platforms, so focus on the skills the class offers and how they relate to what you want to learn.

    Learning Style

    Think about the format that works best for you. Do you thrive in a hands-on, in-person environment where you get direct feedback and can collaborate with others? Or do you prefer the flexibility of online learning, where you can revisit lessons at your own pace and learn from anywhere?

    Course Objectives

    Clearly define what you want to achieve with your sewing. Are you aiming to:

    • Learn the basics? Do you want to master your machine and straight stitches before attempting a dress, or prefer a beginner’s class specifically for making garments?
    • Learn new skills? Look for technique-focused classes, such as how to sew buttonholes or insert elastic.
    • Explore creative projects? Perhaps fun, one-off projects like bags, home decor, or accessories appeal to you.
    • Work on specific patterns? Many pattern companies offer sew-alongs tailored to popular patterns.
    • Build a handmade wardrobe? Focus on garment construction courses, broader fitting techniques, and skills like planning your sewing.
    • Become a professional? Consider courses that offer formal accreditations or focus on “sewing for profit”.
    Instructor Credentials and Experience

    Researching the teacher’s background, qualifications, and teaching style is crucial. Look for instructors with a passion for teaching and deep knowledge of sewing techniques. Reviews and testimonials from past students can offer valuable insights into the clarity of instructions, quality of materials, and overall teaching approach. For example, Sew It Academy highlights its founder Mimi G’s 30+ years of experience and background as a mentor on Project Runway Junior. Tailor Academy boasts “270 years”.

    Location and Accessibility (for in-person)

    For in-person classes, proximity, transport links, and parking can be important factors. If you’re looking for a seamstress course near me in a specific city, like seamstress course London, these practicalities are key.

    Student Support (for online)

    For online seamstress courses, check the availability of community forums, direct messaging with instructors, or live Q&A sessions. This support can be crucial when you run into questions or challenges.

    Recommendations for Beginners

    If you’re a complete beginner, here are some tailored recommendations to help you start your sewing journey:

    • Start with a “seamstress course near me” or a structured “online seamstress course” that covers machine basics and simple projects. This foundational approach will help you understand essential tools and techniques before tackling more complex garments. Seamwork’s “Learn to Sew Clothing For Absolute Beginners” course teaches how to use a machine, work with.

    The Indispensable Sewing Machine

    While it is possible to sew by hand, a sewing machine is highly efficient for beginners and essential for most garment creation. Learning to use a sewing machine correctly takes practice.

    • Machine Operation: You’ll learn about threading, bobbin winding, and adjusting tension to achieve balanced stitches.
    • Needles: Understanding that you need a new needle of the appropriate size for the weight of fabric you’re using is crucial.
    • Stitch Types: Familiarise yourself with essential machine stitches like the straight stitch and zigzag stitch. A zigzag stitch, for instance, is excellent for finishing edges to prevent fraying.
    • Specialised Machines: As you advance, you might encounter other machines like sergers (also known as overlockers), which cut and enclose fabric edges very quickly, or heavy-duty machines for thicker fabrics like leather. Computerised machines can even handle embroidery.

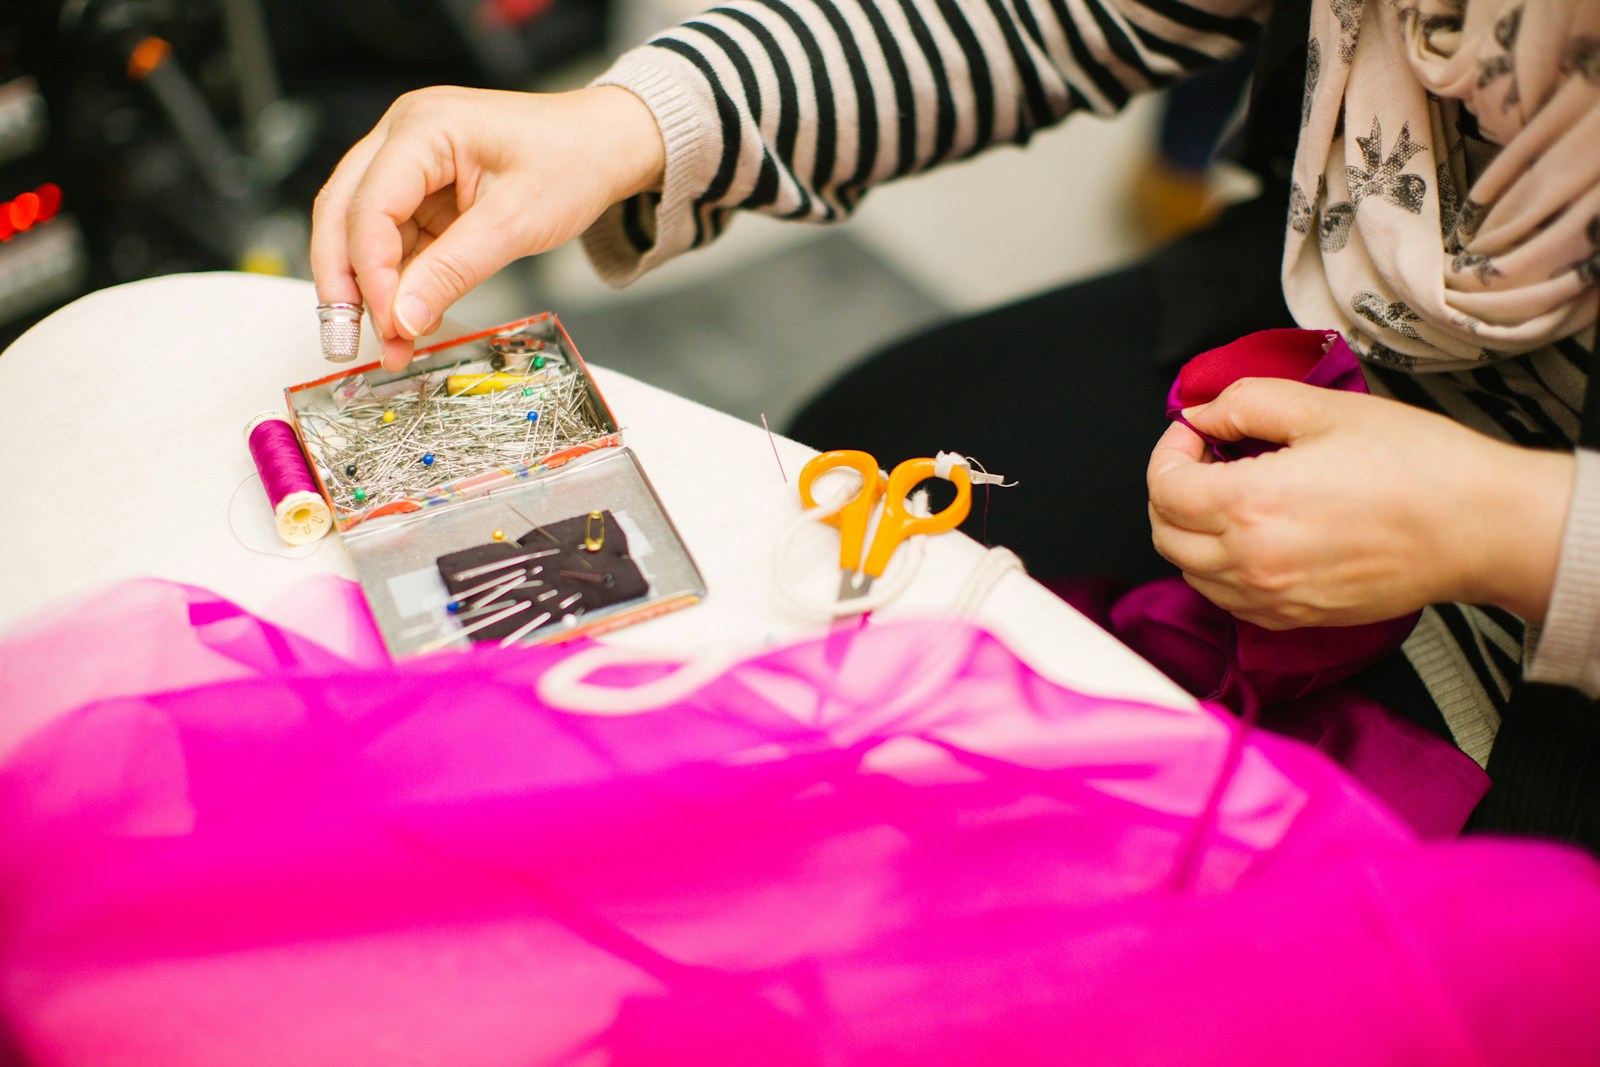
    Hand Tools for Precision and Detail

    Even with a machine,

    • Rotary Cutter and Cutting Mat: Often used for cutting fabric, especially for quilting, as they provide clean, precise cuts.
    • Dress Form/Mannequin: Aids in fitting and draping garments, essential for tailoring and design.

    Understanding and Working with Patterns

    Your sewing pattern is your map, guiding you through the construction process.

    Finding and Interpreting Patterns

    For your first garment, always choose a simple, beginner-friendly pattern. Many indie pattern companies offer excellent options.

    • Taking Measurements: Use a soft measuring tape to measure your chest, waist, and hips. Compare these to the pattern’s sizing. Don’t fret if you’re in between sizes; you can make simple adjustments by tracing the pattern onto paper and modifying it.
    • Pattern Markings: Learn to identify and understand pattern markings like fold lines, grainline arrows, and the number of pieces to cut. The grainline arrow, in particular, indicates how to orient the pattern piece in relation to the.
    • Seam Allowance: Pay close attention to the seam allowance, the specific distance a seam should be from the fabric edge, as stated in your pattern instructions. Getting this right is crucial for accurate sizing; too wide and the garment will be too small, too narrow and it will be too big. Most machines have lines on the stitch plate or seam guides to help you maintain a consistent seam allowance. Using a strip of washi tape on your machine can also act as a visual guide.

    Adding Fullness and Form

    Transforming two-dimensional fabric into a three-dimensional garment involves adding fullness. This is one of the most important concepts in fitting clothes to your body.

    Equipment Needed: A high-quality sewing machine, sharp fabric scissors, measuring tools, pins, needles, diverse threads, iron, ironing board, seam ripper, tailor’s chalk, marking tools, thimbles, and potentially a serger/overlocker and dress form. A dedicated, organised workspace with a changing room and large mirror is crucial for the self-employed.

    Darts: Tapered folds sewn into fabric to give shape and contour, commonly found at the bust, waist, and hips.

    Gathers: Fabric is gathered to create fullness, often used at waistlines or sleeve caps.

    Tucks and Easing: Other techniques to control and distribute fullness, allowing fabric to drape and move with the.

    Education Requirements: Typically, formal education beyond high school isn’t required, but a keen eye for detail, patience, and a passion for the craft are essential. Many start as apprentices or gain experience through seamstress courses and workshops. Continuous practice and learning from experienced mentors are invaluable.

    Salary Range: Annual salaries for seamstresses and tailors can range from $25,000 to $60,000, influenced by whether you are self-employed or work for a company, client volume, location, and expertise.

    Fashion Designer: Creating Trends and Timeless Pieces

    If your passion for sewing extends to conceptualising.

    • Salary Range: Annual salaries can range from $40,000 to $80,000 in theatre, and $60,000 to $120,000 or more in film/television, with a median of $56,000.
    • Equipment Needed: Sketchbooks, design software, knowledge of textiles, fabric swatches, historical references, patternmaking tools, sewing machines, cutting tables, dress forms, and strong communication skills.

    Sewing Instructor: Sharing the Art and Skill of Sewing

    If you have a passion for both sewing and teaching, becoming a sewing instructor is a fulfilling career.

    • What They Do: Sewing instructors teach individuals of all skill levels, designing and delivering sewing classes or workshops. They provide step-by-step guidance, demonstrate techniques, and offer hands-on support, fostering creativity and confidence in their students. They might teach in schools, community centres, fabric stores, or offer private lessons.
    • Education Requirements: A high school diploma is sufficient, but a passion for sewing and teaching is.

    Upholsterer: Crafting and Restoring Furniture

    Furniture enthusiasts might find joy in upholstery, breathing new life into worn pieces.

    • What They Do: Upholsterers restore and enhance furniture by applying fabric, padding, and springs, and performing structural repairs. They advise clients on fabric selection, considering aesthetics and durability.
    • Education Requirements: Formal education isn’t usually required, but specialised training or apprenticeships are highly beneficial, teaching upholstery techniques and furniture restoration.
    • Salary Range: Annual salaries range from $28,000 to $60,000, with higher earnings for those with expertise in antique restoration or custom work. Self-employed upholsterers can set their own rates.
    • Equipment Needed: Mallets, staple removers, shears, specialised sewing machines and heavy-duty needles, upholstery needles, pliers, webbing stretchers, and a range of materials like foam, batting, and springs.

    Embroidery Specialist: Bringing Designs to Life

    Embroidery, as a full-time career, a.

    • Salary Range: As a relatively new field, data varies. Average influencer earnings are around $45,000 annually, but this depends on niche and follower count. Earnings can grow from modest affiliate marketing to substantial incomes through brand partnerships.
    • Equipment Needed: Sewing machines, notions, attractive workspace, high-quality photography/video equipment (digital camera/smartphone, tripods, lighting, microphones), editing software, and potentially inventory management and shipping supplies for online sales.

    Specialised Courses to Become a Seamstress or Tailor

    Many institutions offer more formal pathways if you’re looking for a structured education to become a professional.

    • Formalised Accreditations: Some dressmaking schools offer formalised accreditations or diplomas. For example, Milner’s Fashion House in Pretoria offers an “introduction to fashion design course” covering basics like research, mood boards, and textiles, followed by advanced courses like “pattern gr”.
    • It’s a skill that builds confidence, provides a therapeutic outlet, and empowers you to bring your sartorial visions to life. As the proverb says, “Beautiful things come together one stitch at a time,” and with patience and consistent practice, you too can create stunning pieces.

    Conclusion

    Final Thoughts on Starting Your Sewing Journey: The Thread of Creativity. The world of sewing and dressmaking is a vibrant, creative canvas awaiting your unique touch.

    As we’ve explored, there’s a vast array of seamstress courses available, catering to every level and interest, whether you’re searching for sewing classes for beginners or advanced pattern making classes.

    From the precise art of sewing pattern drafting to the intricate beauty of couture sewing techniques and the communal joy of quilt-making classes or textile art courses, there’s truly something for everyone. Learning to sew offers profound personal rewards, from the sheer joy of creative expression and crafting unique garments to the practical satisfaction of customising your wardrobe and contributing to a more sustainable lifestyle.

    It’s a skill that builds confidence, provides a therapeutic outlet, and empowers you to bring your sartorial visions to life. As the proverb says, “Beautiful things come together one stitch at a time,” and with patience and consistent practice, you too can create stunning pieces.

    Encouragement to Enrol in a Seamstress Course

    If you’ve felt that spark of curiosity, we wholeheartedly encourage you to take the first step. Research local and online seamstress courses, visit schools, and speak to instructors. Many tutors, like those on Superprof, offer a free introductory session, giving you a risk-free opportunity to find the right teacher and ensure a good fit. Enrolling in a seamstress course is an investment – not just in a rewarding and lifelong hobby, but potentially in a fulfilling career. Remember, high fashion and the joy of creating are accessible to all, empowering you to craft with confidence. So, grab your enthusiasm, find your perfect course, and begin weaving your own.

    About the Author: Grace, Founder of London Sewing Courses

    Grace is the heart and hands behind London Sewing Courses. A passionate and experienced sewing instructor, she founded the studio with a unique mission: to create a calm, friendly space for adults to learn and connect, while using the profits to fund free sewing classes for local children in need. Her personal expertise and commitment to community building are at the core of every class and every stitch.

  • Step-by-Step Stitching Lessons for Beginners

    Step-by-Step Stitching Lessons for Beginners

    What is Stitching?

    At its heart, stitching refers to the craft of fastening textiles using a needle and thread, or yarn. For thousands of years, all sewing was performed by hand. The invention of the sewing machine in the 19th century revolutionised textile production, shifting it from homes to mills, and later, computerisation in the 20th century further streamlined mass production. Despite these advancements, hand sewing remains a cherished practice worldwide, particularly valued in high-quality tailoring, haute couture fashion, and custom dressmaking, and is pursued by textile artists and hobbyists as a means of creative expression.

    The earliest forms of sewing date back to the Palaeolithic Era, where it was used to stitch animal hides for clothing and shelter. Cultures across the globe developed diverse sewing techniques; for instance, the Inuit used caribou sinew for thread and bone needles, while indigenous peoples of the American Plains and Canadian Prairies employed sophisticated methods for constructing tipi shelters. In Africa, sewing was combined with plant leaf weaving to create items like baskets. The weaving of cloth from natural fibres emerged in the Middle East around 4000 BC, and the practice of sewing cloth evolved alongside this development.

    By the Middle Ages, those who could afford it in Europe would employ seamstresses and tailors. Sewing was predominantly a woman’s occupation, and before the 19th century, most of it was practical, focusing on mending and extending the life of expensive clothing. Worn or torn clothing would be repurposed into new items or quilts. Decorative needlework, such as embroidery, was also a highly valued skill. The stitches used in embroidery spread globally via trade routes like the Silk Road, bringing Chinese techniques to Western Asia and Eastern Europe, and Middle Eastern techniques to Southern and Western Europe. European colonial settlements further disseminated Western sewing and clothing styles, although traditional methods persist and are being shared through modern online learning platforms.

    Today, stitching encompasses various disciplines, including hand sewing, machine sewing, embroidery, and cross stitch. Each has its unique characteristics and applications. Hand stitches are the single loops or turns of thread that form the fundamental elements of sewing. They are named based on the needle’s position and sewing direction (e.g., running stitch, backstitch), the stitch’s form (e.g., chain stitch), or its purpose (e.g., hem stitch). Machine stitches, while often mimicking hand stitches, are classified by their structure, such as chain stitch, lockstitch, overlock, and coverstitch.

    Importance of Learning to Sew

    Learning to sew is more than just acquiring a technical skill; it’s an investment in a versatile hobby that can enrich your life in numerous ways. It can fundamentally change your perspective on the world, your body, and the items you purchase.

    Practical Benefits

    The practical advantages of knowing how to sew are immense. You can mend ripped seams on clothing, hem trousers or curtains, or simply fix a button on a shirt. This ability to repair not only extends the longevity of your wardrobe, saving you money, but also contributes to a more sustainable lifestyle by reducing textile waste often associated with “fast fashion”. Beyond repairs, learning to sew empowers you to create custom items that perfectly fit your needs and desires. Imagine crafting your own unique clothing, home décor pieces like cushions and placemats, or even functional items like tote bags and knapsacks. This capability to produce handmade items allows for a level of customisation and quality often unattainable with mass-produced goods.

    Creative Outlet

    Sewing serves as a powerful creative outlet, enabling you to express your individuality and design unique pieces. From selecting fabrics and threads to choosing patterns and adding decorative embellishments like embroidery or appliqué, every step of the sewing process offers an opportunity for self-expression. It’s a rewarding experience to bring your vision to life, transforming raw materials into tangible creations that reflect your personal style and creativity.

    Mindfulness and Well-being

    In an increasingly fast-paced world, stitching offers a mindful activity that can significantly boost your well-being. The focused, repetitive movements involved in sewing can reduce stress and anxiety, promoting a sense of calm and concentration. Completing a project, no matter how small, provides a deep sense of accomplishment and pride. This tangible result of your efforts reinforces your capabilities and boosts self-esteem.

    Community and Connection

    Sewing doesn’t have to be a solitary activity. It can be a wonderful way to connect with others who share your passion. Joining stitching groups, participating in online forums, or taking classes can foster a sense of community. Sharing skills, exchanging DIY stitching ideas, and working on projects together can make the learning process even more enjoyable and provide a supportive network. Many local fabric and craft shops offer lessons and formal classes, where you can meet fellow sewists and get expert guidance. Online communities and social media platforms also provide vast resources and inspiration. Ultimately, whether your motivation is practical, creative, or a desire for well-being and connection, learning to sew is a skill that can truly change your life in unexpected ways. It’s a fun, useful craft that you can be proud of doing.

    Sewing Basics for Beginners

    For anyone venturing into the world of textiles, mastering the sewing basics for beginners is your foundation. This involves setting up an efficient workspace, understanding safety protocols, familiarising yourself with key terminology, learning fundamental hand stitches, assembling essential tools, and getting to grips with the basic operation of a sewing machine.

    Setting Up Your Workspace

    An organised and uncluttered workspace is crucial for an enjoyable and efficient sewing experience. While bolts of fabric and cutting boards can be bulky, investing in specialised sewing furniture can significantly enhance your space. A sizeable sewing table and cabinet can neatly hold your sewing machine and notions. A solid cutting surface, often a specialised cutting table, provides ample room for large fabric pieces and can also offer integrated storage for notions and fabrics. Finally, designating specific storage for fabric scraps, fat quarters, and longer bolts of fabric will keep your space tidy, perhaps using bins, baskets, or dedicated fabric organisers. Good lighting and comfortable seating are also important for maintaining focus and preventing strain.

    Safety First

    Safety is paramount when handling sewing tools. Always exercise care with needles, pins, and scissors. Designate a good pair of fabric shears solely for cutting fabric to maintain their sharpness. Avoid using them on paper, heavy string, or cardboard, as this will dull the blades. Smaller embroidery scissors are useful for snipping threads. Keep your cutting tools clean and sharp, periodically applying a drop of sewing machine oil to the inside of the blades and wiping off lint. A thimble, made from various materials like metal, leather, or wood, is essential for protecting your fingers from pricks and soreness when hand sewing.

    Understanding Sewing Terminology

    Familiarising yourself with common sewing terms will make following patterns and tutorials much easier.

    • Warp: The lengthwise threads of the fabric, also known as the lengthwise grain. Fabric is usually purchased by yardage measured along this grain.
    • Weft: The crosswise threads, running across the width of the fabric.
    • Selvage: The narrow, tightly woven strip along the long edge of the fabric that prevents it from unravelling.
    • Raw Edge: The end of the fabric where it has been cut or torn, prone to fraying.
    • Seam Allowance: The extra fabric length added to the edge of a garment or pattern piece to allow for the stitching line, ensuring the project finishes at the correct size.
    • Right Side/Wrong Side: The “right side” is the visible, pretty side of the fabric with the design or desired finish, which typically faces outwards on a garment. The “wrong side” is the inner, less finished side.
    • Grainline: An arrow on a pattern piece that indicates how the pattern should align with the lengthwise grain of the fabric, crucial for proper drape and fit.
    • Bias: The diagonal direction across the fabric, which offers the most stretch or give.
    • Hem: The finished edge of a garment, usually double-folded and sewn in place to prevent fraying and create a clean finish.
    • Darts: Techniques used to shape a garment, commonly found around the waist and bust.
    • Interfacing: An additional layer of fabric added to select inner sections of a garment to provide support, prevent transparency, or create a cleaner edge.
    • Lining: An extra layer of material typically attached to the entire inside of a garment for added warmth or opacity.
    • Basting: Temporary stitches, usually longer than permanent ones, used to hold two pieces of fabric together for fitting, appliqué, or before machine stitching, making them easy to remove later.
    • Topstitching: A line of stitching on the right side of the fabric, used to keep layers flat, reinforce seams, or for decorative purposes.
    • Pivot: A technique used when machine sewing around corners, by leaving the needle in the fabric, raising the presser foot, turning the fabric, and continuing to sew.

    Basic Hand Stitches Explained

    Hand stitching is a valuable skill for intricate details, repairs, or when a machine isn’t suitable. It’s a core component of stitching lessons for beginners.

    • Running Stitch: This is widely considered the easiest stitch and an excellent starting point for children and beginners. It involves weaving the needle in and out of the fabric in a straight line. The running stitch is effective for making items like lavender bags and heart ornaments, or for gathering fabric for pinwheels and flower brooches. It’s the quickest stitch for joining two fabric pieces, particularly in areas that won’t experience significant wear. Longer running stitches are ideal for basting, which is temporary stitching easily removed later. The running stitch should look the same on both sides of the fabric.
    • Overstitch/Overcast Stitch: Often recommended as the “next stitch” to teach after the running stitch, the overstitch is relatively easy but requires neatness as unevenness will show. It involves making slanted stitches over the edge of the fabric, about 21 apart. This stitch is excellent for creating a varied edge or for neatly sewing together fraying fabric to contain the fraying, useful for projects like pincushion dolls and bunny brooches. It is used to enclose a raw or unfinished seam or edge. You can use it to join two halves of a pincushion.
    • Backstitch: Described as a strong and secure stitch, the backstitch is frequently used when seams should not be visible, especially for projects that will be turned “inside out”. It produces results similar to machine sewing, making it ideal for keeping stuffing in place. It is performed by taking a stitch forward, then bringing the needle up a stitch length away, and going back into the hole where the previous stitch ended. This method creates a continuous, secure line of stitching. It’s also simple to keep straight.
    • Blanket Stitch: This is a “super pretty” stitch, often used for felt projects and to connect two pieces of fabric or as edging on a single piece. It involves pulling the thread through to the front near the edge, placing the needle diagonally, and bringing it through a loop to form a 90-degree angle. It’s a versatile stitch, used for items like a nature bag or Christmas pudding ornaments.
    • French Knot: While not a “must-know” stitch, the French Knot is valued for adding “quirky” decorative detail to projects. It’s used for elements such as “raisins” on Christmas pudding ornaments or “beady” eyes on juggling chooks. It can be a “little fiddly” at first but becomes easier with practice.
    • Slip Stitch: This stitch is prized for being invisible from either side of the stitched piece, making it excellent for finishing projects flawlessly. It involves picking up a few threads from a fold, slipping the needle along the fold horizontally inside the fabric, and pulling the thread tight so the stitches are hidden. It’s often used for invisibly closing openings, such as after stuffing a pillow or stuffed animal.
    • Whipstitch: A simple stitch for protecting edges. It involves folding fabric, inserting the needle, and taking it through the back to the front, level with the first stitch, continuing along the edge. It creates a distinct angled look on the front with tiny stitches that blend in with matching thread.

    Essential Tools and Materials

    Having the right tools is fundamental for successful stitching lessons for beginners.

    • Needles: You’ll need both hand-sewing and machine needles. For hand sewing, “sharps” are good for basic use, “betweens” for fine work, “crewel” for darning or embroidery (with larger eyes), and “darning needles” for repairing holes. Needles come in sizes, typically from 1 (coarse) to 10 (fine); a number seven sharp is often recommended for beginners. Machine needles also vary by size (e.g., size 9 for delicate fabrics to 18 for heavy ones) and type (e.g., ball-point for knits to prevent snagging).
    • Threads: All-purpose polyester thread with a mercerised cotton cover is widely used and comes in many colours. The thread colour should match or be slightly darker than your fabric. Keeping large spools of white, black, grey, and beige is practical as they blend with most projects. Embroidery floss is thicker, often used for decorative purposes. Beeswax is useful for coating hand-sewing thread to prevent tangling and strengthen it.
    • Measuring Tools: A good quality 60-inch fabric or plastic-coated tape measure that won’t stretch is essential. A 6-inch ruler or small measuring gauge is also handy.
    • Cutting Tools: Sharp fabric shears (dressmaking shears) are a must for cutting fabric. Smaller embroidery scissors are good for threads. Pinking shears have triangular teeth that cut fabric to reduce unravelling, and rotary cutters (with a cutting mat) are also options for cutting fabric.
    • Marking Tools: Tailor’s chalk is excellent for marking thin lines on dark fabrics that brush off easily. Water-soluble fabric markers (usually blue) disappear with water. A dressmaker’s tracing wheel can transfer pattern markings to fabric, used with tracing paper.
    • Pressing Tools: An iron (dry or steam) and a well-padded ironing board are crucial. A press cloth (muslin or cheesecloth) can dampen fabric during pressing. Pressing, as opposed to ironing, involves lifting and placing the iron rather than sliding, which helps to set seams and darts without distorting the fabric. Darts are typically pressed towards the centre, and seams are pressed open and flat. Always test iron temperature on a fabric scrap.
    • Other Notions: Pins, preferably with large plastic or glass heads for visibility and smooth, pointed tips to slide easily into fabric, are used to hold fabric pieces together. A pincushion keeps pins tidy. A seam ripper is an indispensable tool for correcting mistakes. A sewing needle booklet can keep your needles organised.

    Sewing Machine Basics (Introduction)

    While hand sewing is fundamental, understanding a sewing machine opens up many more possibilities for stitching lessons for beginners.

    Anatomy of a Sewing Machine

    Key parts include the needle, presser foot, and bobbin. Most machines also have a designated thread holder, tension dials, and a side lever to move the needle and presser foot.

    Basic Threading and Bobbin Winding

    Threading a machine involves winding the bobbin first. The thread goes onto a designated holder, through a bobbin hole, and is wound onto the bobbin by placing it on a spindle and activating the machine to spin. The bobbin should be filled to about three-quarters full. For the main thread, it typically involves guiding it through various hooks, holes, and tension disks, then finally through the needle eye, leaving several inches of excess thread. Trimming the thread end cleanly and, if necessary, wetting it can make threading easier. If you have difficulty, a needle threader can be very helpful.

    Joining Top and Bottom Threads

    After threading the top, the bobbin is placed in its holder in the machine. The top thread is then used to pick up the bobbin thread, usually by turning the side lever to lower and raise the needle, bringing the bobbin thread to the surface. Both threads should then be guided to the back of the machine.

    Straight Stitch and Zigzag Stitch

    These are the most basic and versatile machine stitches. To begin sewing a straight line, lift the presser foot, slide the fabric underneath, align the fabric edge with the desired seam allowance (marked by lines on the machine bed), and lower the presser foot to hold the fabric in place.

    Backstitching

    Crucial for securing stitches, you should always backstitch at the beginning and end of a seam to prevent it from unravelling. This involves sewing a short distance, then reversing the stitch over the same part, and then continuing forward.

    Troubleshooting Common Machine Issues

    Issues like poor stitch tension or thread breakage can be frustrating, especially for beginners. Sometimes, the machine itself might be the problem, particularly older models. Practising sewing straight lines on scrap fabric helps to develop a steady hand and achieve even seam allowances. Do not push or pull the fabric under the needle; simply guide it. Don’t be afraid to experiment with your machine’s features on fabric scraps.

    Understanding Fabrics

    Choosing the right fabric is a key part of stitching lessons for beginners, as different fabrics behave differently and are suited for various projects.

    Natural Fibres

    • Cotton: Often considered the simplest fabric for beginner sewers, especially plain-weave cotton used by quilters. It’s easy to handle, allowing you to focus on developing basic sewing skills without intricate fabric-wrangling techniques.
    • Linen, Wool, Silk: While beautiful, these might be more challenging for absolute beginners due to their unique properties and care requirements.

    Synthetic Fibres

    • Polyester, Nylon, Rayon: These fibres offer different properties. For instance, T-shirt jersey (often a knit blend) or denim can be handled by a confident beginner.

    Fabric Weights and Drapes

    Fabrics come in light, medium, and heavy weights, which affect how they drape and their suitability for different projects. For a durable item like a frequently worn skirt, choose a sturdy, washable fabric. For home décor items like pillows, durability is key, but washing instructions might be less critical. For specific projects like cosplay, the range of materials is vast, sometimes requiring consultation with experienced sewists.

    Fabric Grains

    Understanding the grain is vital for proper garment construction. The lengthwise threads are the “lengthwise grain,” and fabric is bought by yardage along this direction. The crosswise threads run across the width. The “bias” runs diagonally and has the most stretch. Woven fabrics should have lengthwise and crosswise threads meeting at right angles; if not, the fabric is “off-grain”. Minor off-grain issues (under an inch) can sometimes be corrected by pulling diagonally or steam pressing.

    Pre-washing Fabrics

    It is essential to pre-wash your fabric before cutting to eliminate shrinkage and most colour bleeding. Always follow the manufacturer’s care instructions, usually found on a label on the fabric bolt. These labels also provide information on fibre content, fabric width, and dye fastness. Be aware that some fabrics with special finishes (e.g., crease-resistant) cannot be straightened if off-grain, so check before buying. When shopping for fabric, especially in person, touch and handle it. If it’s very stretchy or slippery, it might not be the best choice for learning to sew.

    Beginner Sewing Patterns

    For anyone beginning their journey in stitching lessons for beginners, patterns serve as your roadmap. They provide detailed instructions on how to cut fabric and assemble pieces to create your desired item.

    Reading a Sewing Pattern

    Understanding a sewing pattern might initially feel like translating an ancient document. However, with practice, it becomes intuitive.

    Pattern Envelope Information

    The pattern envelope provides crucial details such as sizing, required fabric yardage, and a list of notions (additional items like buttons, zips, or elastic).

    Pattern Pieces and Markings

    The tissue paper pattern pieces will have various markings:

    • Grainlines: Arrows indicating how to align the pattern piece with the fabric’s lengthwise grain. Ensure the distance from the selvage or folded edge to the grainline arrow remains consistent along its entire length before pinning and cutting.
    • Darts: Markings that indicate folds sewn into the fabric to give shape to a garment.
    • Notches: Small marks on the edges of pattern pieces used for matching seams accurately.
    • Lengthen/Shorten Lines: Indicate where a pattern can be adjusted for height.

    Cutting Layouts and Instructions

    Patterns typically include diagrams showing how to lay out the pattern pieces on your fabric efficiently to minimise waste. Always spread your fabric smoothly and cleanly before laying out patterns. It’s usually folded in half lengthwise with right sides together.

    Choosing Your First Pattern

    Start with simple patterns designed specifically for beginners. Patterns with fewer pieces and straightforward construction are generally easier. Look for pattern series labelled “Fast & Easy,” “Super Simple,” or “How to Sew,” which often explain one or two new skills at a time.

    • Some great beginner sewing patterns include:
      • Pillows
      • Tote bags
      • Simple tops or skirts
      • Pincushions
      • Stuffed toys or bean bags
      • Potholders
      • Scarves
      • Aprons
      • Knapsacks

    Reading through all instructions carefully before you begin is always a good practice. If you find the information overwhelming, simply take it one step at a time, starting with the overview. Watching “sew-alongs” on platforms like YouTube can also be helpful for visual learners following a specific pattern.

    Sizing and Fit

    Accurate measurements are crucial for a good fit. For dresses, shirts, or tops, focus on bust or chest measurements. For skirts or pants, go by hip measurements, as the waistline and length are easier to adjust. Remember that size ranges are approximations, and perfect fits might require minor adjustments. Simple adjustments like lengthening or shortening can be made on the pattern. It’s advisable to record any changes you make to a pattern for future reference.

    Easy Stitch Patterns

    Mastering easy stitch patterns is fundamental for stitching lessons for beginners. These patterns are characterised by repetitive, simple movements and clear instructions, making them approachable for new sewists. They form the backbone of both hand sewing and machine sewing projects.

    Examples of Easy Hand Stitch Patterns

    Several hand stitches are perfect for beginners due to their straightforward nature and versatility:

    • Running Stitch Variations: As previously mentioned, the running stitch is perhaps the most basic hand stitch, involving simple in-and-out movements of the needle. It’s ideal for quickly joining fabric pieces or for gathering fabric to create decorative effects like ruffles or pinwheels. Variations might include altering stitch length for basting (longer stitches for temporary holds) or decorative purposes. The running stitch is a fundamental skill for many small simple stitching projects such as lavender bags or pincushions.
    • Basic Backstitch for Outlining: The backstitch is a strong and secure hand stitch that creates a solid line, closely resembling a machine stitch. For beginners, practising it for outlining designs is an excellent way to gain precision and control. It involves bringing the needle up, taking a stitch backward, and then bringing the needle up again a stitch length forward from the previous entry point, effectively creating a continuous line of stitches on the right side of the fabric. This stitch is perfect for outlining embroidered designs or for creating strong, inconspicuous seams that will not show.
    • Stem Stitch: While not explicitly detailed in all sources provided, the concept of a “stem stitch” (from the SEO brief) typically involves creating a continuous line that looks like a twisted rope, often used for stems in embroidery or outlining. It’s an incremental step from basic line stitches.
    • Chain Stitch (simple version): The chain stitch forms a series of connected loops, resembling a chain. It can be used for both seams and decoration. For beginners, a simple version involves bringing the needle up, looping the thread, and re-inserting the needle very close to where it came out, bringing it up inside the loop to form the next loop. This creates a textured, decorative line ideal for embroidery for beginners.

    Examples of Easy Machine Stitch Patterns

    For those ready to introduce a machine into their stitching lessons for beginners, two primary stitches are key:

    • Straight Stitch Applications (Hemming, Seams): The straight stitch is the most basic machine stitch, creating a simple, continuous line. It’s fundamental for sewing seams, which are the lines where two pieces of fabric are joined. To sew a straight seam, you align the fabric edge with the desired seam allowance guide on your machine, lower the presser foot, and guide the fabric evenly while stitching. This stitch is also widely used for hemming garments, where the fabric edge is folded over and stitched down to create a clean, finished edge that prevents fraying.
    • Basic Zigzag for Finishing Edges: The zigzag stitch creates a stitch pattern that moves from side to side, forming a “Z” shape. This stitch is excellent for finishing raw edges of fabric to prevent fraying, especially if you don’t have an overlocker machine. It can also be used for appliqué or decorative purposes. When finishing edges, you’d sew the zigzag stitch close to the raw edge of the fabric.
    • Reinforcement Stitches: While not a distinct stitch type, reinforcement is crucial. This often involves backstitching at the beginning and end of straight seams to secure them and prevent them from coming undone.

    Types of Stitch Patterns (Beyond the Basics)

    As your skills develop, you’ll naturally explore more complex and specialised stitches:

    Decorative Hand Stitches

    • Satin Stitch: A smooth, dense stitch used to fill in designs, where stitches are placed close together without overlapping to create a solid, glossy surface. It’s a key part of embroidery for beginners.
    • French Knot: As discussed, a quirky little knot used for small, textured details.
    • Lazy Daisy Stitch (or Detached Chain Stitch): Creates a single, petal-like loop, often used for floral designs.
    • Feather Stitch: An open, looped stitch used for borders or decorative lines, resembling feathers.

    Functional Hand Stitches

    • Buttonhole Stitch: A strong, protective stitch used to reinforce cut fabric around buttonholes and prevent unravelling.
    • Darning: A technique for repairing holes or worn areas in fabric by weaving new threads over the damaged section.

    Machine Stitch Functions

    Modern sewing machines offer a variety of built-in functions.

    • Buttonholes: Many machines have automated or semi-automated buttonhole functions, making it easier to create neat buttonholes.
    • Zipper Insertion: Specific presser feet and stitch settings assist in sewing zippers cleanly.
    • Overcasting: Machine overcast stitches provide a clean finish to raw edges, similar to what a serger would do.

    Introduction to Appliqué and Patchwork

    These are simple techniques for adding visual interest.

    • Appliqué: Involves attaching pieces of fabric onto a larger piece to create a design, often secured with zigzag or satin stitches.
    • Patchwork: Joins small pieces of fabric to create a larger design, commonly seen in quilting.

    These diverse stitches offer both practical solutions for garment construction and endless possibilities for creative embellishment, making the journey of stitching lessons for beginners continuously exciting.

    Tutorials for Easy Stitch Patterns

    To truly grasp the sewing basics for beginners, hands-on practice with detailed instructions is invaluable. Here, we delve into specific easy stitch patterns with step-by-step guidance.

    How to Sew a Straight Seam

    Sewing a straight seam is a fundamental skill that underpins most sewing projects.

    1. Prepare Fabric: Place your two pieces of fabric “right sides together”. The “right side” is the side with the design or print. If there’s no distinct right side (e.g., plain cotton), either side is fine.
    2. Mark Seam Line (Optional but Recommended for Beginners): For precision, you can mark your seam line. A common seam allowance is ½ inch (1.27 cm) or ⅝ inch (1.59 cm) in from the edge. You can use a fabric marking pen or chalk.
    3. Pin Fabric: To prevent slipping, pin the fabric pieces together, placing pins perpendicular to the edge.
    4. Thread Machine: Ensure your machine is correctly threaded with a top thread and a wound bobbin. Ideally, the thread colour should match your fabric, but for practice, a contrasting colour allows you to see your stitches.
    5. Position Fabric: Lift the presser foot and slide the fabric under it, aligning the fabric edge with the desired seam allowance line on your machine’s needle plate. Lower the presser foot to hold the fabric in place.
    6. Start Stitching: Gently press the foot pedal to start sewing.
    7. Backstitch to Secure: Sew about 1 cm forward, then engage your machine’s backstitch function (usually a switch or button) and stitch backwards to your starting point. This secures the seam.
    8. Continue Sewing Straight: Maintain an even seam allowance by keeping the fabric edge aligned with the guide line on your machine. Guide the fabric gently without pushing or pulling too hard, as this can cause puckering.
    9. Finish with Backstitch: When you reach the end of your seam, perform another backstitch to secure the stitches.
    10. Remove Fabric: Lift the presser foot, ensure the needle is up and out of the fabric by turning the side lever, and cut the threads, leaving a few inches of tail.
    11. Press Seam: Take the sewn seam to an ironing board. Press the seam open by lifting and replacing the iron along the seam, avoiding sliding. This makes a huge difference to the finished appearance.

    How to Hem a Garment

    Hemming gives a polished finish to your projects.

    • Machine-Sewn Hem:
      1. Prepare Edge: For a clean finish, you might first zigzag stitch or overlock the raw edge to prevent fraying.
      2. First Fold: Fold the raw edge of the fabric up by about ¼ inch (0.6 cm) to 1 cm (0.4 inch) to the wrong side and press it flat with an iron. This hides the raw edge.
      3. Second Fold: Fold the fabric up a second time, determining your desired hem width (e.g., another ½ inch to 4 inches, depending on the project). Press and pin in place.
      4. Stitch: Machine stitch along the top folded edge, making sure to use a thread that matches your fabric for an inconspicuous finish. Remember to backstitch at the beginning and end.
    • Hand-Sewn Hem: For an invisible hem, a blind stitch is ideal.

    How to Repair a Simple Tear: Darning vs. Patching

    Repairing tears is a practical skill to learn in stitching lessons for beginners, saving you money and extending clothing life.

    • Darning: This method is for repairing holes or worn areas by weaving new threads across the damaged area to fill the gap. It’s best for small holes or thin areas. You would typically use a darning needle and thread that matches the fabric.
    • Patching: For larger tears or holes, patching involves covering the damaged area with a piece of fabric, either sewn over or under the tear. This can be done with a straight stitch on a machine or by hand with a slip stitch or running stitch for a more discreet repair.

    Basic Embroidery Stitches Tutorial

    Embroidery for beginners allows for personal touches and decoration.

    • Running Stitch: As above, a simple in-and-out stitch for outlines or filling.
    • Hoops/Frames: An embroidery hoop or frame helps to keep the fabric taut, making your stitches more even and preventing fabric distortion.

    Understanding Cross Stitch Charts

    Cross stitch patterns are presented as charts, which are grids filled with symbols and colours.

    • Symbols and Colours: Each symbol on the chart corresponds to a specific colour of embroidery floss. A key is provided to match the symbols to the corresponding DMC or other brand colour numbers.
    • Grid: The chart is usually divided into 10×10 squares with darker lines, mirroring the weave of your Aida fabric. This helps you count stitches and locate your position on the fabric accurately. You will typically find the centre of your fabric and chart and work outwards from there to ensure your design is centred.

    Stamped Cross Stitch Lessons for Beginners

    For those who are just starting out with needlework or prefer a less count-intensive method, stamped cross stitch lessons for beginners offer a fantastic entry point into the craft. This method significantly simplifies the process, allowing absolute beginners to enjoy immediate success.

    • What is Stamped Cross Stitch? The primary difference between traditional cross stitch and stamped cross stitch lies in how the pattern is applied to the fabric. In traditional cross stitch, you work from a chart and count squares on a blank fabric (like Aida) to determine where to place each stitch. With stamped cross stitch, the design is already pre-printed directly onto the fabric. Each square that needs to be stitched is marked with a specific colour. After washing and drying, you can frame your piece, turn it into a cushion, or use it for other DIY stitching ideas. Stamped cross stitch provides a comforting and enjoyable path into the world of stitching, allowing you to build confidence in the physical act of stitching before tackling more complex patterns or design methods.

    Cross Stitch for Absolute Beginners

    Moving beyond just learning the basic stitch, cross stitch for absolute beginners involves developing good habits and understanding common pitfalls to ensure a satisfying crafting experience. This section builds on the foundational knowledge, offering tips for maintaining quality and successfully completing your first projects.

    • Choosing Your First Cross Stitch Kit: For absolute beginners, choosing the right kit is crucial for a positive experience. Look for kits explicitly labelled for beginners. These often feature simpler designs with fewer colours and larger fabric counts (e.g., 11-count or 14-count).
    • Distorted Fabric/Puckering:
      1. Solution: Do not pull your stitches too tightly. Ensure your fabric is taut in the hoop but not overly stretched. Press your work periodically during the process and at the end.
    • Washing and Finishing Your Cross Stitch Project: Once your cross stitch masterpiece is complete, a final wash and finish will make it shine.
      1. Washing: Hand wash your finished piece gently in cool or lukewarm water with a mild, pH-neutral soap (like dish soap or a dedicated fabric wash). Rinse thoroughly until the water runs clear. This removes any hand oils, dirt, or fabric markings.
      2. Drying: Gently roll your piece in a clean towel to absorb excess water, avoiding wringing. Then, lay it flat on a clean, dry towel or hang it to air dry, away from direct sunlight.
      3. Ironing: Once damp-dry, press your piece face down on a clean towel using a low to medium heat setting, with or without steam, appropriate for your fabric. This helps to flatten the stitches and even out the fabric.

    Beginner Projects and DIY Ideas

    Embarking on your first sewing project is an exciting milestone. The key is to start with simple, manageable projects that allow you to practice basic skills and build confidence.

    Practical Everyday Items

    These projects are not only fun to make but also highly useful, such as small pouches, or custom face masks.

    Home Décor Projects

    Bring a handmade touch to your living space with various home décor items.

    • Cushions/Pillows: A classic beginner sewing project, cushions are ideal for practising straight seams and turning fabric right-side out. You can experiment with different fabrics, colours, and decorative stitches to match your home’s aesthetic.
    • Placemats: Simple rectangles of fabric, placemats are excellent for honing hemming and straight stitching skills. They can be personalised with embroidery or patchwork.
    • Wall Hangings: Small fabric art pieces or cross stitch designs can be turned into charming wall hangings. This allows you to showcase your decorative stitching skills.
    • Curtains/Blinds: Learning to hem is invaluable for customising curtains or blinds to fit your windows perfectly.

    Fashion Accessories

    Create unique accessories that complement your wardrobe.

    Project 1: Fabric Pincushion

    This is a straightforward project to use up fabric scraps and practise the running stitch.

    • Materials:
      1. Wool felt or other non-fraying fabric scraps
      2. Two cardboard circles
      3. Wool filler
      4. Needle, scissors, and matching thread
      5. Optional: elastic or ribbon for a wrist pincushion
    • Steps:
      1. Cut Fabric: Cut one 5” diameter circle and one 3 ½” diameter circle from your wool scraps.
      2. Prepare Larger Circle: Double-thread your needle. Sew a running stitch around the outside of the larger 5” wool circle, about ⅜” from the edge.
      3. Gather and Stuff: Gently pull the thread to gather the fabric, forming a cup shape. Push the fabric back along the thread as you pull. Stuff this cup with wool filler.
      4. Close Larger Circle: Place one cardboard circle over the filler. Pull the gathered edge of the wool as close together over the cardboard as possible. Pull the thread tight and close the opening with long zigzag stitches or overcast stitches.
      5. Prepare Smaller Circle: Cover the other cardboard circle with the smaller 3 ½” wool piece. Sew a running stitch around the wool, gather the edge with the cardboard in the centre, and close the opening with zigzag stitches.
      6. Attach Elastic: Fasten one end of the elastic piece to the bottom edge of the pincushion.

    Project 2: Simple Knapsack

    This project is perfect for practising straight seams and creating a functional item.

    • Steps:
      1. Insert Drawstring: Cut the cording in half. Use a large safety pin attached to one end of a cord piece to help pull it through each casing. Knot the ends of the cording together to finish.

    Project 3: Easy Embroidered Dish Towel

    This project introduces basic embroidery stitches and the concept of transferring a design. It’s a great example of embroidery for beginners.

    • Materials:
      1. A plain cotton or linen dish towel
      2. Embroidery floss in desired colours
      3. Embroidery needle
      4. Fabric marking pen or tailor’s chalk
      5. Small embroidery hoop (optional but recommended)
    • Steps:
      1. Choose Design: Select a simple, small design (e.g., a simple floral motif, an initial, or a small quote).
      2. Transfer Design: Use a fabric marking pen or tailor’s chalk to lightly draw your design onto the dish towel. For more intricate designs, you could use tracing paper and a tracing wheel.
      3. Prepare for Stitching: Place the area to be embroidered into an embroidery hoop.

    Project 4: Cross Stitch Coaster

    This project is an ideal introduction to cross stitch for beginners, focusing on fabric preparation and thread management.

    • Steps:
      1. Choose Pattern: Select a very simple cross stitch pattern, perhaps a geometric shape or a small icon. You can find many free easy stitch patterns online, or use a pre-printed (stamped) Aida fabric.
      2. Prepare Fabric: Find the centre of your Aida fabric. Place it in a hoop if using.
      3. Start Stitching: Using 2 strands of floss, begin stitching from the centre of your pattern. Use the loop method or waste knot to start your thread without a knot on the back.
      4. Make ‘X’ Stitches: Follow your chosen pattern, making neat ‘X’ stitches. Ensure the top leg of each ‘X’ consistently slants in the same direction.
      5. Finish Threads: When a thread runs out or a colour section is complete, weave the tail under several completed stitches on the back to secure it.
      6. Wash and Press: Once stitching is complete, gently hand wash your Aida fabric to remove any oils or marks. Press it dry face down on a towel.
      7. Finish as Coaster: Trim your finished cross stitch.

    Project 5: Mending a Torn Seam

    This quick project is for practising the practical skill of mending a torn seam.

    • Steps:
      1. Prepare: Trim any frayed threads around the torn seam.
      2. Align: Align the two raw edges of the fabric at the seam.
      3. Stitch: Using a backstitch for hand sewing or a straight stitch on a machine, sew to reinforce the repair. Sew directly over the original stitch line if possible.
      4. Press: Once the seam is mended, press it open and flat to blend it with the rest of the garment.

    Inspiration from Beginner Projects

    These simple stitching projects provide practical experience and a sense of accomplishment, laying a strong foundation for your continued learning to sew. Having explored the fundamentals and embarked on some simple stitching projects, it’s natural to seek further inspiration for your creative journey. The world of sewing is vast and constantly evolving, with a vibrant community eager to share ideas and celebrate achievements. Remember that every stitch you make, especially as a beginner, is a step forward. What you can achieve, even with just the sewing basics for beginners, is truly impressive. From practical mends to unique handmade gifts, the act of creating something with your own hands brings immense satisfaction.

    Conclusion

    As we draw our comprehensive guide to stitching lessons for beginners to a close, we hope you feel empowered and excited to embark on your creative journey. We’ve explored the fundamental aspects of sewing, from its rich history and diverse disciplines like hand sewing, machine sewing, embroidery, and cross stitch, to the tangible benefits it offers for well-being and self-expression. We’ve delved into the sewing basics for beginners, covering everything from setting up your workspace and understanding essential terminology to mastering foundational hand stitches like the running stitch, backstitch, slip stitch, and whipstitch. You now have a clearer picture of the indispensable tools and materials that form a good sewing kit, including various needles, threads, and cutting tools.

    About the Author: Grace, Founder of London Sewing Courses

    Grace is the heart and hands behind London Sewing Courses. A passionate and experienced sewing instructor, she founded the studio with a unique mission: to create a calm, friendly space for adults to learn and connect, while using the profits to fund free sewing classes for local children in need. Her personal expertise and commitment to community building are at the core of every class and every stitch.