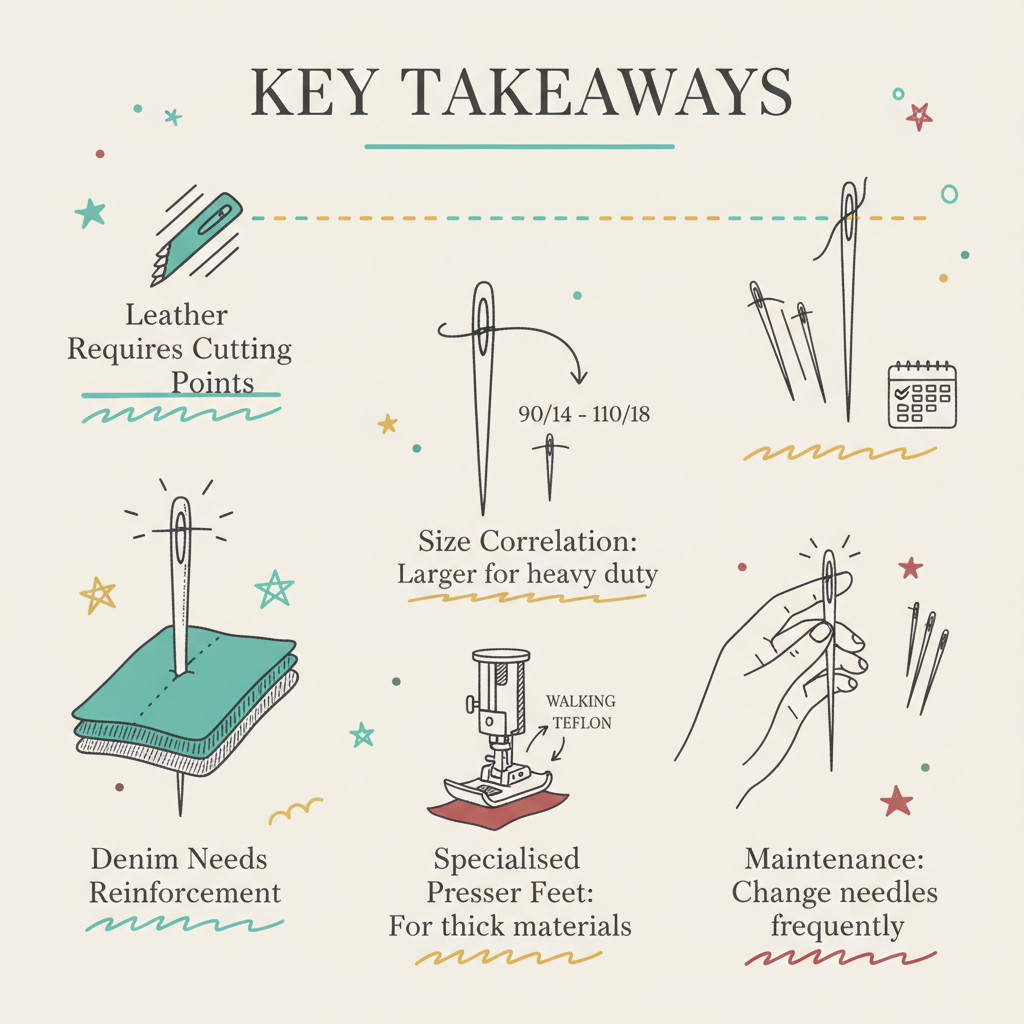
Tag: Grace Barrett

  • Heavy-Duty Needles & Feet: Sewing Denim, Leather, and Canvas

    Heavy-Duty Needles & Feet: Sewing Denim, Leather, and Canvas

    Key Takeaways

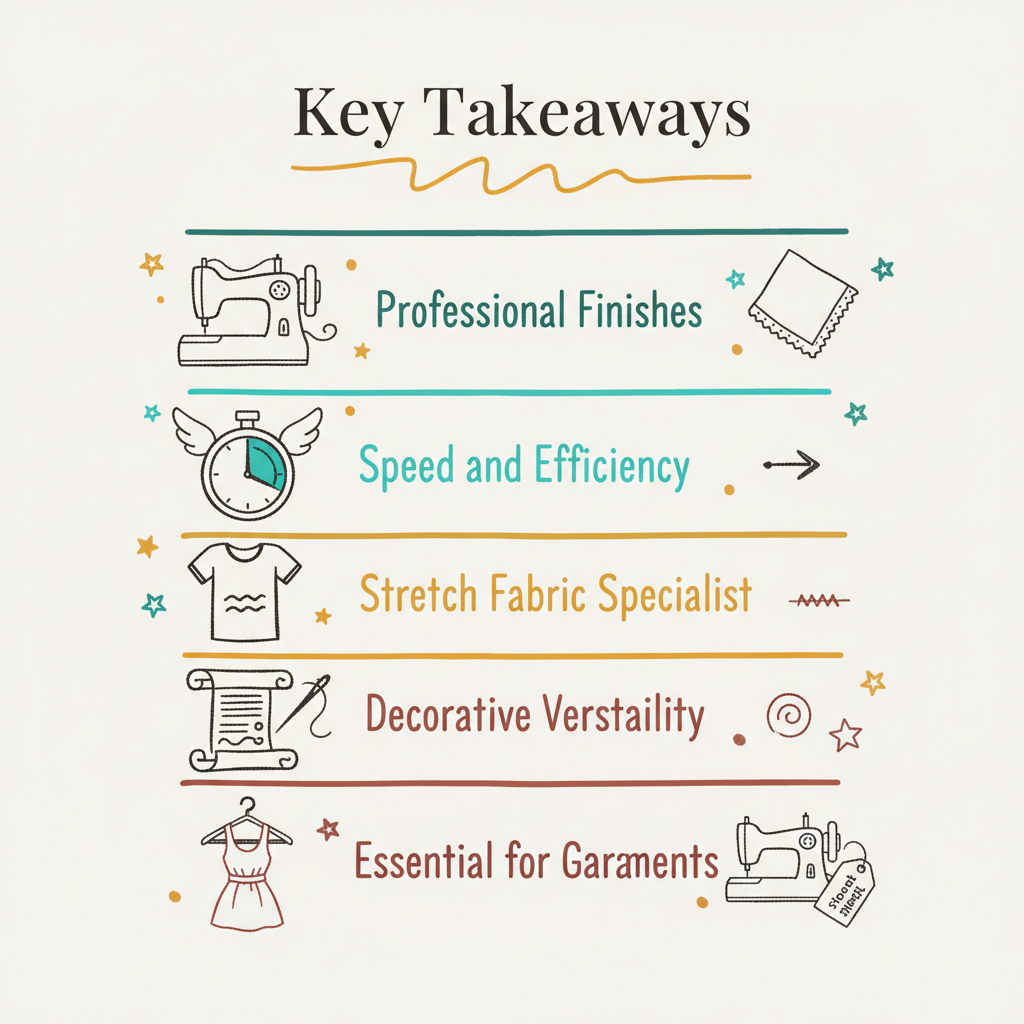
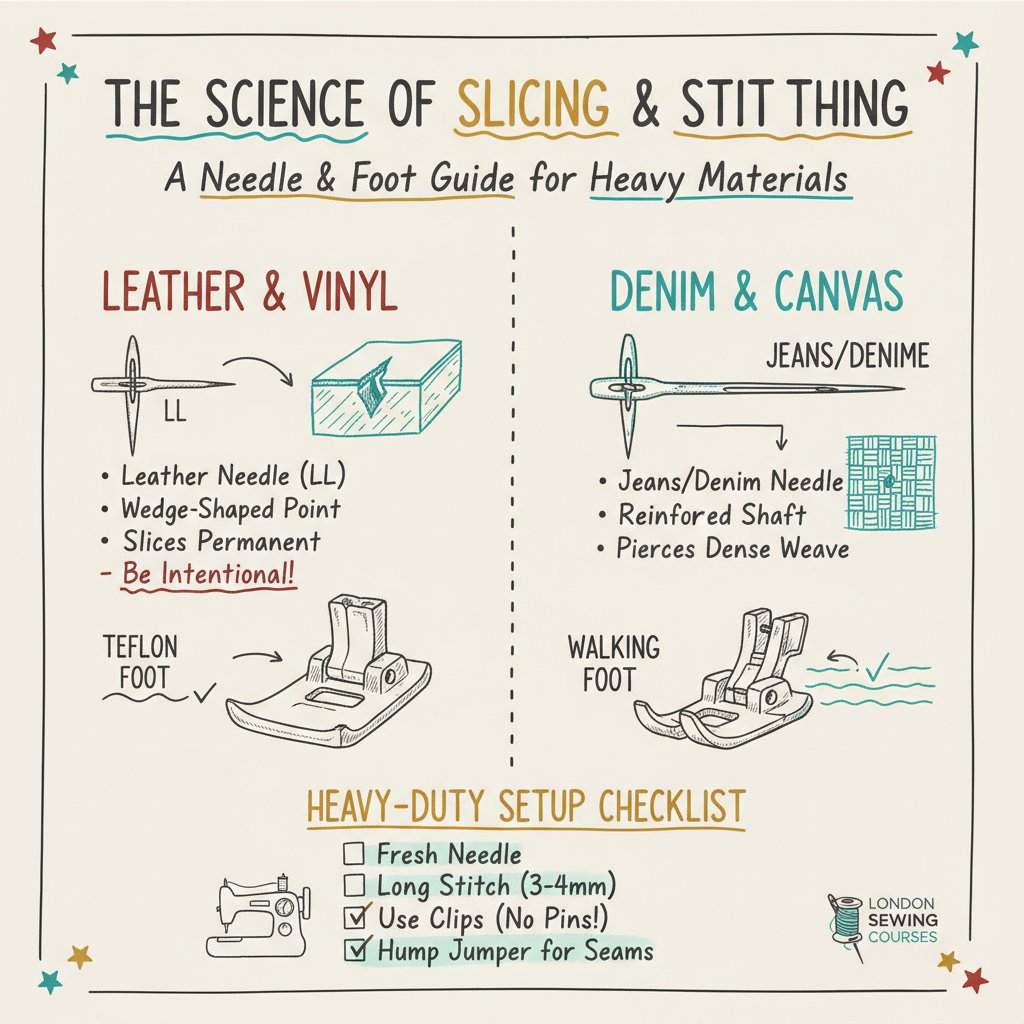
    • Leather Requires Cutting Points: Unlike fabric needles, leather needles have a wedge-shaped point to slice through hide.
    • Denim Needs Reinforcement: Heavy fabrics like denim require a thick, strong shaft and a very sharp point to prevent bending.
    • Size Correlation: Use larger needle sizes (90/14 to 110/18) for heavy-duty materials to ensure the needle doesn’t snap.
    • Specialised Presser Feet: Using a walking foot or Teflon foot is essential for helping thick or “sticky” materials glide through.
    • Maintenance: Change needles frequently when sewing tough materials as they dull much faster than when sewing cotton.
    Key takeaways infographic for what type of needle for leather hat needle to use for jeans, what type of needle for denim

    Starting a project with heavy-duty materials like denim or leather is an exciting milestone in any sewist’s life. It signifies a move toward more structured, professional-grade garments and accessories. However, the most common question I hear in our studio is: what type of needle for leather is actually safe for my machine? Transitioning from soft cottons to tough hides or thick twills requires more than just a bit of extra muscle; it requires a specific understanding of needle geometry. Using the wrong tool won’t just result in poor stitches; it can actually damage your machine’s timing or break your internal components. Whether you are upcycling a pair of vintage jeans or crafting a bespoke leather clutch, your choice of needle is the most critical technical decision you will make.

    Infographic about what type of needle for leather for London Sewing Courses

    The Science of the Slice: What Type of Needle for Leather?

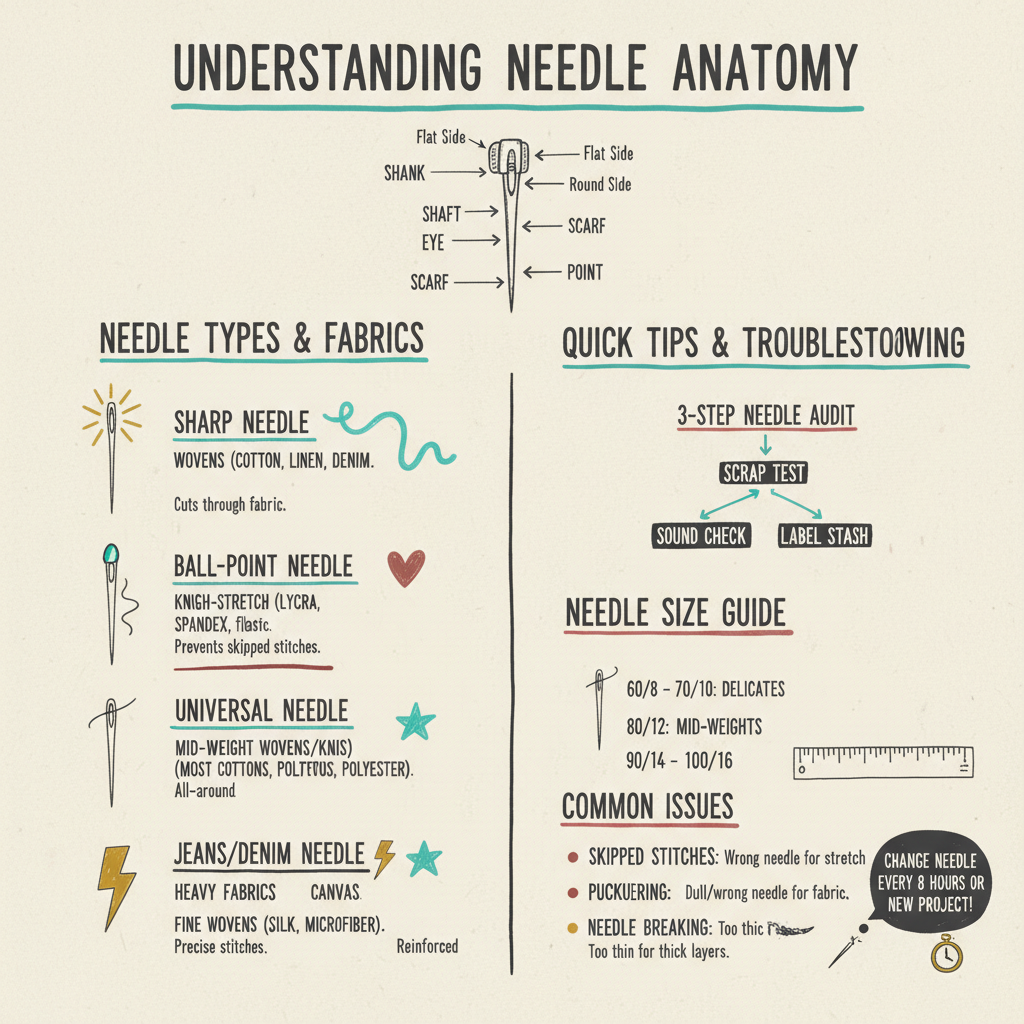
    Leather is not a woven fabric; it is a dense, non-fibrous material. This means that a standard needle, which is designed to push threads aside, will simply struggle and fail to penetrate the surface cleanly. When asking what needle do you use to sew leather, the answer is always a “Leather Needle” (often marked as LL). [cite_start]These needles feature a unique wedge-shaped cutting point that actually slices a small hole as it enters the material[cite: 3].

    Because leather does not “heal” like fabric, every hole is permanent. This is why having the correct cutting point is so vital; it ensures the hole is exactly the right size for the thread to pass through without tearing the surrounding hide. If you are joining us for private sewing lessons London, we always emphasise that you must never use a leather needle on woven fabrics, as the wedge point will cut the yarns and cause the fabric to unravel.

    Conquering Canvas and Twill: What Type of Needle for Denim?

    Denim is a tightly woven, heavy-duty cotton twill that presents a different challenge. While it is a woven fabric, its density and thickness—especially at the seams—can easily snap a standard needle. When considering what type of needle for denim, you must look for a “Jeans” or “Denim” needle. [cite_start]These are specifically engineered with a reinforced shaft to reduce needle deflection (bending) and a very sharp, slim point[cite: 1, 4].

    The sharp point is designed to pierce through the dense weave without pushing the fabric down into the needle plate. If you have ever wondered what type of sewing needle for denim provides those iconic, straight topstitching lines, it is this combination of a sharp tip and a strong body. For those in our sewing classes London for beginners, we recommend starting with a 90/14 Jeans needle for standard denim and moving up to a 100/16 or 110/18 for heavy-duty projects like jackets or bags.

    Our Unique Insight: The “Memory” of Heavy Materials

    At London Sewing Courses, we teach our students that heavy-duty sewing is as much about psychology as it is about hardware. Unlike lightweight silk, materials like leather and heavy denim have a “memory.” If you make a mistake and have to unpick a seam in leather, the holes remain forever. This can create a sense of “perfectionist paralysis” in many students.

    Our insight is this: treat your first few heavy-duty projects as a dialogue with the material. Instead of fearing the permanent nature of the stitch, use it to your advantage by being more intentional with your prep. Use clips instead of pins (which leave holes) and take the time to hand-crank your machine over thick intersections. This slower, more mindful approach doesn’t just protect your needle; it builds a deeper connection between your hands and the craft, resulting in a garment that feels truly “built” rather than just “sewn.”

    Actionable Strategy: Handling the Bulk with the Right Foot

    Even with the perfect needle, thick fabrics can get “stuck” under the presser foot. When asking what sewing machine needle to use for thick fabric, you must also ask what presser foot to use for thick fabric. To ensure smooth sailing, implement these three tool strategies:

    1. The Walking Foot: This is essential for denim and canvas. It has its own set of feed dogs on the top, ensuring that all layers of fabric move through the machine at the exact same speed, preventing the dreaded “shifting” of seams.
    2. The Teflon (Non-Stick) Foot: This is the secret weapon for leather and vinyl. Standard metal feet can “stick” to the surface of leather, causing the machine to skip stitches. A Teflon foot glides right over the surface.
    3. The Hump Jumper: When sewing over the flat-felled seams of jeans, use a “clearance plate” or hump jumper. This keeps the presser foot level as it climbs over the bulk, preventing the needle from snapping.

    Choosing the Right Gauge: What Needle to Use for Jeans

    Weight matters just as much as type. When deciding what needle to use for jeans, you must match the size (the number) to the weight of your denim. Standard retail jeans are usually around 10–12oz, which pairs perfectly with a 90/14 Jeans needle. [cite_start]However, if you are working with “raw” or heavyweight selvedge denim (14oz and above), you must move to a 100/16 or even 110/18[cite: 1, 4].

    A needle that is too small for the thread or the fabric will struggle to create a clean stitch loop, leading to the thread shredding or the needle breaking. If you are progressing through intermediate sewing courses London adults often attend, you will find that having a variety of Jeans needles in your kit is essential for tackling the diverse range of denims available today.

    Actionable Strategy: The Heavy-Duty Setup Checklist

    Before you drop the needle into your leather or denim, run through this 60-second checklist to ensure a perfect result:

    • Freshness Check: Have you used a brand-new needle? Heavy fabrics dull tips instantly.
    • Thread Match: Are you using heavy-duty polyester or topstitching thread? Standard cotton thread is often too weak for these materials.
    • Stitch Length: Have you increased your stitch length? For leather and denim, a longer stitch (3.0mm to 4.0mm) looks more professional and prevents the fabric from being “perforated” like a postage stamp.
    • Tension Test: Have you tested your tension on a scrap? You will likely need to slightly increase your top tension to pull the heavier thread through the thick layers.

    Understanding the “LL” and “R” Markings

    When shopping for leather needles, you might see letters like “LL” or “R”. The “LL” stands for “Leather Left,” referring to the specific angle of the cutting point. [cite_start]This creates a slightly slanted stitch that is traditionally associated with high-end leatherwork[cite: 3]. Understanding these nuances is part of what we cover in our seamstress courses, helping you move from amateur hobbyist to someone with a professional technical vocabulary.

    Custom Learning: Mastering the Machine for Heavy Fabrics

    Modern domestic sewing machines are surprisingly capable, but they have their limits. If you find your machine “groaning” or struggling, it might not be your skill—it might be the machine’s motor. This is where private sewing lessons London can be invaluable. A tutor can show you how to “help” your machine through thick sections using the handwheel and how to adjust the presser foot pressure—a hidden setting on many machines that can make sewing thick fabric significantly easier.

    Frequently Asked Questions (FAQ)

    Can I use a denim needle for leather?

    While it may seem tempting because both are “strong” needles, you should generally not use a denim needle for leather. [cite_start]A denim needle has a sharp, round point designed to pierce fabric, whereas leather needs a wedge-shaped point to slice through the material[cite: 3]. Using a denim needle on leather can cause the machine to struggle, resulting in uneven stitches or the needle getting “stuck” in the hide. For the best results and to protect your machine’s motor, always use the dedicated needle type for the material.

    What is the best size needle for sewing thick upholstery fabric?

    [cite_start]For thick upholstery fabrics like heavy canvas or tapestry, a size 100/16 or 110/18 Universal or Jeans needle is typically best[cite: 1, 4]. These fabrics are often very dense, and a thicker needle shaft is required to prevent the needle from bending as it enters the material. Additionally, these larger sizes have a bigger “eye,” which is necessary if you are using the thicker, stronger threads often required for upholstery projects to ensure the seams don’t rip under pressure.

    How do I stop my machine from skipping stitches on leather?

    Skipped stitches on leather are usually caused by the needle “sticking” to the material as it tries to rise, which prevents the thread loop from forming correctly for the bobbin to catch. [cite_start]To fix this, first ensure you are using a dedicated leather needle[cite: 3]. Secondly, switch to a Teflon or non-stick presser foot, or place a small piece of “magic tape” on the bottom of your standard foot to help it glide. Finally, try increasing your stitch length, as short stitches can cause the leather to bunch.

    Why does my thread keep snapping when I sew denim?

    Thread snapping on denim is often caused by a “size mismatch” between the thread and the needle. If you are using thick topstitching thread with a needle that has a small eye, the thread will shred as it passes through. [cite_start]Ensure you are using a Jeans needle, which has a larger eye designed for heavier threads[cite: 1, 4]. Also, check that your needle isn’t slightly bent or burred; even a tiny nick on the needle can catch and break the thread as you sew through tough layers.

    Conclusion

    Mastering heavy-duty sewing is a badge of honour for any sewist. By understanding what type of needle for leather you need and identifying the best sewing machine needle to use for thick fabric, you open up a world of creative possibilities—from rugged outdoor gear to sophisticated leather accessories. Remember that your sewing machine is a partner in this process; give it the right tools, and it will reward you with beautiful, durable results. Whether you are learning at our sewing blog or joining us for sewing classes North London, the key is to stay curious, keep testing, and always have a fresh pack of needles ready for your next big adventure.

    About the Author: Grace, Founder of London Sewing Courses

    Grace is the heart and hands behind London Sewing Courses. A passionate and experienced sewing instructor, she founded the studio with a unique mission: to create a calm, friendly space for adults to learn and connect, while using the profits to fund free sewing classes for local children in need. Her personal expertise and commitment to community building are at the core of every class and every stitch.

    Sources

  • What Needle Should I Use for Stretch Fabric and Beyond?

    What Needle Should I Use for Stretch Fabric and Beyond?

    Key Takeaways

    • Stretch and Knit Fabrics: Always use a Ball Point or Stretch needle to prevent skipped stitches and fabric damage.
    • Woven Cottons: A Sharp or Universal needle works best for stable, natural fibres like cotton.
    • Synthetic Polyesters: Universal needles are suitable, but Microtex needles offer superior precision for fine synthetics.
    • Needle Size Matters: Match the needle size to the fabric weight—finer needles for silks, thicker for denim.
    • Regular Replacement: Change your needle every 8 hours of sewing to maintain stitch quality and protect your machine.

    Choosing the right tool is the first step in any creative journey. When you sit down at your machine, the question of what needle should I use for stretch fabric often arises as soon as you touch a piece of jersey or Lycra. It is a vital question because the wrong choice can lead to frustrating skipped stitches or, worse, tiny holes in your beautiful material. For many beginners, the world of sewing machine needles feels like a secret language, but once you understand the “why” behind the needle tip, your confidence will grow. Whether you are sewing a simple cotton tote or a complex stretch garment, your needle is the bridge between your skill and a professional finish.

    Infographic about what needle should i use for stretch fabric for London Sewing Courses

    Understanding Needle Anatomy and Why It Matters

    Before we dive into specific fabric types, it is helpful to understand that not all needles are created equal. A sewing machine needle is an engineered tool designed to pass through fibres in very specific ways. If you use a needle designed to pierce through tough denim on a delicate knit, you will likely tear the fibres. Conversely, a blunt needle used on heavy cotton will struggle to penetrate, potentially timing out your machine.

    The “point” of the needle is the most critical factor. Sharp needles are meant to cut through the weave of woven fabrics. Ball-point needles are designed to push the yarns of a knit fabric aside rather than cutting them. This subtle difference is the key to preventing “runs” in your fabric, much like a ladder in a pair of tights.

    What Needle to Use for Lycra Fabric and Elastics

    When working with highly elastic materials, the specific question of what needle to use for lycra fabric becomes paramount. Lycra, Spandex, and other high-stretch synthetics require a “Stretch Needle.” While a standard ball-point needle is often okay for basic t-shirt jersey, Lycra has a high elastic content that can cling to the needle, causing the thread to skip.

    Stretch needles have a specially designed scarf (the indentation above the eye) that allows the bobbin hook to catch the thread more easily, even when the fabric is being pulled or compressed. If you are learning how to sew swimwear or activewear, this needle is your best friend. Similarly, when considering what needle to use for elastic, the stretch needle remains the champion. It prevents the needle from “chewing” the rubber or latex strands inside the elastic, ensuring the waistband or cuff remains durable and functional.

    The Versatile World of Cottons: Which Needle Wins?

    Cotton is the backbone of the sewing world, loved for its breathability and ease of use. However, because cotton comes in so many weights—from airy lawn to heavy canvas—you might wonder what needle should I use for cotton. For most mid-weight woven cottons, a Universal needle is perfectly adequate. It has a slightly rounded tip that is sharp enough to pierce the weave but won’t damage the fibres.

    If you are working with very fine, high-thread-count cottons, you might find that what needle to use for cotton shifts toward a “Sharp” or Microtex needle. These have a very slim, acute point that creates perfectly straight stitches. For those just starting their journey with sewing classes London for beginners, sticking to a 70/10 or 80/12 Universal needle for your first few cotton projects is a safe and reliable choice.

    What Sewing Machine Needle to Use for Cotton Quilting

    Quilting involves sewing through multiple layers—the quilt top, the batting, and the backing. Therefore, what sewing machine needle to use for cotton in a quilting context requires a bit more strength. Quilting needles are reinforced to handle the bulk without bending. They have a tapered point that can pass through several layers of cotton and wadding while maintaining a straight line. If you are exploring seamstress courses that involve patchwork, investing in a dedicated quilting needle will make the process much smoother and prevent the needle from deflecting as it hits thicker seams.

    Mastering Synthetics: What Needle to Use for Polyester

    Polyester is a modern marvel, found in everything from silky blouses to sturdy upholstery. When deciding what needle to use for polyester, you must consider the structure of the fabric. If it is a polyester knit (like many sports tops), refer back to the stretch needle. However, for woven polyester, a Universal needle is usually the standard.

    Polyester fibres are incredibly strong and can sometimes dull a needle faster than natural fibres. If you notice your machine making a “thumping” sound, it is time to change the needle. For very fine or densely woven polyesters, a Microtex needle is often the secret to success, providing the sharpest point possible to avoid puckering the seams.

    Our Unique Insight: The Psychology of the “Perfect Stitch”

    At our London sewing courses for adults, we often observe that a student’s frustration isn’t due to a lack of talent, but a mismatch of tools. We believe the needle is the “unsung hero” of the sewing room. Most sewists wait until a needle breaks to replace it, but we suggest viewing the needle as a consumable, much like thread.

    A fresh needle doesn’t just prevent damage; it changes the way the machine feels. It reduces noise, vibration, and resistance. By matching your needle precisely to your fabric, you aren’t just following a rule—you are removing a barrier between your intention and the finished garment. This small act of mindfulness at the start of a project sets the tone for a calm, successful sewing session.

    Actionable Strategy: The 3-Step Needle Audit

    To ensure you never struggle with the wrong tools again, try this simple strategy before starting your next project:

    1. The Scrap Test: Never start on your actual garment. Take a scrap of your project fabric and sew a few inches. If you see skipped stitches or “puckering,” change your needle type immediately.
    2. The Sound Check: Listen to your machine. A dull needle makes a distinct “pop” or “thump” as it enters the fabric. A sharp, correct needle should be almost silent.
    3. Label Your Stash: Use a small piece of washi tape or a pin cushion with sections to mark which needle is currently in your machine. There is nothing more confusing than forgetting if you have a Stretch or Universal needle loaded!

    Exploring Advanced Options for Specialists

    As you progress through intermediate sewing courses London adults enjoy, you might encounter more niche needles. Denim needles, for example, have a very thick, strong shaft to prevent breakage when sewing through multiple layers of heavy twill. Topstitching needles have an extra-large eye to accommodate thicker decorative threads, which is essential for that professional “jeans” look. Leather needles have a “cutting” point shaped like a wedge to slice through hide. Understanding these variations ensures that as your skills grow, your toolkit grows with you.

    Actionable Strategy: How to Build a “Core” Needle Library

    You don’t need every needle ever made, but having a “Core Library” will save you from midnight runs to the haberdashery. We recommend stocking:

    • Universal (Sizes 70, 80, 90): For almost all woven projects.
    • Stretch (Sizes 75, 90): For jersey, Lycra, and leggings.
    • Microtex (Size 70): For silks, microfibres, and delicate synthetics.
    • Jeans (Size 100): For repairs and heavy-duty bags.

    Having these on hand means you can pivot from making a cotton cushion to a jersey top without any technical delays.

    The Importance of Needle Size (Numbers Explained)

    You will notice two numbers on a needle pack, such as 80/12. The first number (80) is the European metric size, and the second (12) is the American size. Essentially, the smaller the number, the finer the needle.

    • 60/8 to 70/10: Use for very lightweight fabrics like chiffon or organza.
    • 80/12: The “goldilocks” size for most mid-weight fabrics.
    • 90/14 to 100/16: Use for heavy fabrics like denim or curtain material.

    Using a needle that is too thick for a fabric will leave visible holes, while a needle that is too thin might snap. If you are unsure, our sewing classes North London team is always happy to offer a quick bit of advice on matching your project to the right gauge.

    Custom Learning: Why One-on-One Guidance Helps

    Sometimes, reading about needles isn’t enough; you need to feel the difference in the machine. Private sewing lessons London are a fantastic way to troubleshoot specific issues you might be having. Whether you are struggling with a specific brand of sewing machine or a particularly tricky fabric like velvet, a tutor can show you the subtle nuances of tension and needle choice that make all the difference. This personalised approach often helps students overcome “machine fear” and start enjoying the creative process much faster.

    Frequently Asked Questions (FAQ)

    What happens if I use a universal needle on stretch fabric?

    Using a universal needle on stretch fabric often results in skipped stitches because the needle cannot properly catch the bobbin thread as the fabric stretches. Furthermore, the universal tip may nick the elastic fibres, leading to small holes or “ladders” that appear after the garment has been worn or washed. It is always better to switch to a dedicated ball-point or stretch needle to ensure the longevity and professional finish of your knitwear.

    How often should I actually change my sewing machine needle?

    A general rule of thumb followed by professionals is to change your needle after every 8 hours of actual sewing time or at the start of every new project. Over time, the tip of the needle becomes microscopicly dull or hooked, which can snag fabric and cause uneven tension. If you hear a “thumping” sound or notice your stitches looking irregular, it is a clear sign that your needle has reached the end of its life.

    Can I use the same needle for both cotton and polyester?

    Yes, you can often use a Universal needle for both woven cotton and woven polyester, provided the fabric weights are similar. However, if the polyester is a fine synthetic or the cotton is a heavy denim, you should adjust the needle size accordingly. Always perform a test stitch on a scrap of the fabric you intend to use to check that the needle isn’t causing puckering or leaving excessively large holes in the material before proceeding.

    Why does my needle keep breaking when I sew thick seams?

    Needle breakage on thick seams usually happens because the needle is too thin for the task or it is “deflecting” (bending) as it hits the bulk, causing it to strike the throat plate. To prevent this, switch to a larger needle size, such as a 90/14 or 100/16, or use a specific “Jeans” needle. Additionally, try slowing down your sewing speed and using a “hump jumper” tool to keep the presser foot level as you cross thick intersections.

    Conclusion

    The journey from a beginner to a confident sewist is paved with small, technical realisations. Answering the question of what needle should I use for stretch fabric is one of those “lightbulb moments” that instantly improves your results. By respecting the relationship between the needle, the thread, and the fibre, you unlock the ability to work with any material you desire. Whether you are visiting a sewing blog for inspiration or attending sewing classes london for adults to refine your technique, remember that the smallest part of your machine is often the most important. Keep your needles fresh, your tension balanced, and your creativity will have no bounds.

    About the Author: Grace, Founder of London Sewing Courses

    Grace is the heart and hands behind London Sewing Courses. A passionate and experienced sewing instructor, she founded the studio with a unique mission: to create a calm, friendly space for adults to learn and connect, while using the profits to fund free sewing classes for local children in need. Her personal expertise and commitment to community building are at the core of every class and every stitch.

    Sources

  • What is a Serger Used for in Sewing? A Complete Overlock Guide

    What is a Serger Used for in Sewing? A Complete Overlock Guide

    Key Takeaways

    • Professional Finishes: A serger trims excess fabric and encases raw edges simultaneously to prevent fraying.
    • Speed and Efficiency: Operating at higher speeds than standard machines, it completes seams in a single pass.
    • Stretch Fabric Specialist: The “overlock” stitch is naturally elastic, making it perfect for jersey and activewear.
    • Decorative Versatility: Beyond utility, these machines create beautiful rolled hems and flatlock decorative details.
    • Essential for Garments: While not a replacement for a sewing machine, it provides the “store-bought” look for clothes.
    Key takeaways infographic for what is a serger used for in sewing what is a serger for

    Should I Add a Serger to My Sewing Room?

    The question of what is a serger used for in sewing often marks the transition from a casual hobbyist to a dedicated garment maker. For many, the answer is a resounding “yes” if you crave that polished, high-end finish found in professional ateliers. Adding an overlocker to your toolkit is one of the most direct ways to build a versatile sewing practice around your existing skills.

    It is an opportunity to nurture your creative understanding—to cultivate your confidence from a hesitant beginner into a strong, established maker. Unlike a standard machine, a career in dressmaking or high-level tailoring often starts with this single, crucial asset: the ability to manage raw edges with speed and precision. The UK market for handmade fashion is robust, driven by creators seeking personalised, high-impact clothing that mass-market brands cannot match.

    If you have a deep passion for textiles and the ability to master new mechanical rhythms, you are already halfway there. You do not need a professional manufacturing background to successfully use an overlocker; you need clarity, patience, and a genuine commitment to the craft. The subsequent sections will address the filtering process, from understanding the mechanics to choosing your first project.

    Infographic about what is a serger used for in sewing for London Sewing Courses

    The Simple Answer: Speed Trumps Standard Stitches

    The simple truth that often surprises people is that the overlock framework is highly efficient. There is no law saying you must use one, but the difference in output is remarkable. This means that a hobbyist can produce boutique-quality leggings, a fashion student can breeze through a collection, or a professional seamstress can offer advanced alterations—all with a level of durability a zig-zag stitch cannot provide.

    The sewing world naturally filters out those who ignore the importance of internal finish. The makers who succeed are those whose passion for detail is infectious and whose garments achieve real, measurable longevity. Understanding what is a serger for involves recognising it as a three-in-one powerhouse: it sews a seam, cuts the seam allowance, and finishes the edge all at once.

    The Overlock Landscape: What is an Overlocker Machine Used For?

    The real question isn’t just about the definition, but rather, what is an overlocker for in the context of your specific projects? The filtering process in the sewing room focuses on proven edge mastery and safeguarding the structural integrity of your seams.

    Professional Seams: What the Machine Does

    As mentioned, there is no requirement to own a serger to enjoy sewing, but its utility is undeniable. This capability is reflected in numerous professional garment factories. However, this lack of “requirement” places a high degree of responsibility on the maker to establish their own standard of quality. If you are sewing for clients or creating gifts, having clean, encased edges is generally expected as proof of your ability to guide a project to completion.

    Expertise and Authority: The True Utility

    The single most effective use for an overlocker is managing stretch fabrics. If you are sewing activewear, swimwear, or modern knitwear, the machine’s ability to create a “differential feed” is far more valuable than any standard sewing machine feature. For instance, notes that the loopers create a flexible web of thread that moves with the fabric. The authority of your finished work comes from this real-world durability, not just how the garment looks on a hanger.

    Distinguishing Your Tools: What is a Serger vs Sewing Machine

    The machine you choose dictates both the techniques you will use and the psychological approach you must adopt toward construction. This is a key professional distinction in the textile world.

    Subject Scope and Approach

    When using a standard sewing machine:

    • Functions are Versatile: The focus is on construction, topstitching, buttonholes, and zips.
    • The Approach is Foundational: You act as the architect, building the structure and managing intricate details. This work requires greater emphasis on precision and specific attachments like zipper feet.

    When using a serger overlock machine:

    • Functions are Specialized: The focus shifts to seam finishing, edge trimming, and working with knits.
    • The Approach is Consultative: You act as the refiner. The machine handles the heavy lifting of edge management, reducing the time spent on finishing but requiring greater attention to thread tension. The dynamic is one of professional speed, requiring a deeper understanding of how four or five threads interact.

    Our Unique Insight: The Secret of Differential Feed

    If you’re wondering what is a serger good for beyond just finishing edges, the secret lies in the differential feed. Most people assume the machine just sews fast, but the true “unique insight” is its ability to control how fabric is “gathered” or “stretched” as it passes under the needles.

    By adjusting the two sets of feed dogs, you can prevent “lettuce edges” on thin knits or intentionally create ruffles without a specialized foot. This level of control is why an overlocker is a good investment for the long term—provided you approach it with the same professional rigour you would any technical skill. It is not just a secondary tool; it’s a path that balances creative reward with an impressive level of control over your textile outcomes.

    Actionable Strategy: Building Your Overlock Credibility

    To bridge the gap between “knowing” and “doing,” focus on these three things today:

    • Define Your Niche: Don’t just “serge everything”; practice “3-thread narrow hems for silk scarves” or “4-thread safety stitches for heavy denim.” Specificity breeds mastery.
    • Collect Evidence: Keep a swatch book of your tension settings. Document the fabric type, thread brand, and the resulting stitch. These “case studies” are your professional currency when starting new projects.
    • Start Your Documentation: Even if you are just learning to use a sewing machine, begin tracking your machine maintenance and needle changes to demonstrate professional rigour.

    Earning Potential and Flexibility

    The rewards in mastering what is an overlocker in sewing can be highly competitive if you choose to take on commissions. Quality varies significantly across the UK, and those who can produce high-standard, overlocked interior finishes command a premium. The flexibility is a major advantage. As a skilled operator, you are the director of your own time. You can take on private sewing lessons London or offer niche alteration services, allowing you to tailor your work schedule to other professional pursuits.

    The Intrinsic Rewards of High-Impact Sewing

    Beyond the potential for income, the intrinsic reward is immeasurable. High-impact sewing is defined by the satisfaction of a garment that looks as good on the inside as it does on the outside. When you see a student’s confidence begin to grow—when that difficult jersey neckband finally clicks and their understanding blossoms—you are directly seeing the result of specialized tool mastery. This direct link between your expertise and the final success is what makes seamstress courses so deeply satisfying.

    Actionable Strategy: How to Practice During the Day

    Most beginners assume their practice must happen exclusively in long, daunting blocks. However, you can deliberately structure your learning by targeting small, non-traditional tasks:

    • Scrap Mastery: Spend 15 minutes a day testing different tension settings on fabric scraps.
    • Home-Educated Learning: If you are teaching others, use the sewing blog to find quick tutorials for small accessories like cloth napkins.
    • Flexible Projects: Many London sewing courses for adults recommend starting with simple infinity scarves to get used to the machine’s speed.
    • International Inspiration: Follow global makers to see how they leverage what is a serger machine used for in different cultural textile traditions.

    The Practical Path: How to Use a Serger in the UK

    If you’ve decided this is the path for you, you need to know how to operate with professionalism. This path is straightforward but requires attention to safety and maintenance.

    Essential Setup and Trust Signals

    While the question of what is a serger for might suggest a relaxed environment, the technical requirement for safety is paramount.

    • The Non-Negotiable: Always use the correct needles. Sergers operate at high speeds, and using a standard sewing machine needle when a specialized one is required can lead to timing issues or injury.
    • Maintenance: If you work in a communal space or for a national sewing company, ensure the blade is sharp. A dull blade “chews” the fabric rather than cutting it, which reassures no one of your professional ability.

    Thread and Tension Setup

    When asking how to do overlocking professionally, you must consider the logistics. If you are learning how to sew, you are legally obligated—to your sanity—to learn the “tie-on” method for changing threads.

    • Register Your Settings: Keep a log of what works for different weights. This is the simplest structure and is necessary even if sewing is only a part-time hobby.
    • Keep Records: Maintain accurate records of your machine’s service history and any sewing classes London for beginners you attend to build your CV.

    How to Choose: Manual vs Air-Threading

    Deciding between a manual or an air-threading model is a key strategic decision. Manual threading offers a traditional, personal connection to the machine’s mechanics, but air-threading drastically expands your productivity.

    • Air-Threading Benefits: You can change thread colours in seconds, eliminate frustration, and often achieve more consistent results. This model is particularly effective for those who find what is a serger machine used for intimidating.
    • Manual Benefits: Best for those on a budget and students who want to truly understand the path of the thread through the loopers.

    Filling the Ranks: How to Find Your Sewing Community

    Once you’ve established your niche and decided whether to learn in-person or via a sewing blog, the next hurdle is finding the right community. The challenge isn’t usually the lack of interest; it’s connecting with the right people who value your specific expertise.

    Starting with Word-of-Mouth

    Your first few projects are often the hardest to secure, but they are your most valuable asset. The trust signal created by a personal recommendation for a well-made garment is unmatched.

    • Friends and Family: Let everyone in your network know you are taking sewing classes North London.
    • Initial Offers: Consider offering to finish the seams on a friend’s project in exchange for a detailed testimonial. These early reviews form the foundation of your reputation.

    Utilising Platforms and Learning Models

    While going independent gives you the most freedom, intermediate sewing courses London adults offer a ready-made stream of knowledge.

    • Course Benefits: Provide structure, guaranteed equipment access, and may handle the initial technical hurdles.
    • Platform Benefits: Offer greater control over your learning pace, acting as a digital marketplace for ideas and patterns.

    London Sewing Courses’ Digital Mentorship

    For those focused on vocational or highly specialist skills—such as how to sew and alter clothes or complex tailoring—we provide a clear pathway for clients seeking high-level expertise. We offer both a custom private sewing lessons London for those who require continuous, hands-on guidance and detailed, bespoke seamstress courses for those who want to build the capability themselves. Our reputation for ethical, effective textile education means that students associated with our methods gain immediate credibility in this creative space.

    Addressing the Investment: Is an Overlocker Worth It?

    From a student’s perspective, the question is purely transactional: will the investment of time and money yield better garments, greater confidence, or a stronger creative path? The answer, supported by extensive research, is generally yes, but the quality of the machine and the instruction is the differentiating factor.

    The Student’s Perspective: Cost vs. Confidence

    The ultimate gauge of whether a serger is worth it balances the often significant cost against the student’s confidence and outcomes.

    • Cost Barrier: Quality machines remain financially inaccessible for many, which is why we offer sewing classes London for adults where equipment is provided.
    • Confidence Boost: Students frequently report that even before they master complex patterns, the professional finish of an overlocked seam leads to a dramatic increase in self-esteem.

    Frequently Asked Questions (FAQ)

    What is a serger used for in sewing most often?

    A serger is primarily used to finish fabric edges and sew seams simultaneously. Its most frequent application is in garment construction, especially for clothing made from knit or stretch fabrics. By encasing the raw edge in a thread wrap, it prevents the fabric from fraying over time, which is essential for the durability of wearable items.

    Is an online sewing course as effective as an in-person one?

    Yes, an online course can be just as effective if the tutor is skilled and the student is engaged. Online sessions provide access to highly specialised tutors regardless of geography, and digital tools like recorded close-ups often enhance the learning experience. While some young learners benefit from physical presence, for most adults, the convenience of sewing classes london for beginners online is highly beneficial.

    Can I use a serger for everything?

    While a serger is incredibly versatile, it cannot replace a standard sewing machine entirely. You still need a regular machine for tasks like topstitching, sewing buttonholes, inserting zippers, and creating decorative embroidery. Think of the serger as a specialized partner that handles the heavy lifting of seam construction and finishing.

    Do I need a special table for an overlocker?

    You do not necessarily need a specialized table, but because sergers operate at very high speeds, they can vibrate significantly. A sturdy, flat surface is essential to prevent the machine from “walking” across the table. Many London sewing courses recommend using a non-slip mat underneath the machine to dampen noise and vibration during use.

    Conclusion

    The answer to the initial question—what is a serger used for in sewing—is a resounding “professionalism.” The UK textile landscape is defined by skill, expertise, and a commitment to quality signals. This path offers exceptional flexibility and intrinsic reward for those who combine their creativity with the right tools. Whether you are learning to use a sewing machine for the first time or helping a child master their first project, your greatest asset is your ability to choose the right tool for the job. If you have the passion, the commitment, and the right approach, the world of overlocking is wide open for your expertise to take root and flourish.

    About the Author: Grace, Founder of London Sewing Courses

    Grace is the heart and hands behind London Sewing Courses. A passionate and experienced sewing instructor, she founded the studio with a unique mission: to create a calm, friendly space for adults to learn and connect, while using the profits to fund free sewing classes for local children in need. Her personal expertise and commitment to community building are at the core of every class and every stitch.

    Sources

  • What Does E5 Mean on a Brother Sewing Machine?

    What Does E5 Mean on a Brother Sewing Machine?

    Key Takeaways

    • Safety Protocols: Error codes like E5 and E6 are protective mechanisms, often indicating a conflict between controls (like the foot pedal and Start/Stop button) or a physical jam protecting the motor.
    • E5 Specifics: This code typically signals a procedural error, such as pressing the foot controller while the machine is in a mode that doesn’t expect it, or a motor overload protection trigger.
    • The Tangle of E6: E6 usually points to a “thread nest” or motor lock, requiring you to check the bobbin area and re-thread the upper path.
    • Upper Thread Issues (E3): This code often relates to the needle bar position or the upper thread being broken or unthreaded.
    • The Function of SS: On mechanical models, “SS” stands for Stretch Stitch, a setting required to access flexible stitches for knit fabrics.
    what does e5 mean on a brother sewing machine

    There is a particular sinking feeling that every sewist, whether a novice or a seasoned tailor, knows all too well. You are in the flow, the fabric is feeding beautifully, and the rhythm of the needle is hypnotic. Then, suddenly—beep, beep, beep. The machine stops, and a cryptic combination of letters and numbers flashes on the LCD screen. It can feel like your creative partner has suddenly decided to speak a foreign language.

    If you are currently staring at a blinking display asking what does e5 mean on a brother sewing machine, take a deep breath. Your machine is not broken; it is simply communicating with you. As a tutor who has guided countless students through their first “technological tantrums” in our sewing classes North London, I can assure you that these codes are helpful guardians. They are there to prevent damage to the delicate internal mechanics of your machine—and to your masterpiece.

    In this guide, we will decode the language of Brother sewing machines. We will explore not just the specific meaning of E5, but also the common companions E3 and E6, and unravel the mystery of the “SS” setting. Think of this as a translation guide for your sewing journey, ensuring you can get back to what matters most: creating.

    what does e5 mean on a brother sewing machine

    The Language of Machines: Why Error Codes Exist

    Before we dive into the specific fix for the E5 error, it is helpful to understand the “psychology” of your sewing machine. Modern computerized machines are equipped with sensors that monitor tension, needle position, and motor resistance. When a code appears, the machine is essentially saying, “I have detected a condition that makes it unsafe or impossible to continue stitching.”

    This is actually a positive feature. In the days of purely mechanical vintage machines, a motor might keep running against a jam until a belt snapped or a gear stripped. Your modern Brother machine is smart enough to stop before that happens. So, rather than viewing the code as a failure, view it as a safety pause.

    Decoding the Primary Error: What Does E5 Mean on a Brother Sewing Machine?

    The E5 error is one of the most common interruptions, and interestingly, it is often caused by a simple misunderstanding between the user and the machine’s controls.

    The Conflict of Controls

    In most cases, answering what does e5 mean on a brother sewing machine brings us to the foot controller. On many computerized Brother models, E5 appears when the foot controller is pressed while the Start/Stop button is also being utilized, or if the machine is in a specific mode (like winding a bobbin or an automatic buttonhole sequence) where the foot pedal should be dormant.

    Essentially, the machine is confused. It is receiving input from two different sources—the automated button and your foot—and it doesn’t know which one to obey. To prevent erratic stitching, it halts and displays E5.

    The “Motor Overload” Scenario

    In some specific models, or if the control conflict isn’t the issue, E5 can indicate that the motor has locked due to a safety device activating. This happens if the fabric is too thick for the needle to penetrate, causing the motor to strain, or if a thread jam has physically stopped the mechanism from turning.

    Step-by-Step Recovery Strategy

    If E5 flashes on your screen, follow this gentle protocol:

    1. Release Everything: Take your foot off the pedal and stop pressing any buttons.
    2. Check Connections: If you intend to use the Start/Stop button (sewing without the pedal), ensure the foot controller is unplugged from the machine entirely. Most machines will not allow the button to function if the pedal is jacked in.
    3. Restart: Turn the machine off at the power switch. Wait for ten seconds to allow the internal computer to reset. Turn it back on.
    4. Test: Try to sew slowly on a scrap piece of fabric. If the error persists, check for a physical jam (see the section on E6 below).

    Our Unique Insight: The “User Error” Myth

    We often label these moments as “user error,” a phrase that carries a lot of blame. At our studio, we prefer to call them “workflow conflicts.” The E5 error often appears when a student is transitioning from one technique to another—perhaps moving from winding a bobbin back to sewing seams. The machine is simply reminding you to reset your physical setup. It is a prompt for mindfulness in your process, asking you to ensure your tools are aligned with your intent.

    The Tangle Below: What Does E6 Mean on a Brother Sewing Machine?

    If E5 is a communication error, E6 is almost always a physical one. When students ask what does e6 mean on a brother sewing machine, the answer usually involves the dreaded “bird’s nest.”

    The Anatomy of an E6 Error

    The E6 code signifies that the motor has locked because the thread is tangled. This usually happens in the bobbin area. You might not see it from above, but underneath the throat plate, the upper thread may have failed to complete its loop around the bobbin case, creating a snarl of thread that physically prevents the hook from rotating.

    How to clear an E6 Error safely

    Force is your enemy here. Never pull hard on the fabric if the machine is locked.

    1. Power Down: Turn the machine off immediately.
    2. Raise the Needle: Use the handwheel (turning it towards you) to lift the needle. If it won’t move, do not force it. You may need to cut the threads first.
    3. Access the Bobbin: Remove the plastic bobbin cover and the bobbin itself.
    4. Inspect the Race: You may need to unscrew the needle plate (the metal plate under the foot). Look for a clump of thread jammed in the “race” (the area where the bobbin case sits).
    5. Clean and Re-thread: Remove all stray threads. It is vital to re-thread the upper thread completely. A tangle below is often caused by the upper thread slipping out of the take-up lever.

    Actionable Strategy: The “Floss” Technique

    To prevent E6 errors, ensure your upper thread is “flossing” through the tension discs. When threading the machine, raise the presser foot first. This opens the tension discs. Pass the thread through, then lower the foot. You should feel a significant increase in resistance when you pull the thread. If you don’t feel that “hug” on the thread, the tension is loose, and an E6 tangle is inevitable.

    The Upper Path: What Does E3 Mean on Brother Sewing Machine?

    The E3 error is less dramatic than the E6 but equally frustrating. When you search for what does e3 mean on brother sewing machine, you are looking at an issue with the needle bar or the upper thread.

    The Broken Thread Sensor

    On many models, E3 indicates that the machine simply cannot detect the upper thread. This could mean:

    • The upper thread has snapped.
    • The spool is empty.
    • The thread has slipped out of the needle eye.

    The Needle Bar Position

    E3 can also trigger if you try to wind a bobbin or start a specific function while the needle is not in the correct “up” position. Modern machines need the needle to be at its highest point to begin a stitch cycle safely.

    The Fix

    1. Check the Needle: Is it bent? A slightly bent needle can rub against the foot or plate, triggering a safety stop. Replace the needle if you are unsure.
    2. Re-thread: As with the E6 error, completely re-thread the top path.
    3. Needle Up: Press the “Needle Up/Down” button to ensure the mechanism is reset to the starting position.

    Decoding the Dial: What Does SS Mean on Brother Sewing Machine?

    Moving away from digital error codes, we often encounter confusion regarding the physical dials on mechanical Brother machines. Students frequently ask what does ss mean on brother sewing machine when looking at the stitch length dial.

    The Realm of Stretch Stitches

    SS stands for Stretch Stitch. On mechanical machines, you will often see the stitch length dial numbered 0 to 4, and then a marking for “SS” (often coloured green or orange).

    When you turn the dial to SS, you are not changing the length of the standard stitches. Instead, you are unlocking a secondary bank of stitch patterns. If you look at your machine’s stitch chart, you will likely see two rows of diagrams. The top row is the standard stitch (accessed by lengths 1-4). The bottom row, often matching the colour of the “SS” on the dial, represents the stretch stitches.

    When to Use SS

    You should use the SS setting when sewing:

    • Knits and Jerseys: These stitches are designed to move with the fabric, preventing the seams from popping when the garment is stretched.
    • Reinforced Seams: The “Triple Straight Stitch” (found in the SS mode) sews two stitches forward and one back, creating an incredibly strong seam for crotches or armholes.
    • Decorative Effects: Many of the “vine” or “feather” stitches live in the SS bank.

    General Machine Health: Prevention is Better than Cure

    Understanding what does e5 mean on a brother sewing machine is useful, but avoiding the error entirely is better. In our sewing classes London for beginners, we teach that 90% of machine issues are caused by three things:

    1. Old Needles: Change your needle every 8-10 hours of sewing. A blunt needle pushes fabric into the machine rather than piercing it, causing jams (E6).
    2. Cheap Thread: Low-quality thread sheds lint, which clogs the sensors and tension discs.
    3. Lack of Dusting: Sewing creates “fluff.” If you don’t brush out the bobbin case regularly, that fluff builds up and triggers safety sensors.

    When to Seek Professional Help

    While clearing an E5 or E3 error is usually a home-fix, there are times when you need an expert. If your machine is making a loud clanking noise, smells hot, or if the error code persists despite a full reset and cleaning, it is time to stop.

    If you are based in the capital, looking into private sewing lessons London can be a great way to have a professional look at your machine usage. Sometimes, the issue isn’t the machine, but a subtle habit in how the fabric is being handled. For more serious mechanical failures, a certified Brother technician is required.

    Expanding Your Skills

    Once you have conquered the fear of error codes, the world of sewing opens up. You stop worrying about breaking the machine and start focusing on the art of construction. Whether you are looking to refine your tailoring with Intermediate London Sewing Courses for Adults or just want to understand the basics of how to sew and alter clothes, knowing your equipment is the first step.

    For those truly starting from scratch, reading a guide to beginner seamstress courses can help you choose the right learning environment. And remember, every expert was once a beginner who didn’t know what does e5 mean on a brother sewing machine.

    Frequently Asked Questions (FAQ)

    What does E5 mean on a Brother sewing machine?

    The E5 error code on a Brother sewing machine usually indicates a safety stop because the foot controller was pressed while the machine was in a mode that doesn’t allow it (like winding a bobbin), or the Start/Stop button was used while the foot pedal was connected. It can also signify a motor overload if the machine is struggling to pierce thick fabric. To fix it, stop sewing, unplug the foot pedal if you wish to use the button, or turn the machine off and on again to reset the sensor.

    What does E6 mean on a Brother sewing machine?

    E6 signifies a motor lock due to a thread tangle. This is often caused by the upper thread not being properly tensioned, leading to a “bird’s nest” of thread in the bobbin area. The machine stops to prevent the motor from burning out. You must turn off the machine, raise the needle, remove the bobbin case, and clear any jammed threads from the race area before re-threading carefully.

    What does E3 mean on a Brother sewing machine?

    E3 indicates an issue with the upper thread or needle bar position. It typically appears if the upper thread breaks, runs out, or slips from the needle eye. It can also happen if the needle is not fully raised when you try to start a new function. Re-thread the upper path ensuring the thread passes through the take-up lever, and use the handwheel to ensure the needle is in the highest position.

    What does SS mean on a Brother sewing machine dial?

    SS stands for “Stretch Stitch.” It is a setting on the stitch length dial of mechanical Brother machines. When you turn the dial to SS, the machine’s feed dogs move the fabric back and forth to create flexible stitches (like the triple straight stitch or honeycomb stitch) that are suitable for stretchy knit fabrics or decorative patterns.

    How often should I service my Brother sewing machine?

    You should clean the bobbin area (remove lint) after every major project. A full professional service is recommended every 12 to 24 months, depending on usage. If you are sewing daily or using heavy fabrics, an annual service ensures the timing remains perfect and prevents persistent error codes.

    Can I reset the machine to clear an error code?

    Yes, a “soft reset” often clears glitchy codes. Simply turn the power switch off, wait for at least 60 seconds to allow the capacitors to discharge, and then turn it back on. If the error was due to a temporary sensor confusion (like E5), this will often clear it. If the error is mechanical (like a jam causing E6), a reset won’t work until the physical obstruction is removed.

    Conclusion

    Navigating the digital alerts of a modern sewing machine can feel like learning a new dialect, but the answer to what does e5 mean on a brother sewing machine is simply a request for clarity. Your machine is asking you to choose between the foot pedal and the button, or to check that the path is clear for the needle to do its work.

    By understanding the distinctions between the procedural check of E5, the physical tangle of E6, and the setup requirements of E3 and SS, you transform from a passive operator into a master of your tools. Sewing is a partnership between you and the machine. Treat it with patience, keep it clean, and it will reward you with years of beautiful, uninterrupted stitching.

    If you are ready to take your skills beyond troubleshooting and into true garment creation, we would love to welcome you to our sewing classes London for adults. Until then, may your bobbins be full and your error codes be few.

    About the Author: Grace, Founder of London Sewing Courses

    Grace is the heart and hands behind London Sewing Courses. A passionate and experienced sewing instructor, she founded the studio with a unique mission: to create a calm, friendly space for adults to learn and connect, while using the profits to fund free sewing classes for local children in need. Her personal expertise and commitment to community building are at the core of every class and every stitch.

    Sources