Tag: dressmaking for beginners

  • What Do Beginner Sewers Need: Essential Kit & Tips

    What Do Beginner Sewers Need: Essential Kit & Tips

    Key Takeaways

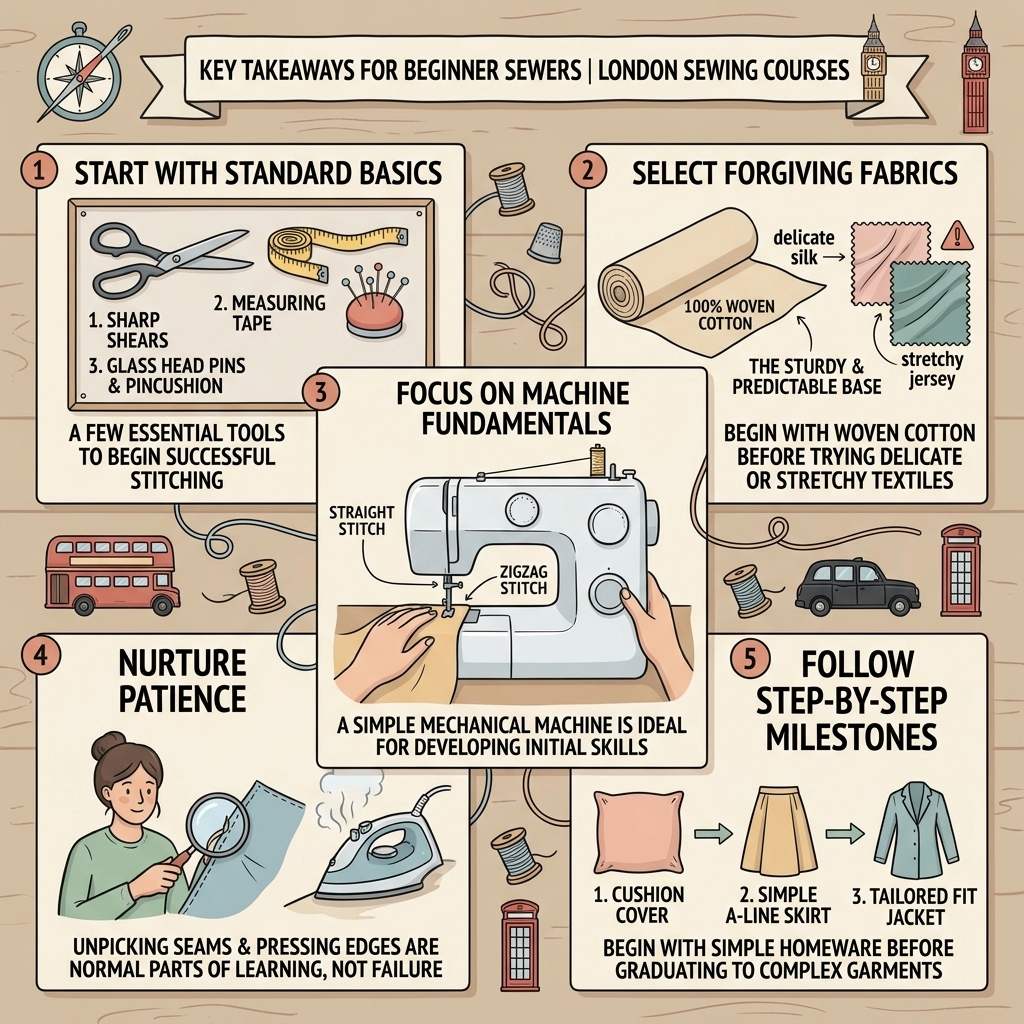
    • Start with standard basics: You only need a few essential cutting, measuring, and pinning tools to begin stitching successfully.
    • Select forgiving fabrics: 100% woven cotton provides a sturdy, predictable base for new dressmakers before trying delicate or stretchy textiles.
    • Focus on machine fundamentals: A simple mechanical sewing machine with straight and zigzag stitches is ideal for developing initial skills.
    • Nurture patience: Unpicking seams and pressing edges are a completely normal part of learning, not a sign of failure.
    • Follow step-by-step milestones: Begin with simple homeware items like cushion covers before moving on to wearable garments and tailored fits.
    Starting your sewing journey is a wonderful and rewarding decision. When you take those first steps into dressmaking, asking what do beginner sewers need is a great place to begin. With a bit of patient guidance, the right basic tools, and practical knowledge, you will quickly find your feet. You certainly do not need a studio full of expensive gadgets to get started; a few well-chosen essentials will give you everything necessary to build your confidence and enjoy making your own handmade items.

    Taking your first steps in sewing should feel exciting rather than overwhelming. It is easy to feel confused by the sheer variety of haberdashery tools available in craft shops. However, keeping things simple with high-quality basic tools ensures that your early stitching experiences stay enjoyable and stress-free. As you practise, your technique and understanding will develop quite naturally.
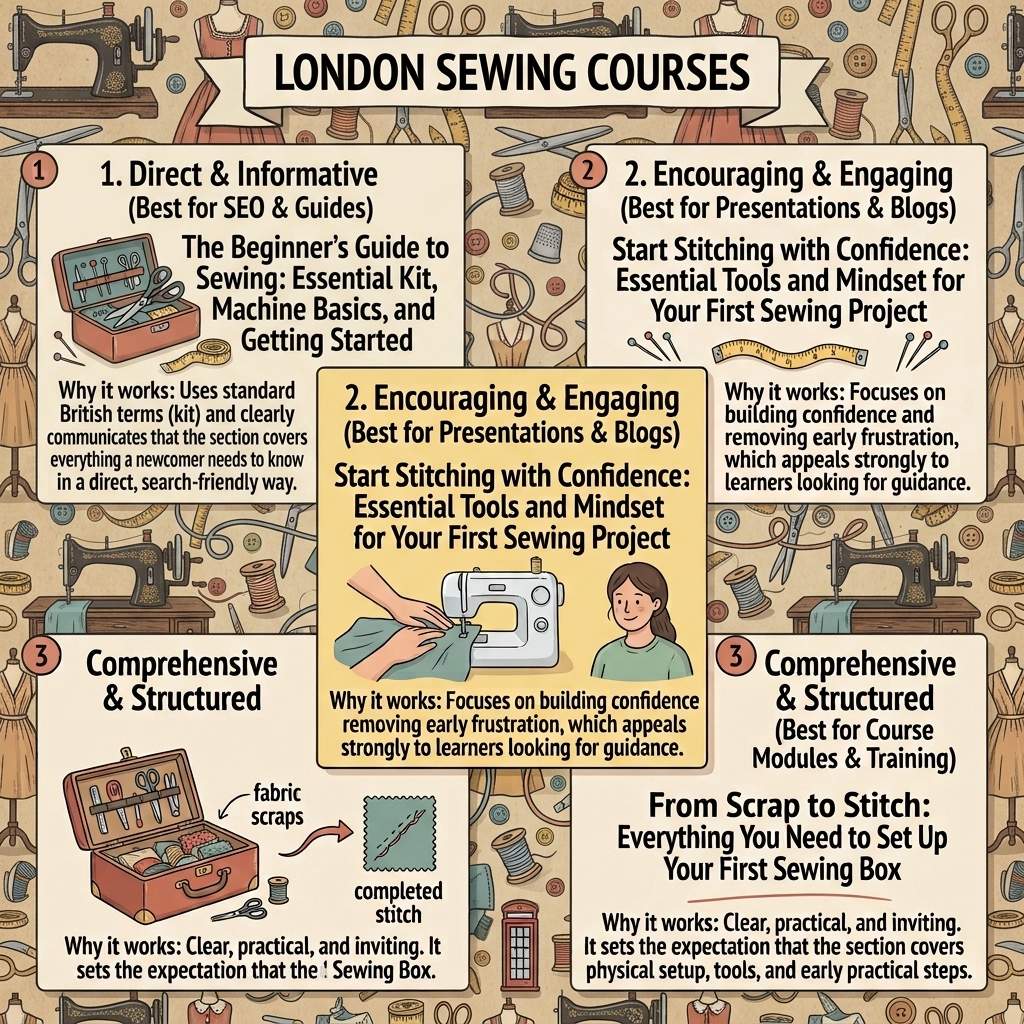
    Infographic sewing courses in London. Central machine, corner modules for beginners: essential kit, machine basics, mindset, first box. London landmarks icons.

    What Does a Beginning Sewer Need to Get Started?

    When considering what does a beginning sewer need to set themselves up for success, it helps to group your kit into three core areas: cutting, measuring, and securing fabric. Taking the time to prepare your materials accurately makes the whole stitching process much smoother.

    The Core Cutting Tools

    Clean, precise cutting makes a massive difference to the quality of your finished project. Standard household scissors will chew through cotton or linen, leaving uneven edges and frayed seams.

    • Fabric Shears: Invest in a decent pair of 8-inch or 9-inch dressmaking shears. Keep these strictly for fabric, as cutting paper will dull the blades very quickly.
    • Embroidery Scissors: Small, sharp scissors with fine tips are ideal for snipping loose thread ends neatly and clipping curves.
    • Thread Snips: Handy spring-action cutters that sit right next to your machine for quick, easy thread trimming as you go.
    • Seam Ripper: Never view the seam ripper as an enemy. Unpicking a line of stitching is simply a chance to fix a quick mistake and get your project back on track.

    Essential Measuring and Marking Equipment

    Accurate measurements ensure that your fabric pieces line up properly during assembly. Clear marking tools keep everything straight and even.

    • Flexible Tape Measure: A soft 60-inch fiberglass tape measure is essential for taking accurate body measurements and measuring fabric lengths.
    • Clear Quilting Ruler: A rigid transparent ruler makes drawing straight lines, checking right angles, and measuring seam allowances nice and clear.
    • Tailor’s Chalk or Water-Soluble Pens: Use these temporary marking tools to transfer pattern notches, darts, and fold lines onto your fabric without leaving marks behind.

    If you would like a bit of hands-on help learning how to use these tools properly, exploring our foundation courses for beginners

    will help you build calm, confident habits right from your very first session.

    What Supplies Does a Beginner Sewer Need for the First Kit?

    When putting together your initial sewing box, focus on reliable, high-quality supplies. Beginners often wonder what supplies does a beginner sewer need to avoid clutter while still having every handy tool nearby.

    Building Your Starter Sewing Box

    A well-stocked starter box gives you a solid foundation for every project. Choosing good-quality items saves you from snapped threads, bent pins, and skipped stitches.

    • All-Purpose Polyester Thread: Choose a trusted brand of polyester thread. It offers good strength, low lint, and a tiny bit of give, making it suitable for almost all woven and stretch fabrics.
    • Glass-Headed Dressmaking Pins: Glass heads will not melt if you accidentally touch them with a hot iron while pressing, unlike plastic ones.
    • Magnetic Pincushion or Pin Dish: Keeping your pins neatly in one place stops accidental spills and keeps your workspace safe.
    • Hand Sewing Needles: Keep a small pack of varied hand needles for tacking seams, sewing on buttons, and closing small openings.
    • Seam Gauge: A small 6-inch metal ruler with a sliding marker makes measuring hems and seam allowances quick and consistent.

    You can read more helpful advice on setting up an easy home sewing space on our dedicated sewing blog

    , where we share practical tips for home sewers.

    Choosing Fabric with Care and Intent

    The fabric you pick for your first few projects makes a huge difference to how easily you learn. Some materials behave wonderfully under the needle, while others can be a bit tricky to handle.

    For your very first project, stick to 100% woven cotton, cotton poplin, or lightweight linen. These stable fabrics stay still on your cutting table, feed smoothly through your sewing machine, and press flat with steam. Cotton gives you a solid base to practise on before you try more challenging materials like slippery silk, soft chiffon, or stretchy jersey.

    Beginner Sewer What Do I Need to Know About Sewing Machines?

    Starting out with a sewing machine often brings up the question: beginner sewer what do i need to look for in my first machine? You do not need a complicated, high-end industrial machine to make beautiful things.

    Selecting an Accessible First Machine

    A straightforward mechanical machine is usually much easier to learn on than a complex computerized unit. Look out for these basic features:

    • Straight Stitch & Zigzag Stitch: These two simple stitches handle the vast majority of sewing tasks, including joining seams and finishing raw edges.
    • Adjustable Stitch Length and Width: Being able to change stitch sizes gives you complete control over topstitching and temporary basting stitches.
    • Four-Step or One-Step Buttonhole: An easy buttonhole setting takes the stress out of making neat closures for garments.
    • Drop-in Bobbin System: A clear top-loading bobbin lets you see how much thread you have left before you start a long line of stitching.

    If threading or changing presser feet feels a bit daunting, reading our guide to mastering your sewing machine

    will walk you through every dial and setting in plain language.

    Machine Needles and Presser Feet Essentials

    Using the correct needle for your fabric stops skipped stitches and fabric snagging. Keep a packet of universal needles in sizes 70/10 (for lighter fabrics), 80/12 (for medium cottons), and 90/14 (for heavier linens). Try to change your needle after every eight hours of stitching or at the start of a main project.

    For presser feet, you only need three basics to get going: a standard zipper foot, an all-purpose zigzag foot, and a buttonhole foot. These three attachments will let you complete almost any beginner pattern easily.

    Our Unique Insight: Cultivating Confidence Beyond the Sewing Box

    The Mindset of Learning

    Every experienced dressmaker started out as a beginner holding a needle with hesitant fingers. The real key to enjoying sewing isn’t expensive kit; it is simply patience, curiosity, and being gentle with yourself as you learn. Skill takes time to build, and mastering basic steps—like sewing a straight line, pressing seams flat, and placing pattern pieces accurately—is where real confidence comes from.

    In our London classes, we always remind students that mistakes are just part of the process. Every seam you unpick helps your hands learn control, building muscle memory that makes neat stitching feel second nature over time.

    Overcoming Early Mistakes as Learning Moments

    It is completely normal to deal with thread tangles, uneven hems, or misaligned edges when you are starting out. Instead of feeling frustrated, try to treat these moments as simple feedback from your machine. Thread bunches usually mean the top thread missed a tension guide, while skipped stitches often mean your needle is a bit dull and needs swapping.

    If you would like to see how our friendly, encouraging approach helps students build skill comfortably, take a moment to learn more about Grace’s teaching philosophy

    . Approaching small hiccups with good humour makes learning far more enjoyable.

    What Do Beginner Sewers Need to Do Before Starting Their First Project?

    Taking a few preparation steps before stitching saves a lot of time later on. Asking what do beginner sewers need to do before cutting into your fabric helps ensure your finished piece turns out neatly and fits well.

    Fabric Preparation and Pre-Washing

    Natural fibres like cotton, linen, and wool can shrink when washed. Always pre-wash and dry your fabric using the same temperature settings you plan to use for your finished item. Once it is dry, give the fabric a good press with a steam iron to smooth out creases and line up the grain.

    Setting Up a Comfortable Workspace

    A clear, comfortable setup prevents tired shoulders and keeps sewing relaxing:

    • Comfortable Seating: Set your chair so your feet rest flat on the floor and your knees sit at a comfortable angle while using the foot pedal.
    • Good Lighting: Place a bright desk lamp directly over your sewing machine area to prevent eye strain when working with dark thread.
    • Dedicated Pressing Area: Keep your ironing board right next to your sewing table. Pressing every seam as soon as you stitch it is the secret to achieving clean, professional-looking edges.

    For hands-on practice in a welcoming environment, joining our tailored adult sewing classes

    gives you access to a fully equipped workspace with spacious cutting tables and pressing stations.

    What Do Beginner Sewers Need For Specific Project Types?

    Knowing what do beginner sewers need for different types of simple projects helps you choose items that match your current skill level.

    Homeware and Beginner Craft Projects

    Simple homeware projects let you practice basic machine skills without worrying about garment fit:

    • Tote Bags: Fantastic for practicing straight seams, topstitching, and attaching sturdy handles.
    • Cushion Covers: Great for mastering neat envelope openings or trying out a simple zip.
    • Cloth Napkins and Tea Towels: Ideal for gaining confidence with straight hems and clean folded corners.

    Simple Garment Construction and Alterations

    Once your hands feel steady on flat projects, you can make the move into simple dressmaking:

    • Elasticated Waist Skirts: A simple gathered skirt requires minimal fitting and gives rewarding results quickly.
    • Boxy Woven Tops: Simple tops introduce you to shoulder seams, neck facings, and basic hem finishes.

    If you would love to update items already in your wardrobe, take a look at our simple garment alteration tutorial

    to see how easy small adjustments can be. For anyone aiming to go further with garment making, reading our comprehensive guide to seamstress training

    provides a clear, practical roadmap.

    Actionable Strategy: Building Your Skills Step-by-Step

    To avoid feeling overwhelmed, try breaking your sewing journey down into manageable stages. This gradual approach keeps learning fun as your technical ability grows.

    Stage 1: Building Machine Confidence (First 30 Days)

    Focus on getting comfortable with your sewing machine and controlling your fabric speed:

    1. Practice sewing straight lines, soft curves, and neat corners on scrap cotton fabric.
    2. Experiment with stitch lengths, tension dials, and swapping presser feet.
    3. Complete two straightforward homeware projects, such as a drawstring pouch and a cushion cover.
    4. Get into the habit of pressing every seam flat with an iron before moving to the next step.

    Stage 2: Expanding Your Skills (Months 2–3)

    Start working with simple dressmaking patterns and practical shapes:

    1. Learn how to take accurate body measurements and choose pattern sizes based on those numbers rather than shop sizes.
    2. Sew your first simple garment, like an elasticated skirt or easy lounge trousers.
    3. Practice neat edge finishes, such as zigzag stitching or seam binding.

    When you feel ready to move beyond basic cotton projects, our intermediate skills workshops

    offer friendly guidance on handling trickier fabrics, adding darts, and sewing clean buttonholes.

    Stage 3: Developing Independence (Months 4–6)

    Build on your experience by trying minor fitting tweaks and more detailed techniques:

    1. Learn basic pattern adjustments, such as blending between sizes or shortening hem lines.
    2. Try inserting concealed zips, sewing set-in sleeves, and attaching waistbands.
    3. Start altering ready-to-wear clothing to fit your personal shape comfortably.

    If you prefer one-on-one help structured around your exact goals and pace, booking one-to-one private tutoring

    provides supportive, dedicated instruction.

    What Do Beginner Sewers Need UK Edition: Local Sourcing and Standards

    When buying materials across the UK, knowing local units and standards helps keep shopping straightforward. Beginners asking what do beginner sewers need uk focused often notice a mix of metric and imperial measures in shops.

    Navigating UK Fabrics and Haberdashery

    • Units of Measurement: Fabric in UK shops is sold by the metre, but seam allowances on standard patterns are usually printed in inches (such as the standard 5/8 inch allowance). Keep a tape measure that shows both units in your kit.
    • Pattern Sizing: UK sewing pattern sizes do not match standard high-street clothing sizes. Always pick your pattern size using your actual chest, waist, and hip measurements.
    • Local Sourcing: Visit local haberdashers, markets, and craft shops for remnant pieces and deadstock cottons to build up a practice stash economically.

    If you ever need advice on finding supplies locally or choosing the right course for your goals, please reach out to our friendly team

    for warm, practical advice.

    Frequently Asked Questions (FAQ)

    Do I need an expensive sewing machine to start learning as a beginner?

    No, you definitely do not need an expensive sewing machine to start. A basic mechanical machine with straight stitch, zigzag stitch, and an adjustable thread tension dial is plenty for starting out. Advanced computerized machines can often feel overly complicated for new sewers. A simple, sturdy machine lets you focus on building good technique first.

    What is the easiest fabric for a beginner sewer to practice with?

    The easiest fabric to use when starting out is 100% woven cotton or lightweight cotton poplin. Cotton stays flat on your cutting table, does not slip around under the needle, and presses cleanly with an iron. Leaving slippery silks, delicate chiffons, or stretchy jerseys for later makes your early stitching much more enjoyable.

    Can I teach myself to sew at home without formal classes?

    While you can learn at home using books and video tutorials, guided classes can save you a lot of time and frustration. Learning with an experienced tutor helps you catch common mistakes early—like incorrect thread tension or awkward fabric handling—so you build good habits right away.

    How do I choose the correct thread and needle for my project?

    Match your needle and thread weight to the fabric you are using. For medium-weight woven cottons, standard all-purpose polyester thread with an 80/12 universal needle works perfectly. Polyester thread is strong and dependable for most everyday projects. Always use finer needles for lightweight fabrics and thicker needles for heavy materials.

    Conclusion

    Beginning your sewing journey is a wonderful process. By collecting a few essential cutting tools, picking beginner-friendly cotton fabrics, and getting used to a simple sewing machine, you set yourself up for a really enjoyable hobby. Remember that every skilled dressmaker started with basic straight lines, unpicked seams, and simple first steps. Take your time, enjoy learning each new skill, and celebrate every finished piece along the way.

    About the Author: Grace, Founder of London Sewing Courses

    Grace is the heart and hands behind London Sewing Courses. A passionate and experienced sewing instructor, she founded the studio with a unique mission: to create a calm, friendly space for adults to learn and connect, while using the profits to fund free sewing classes for local children in need. Her personal expertise and commitment to community building are at the core of every class and every stitch.

    Sources

    1. Contrado Sewing Kit Guide:Beginner Sewing Supplies & Tool Checklist
    2. The Sewing Directory:Beginner’s Guide to Essential Sewing Tools & Equipment
    3. Tilly and the Buttons:Essential Sewing Equipment & Toolkit Guide for Beginners
    4. Threads Magazine:Essential Beginner Toolkit & Machine Sewing Fundamentals
    5. Singer Sewing Resources:Sewing Machine Basics, Needle Selection & Maintenance Guides
  • The Machines of the Screen: What Sewing Machines are Used on ‘The Great British Sewing Bee’?

    The Machines of the Screen: What Sewing Machines are Used on ‘The Great British Sewing Bee’?

    Key Takeaways

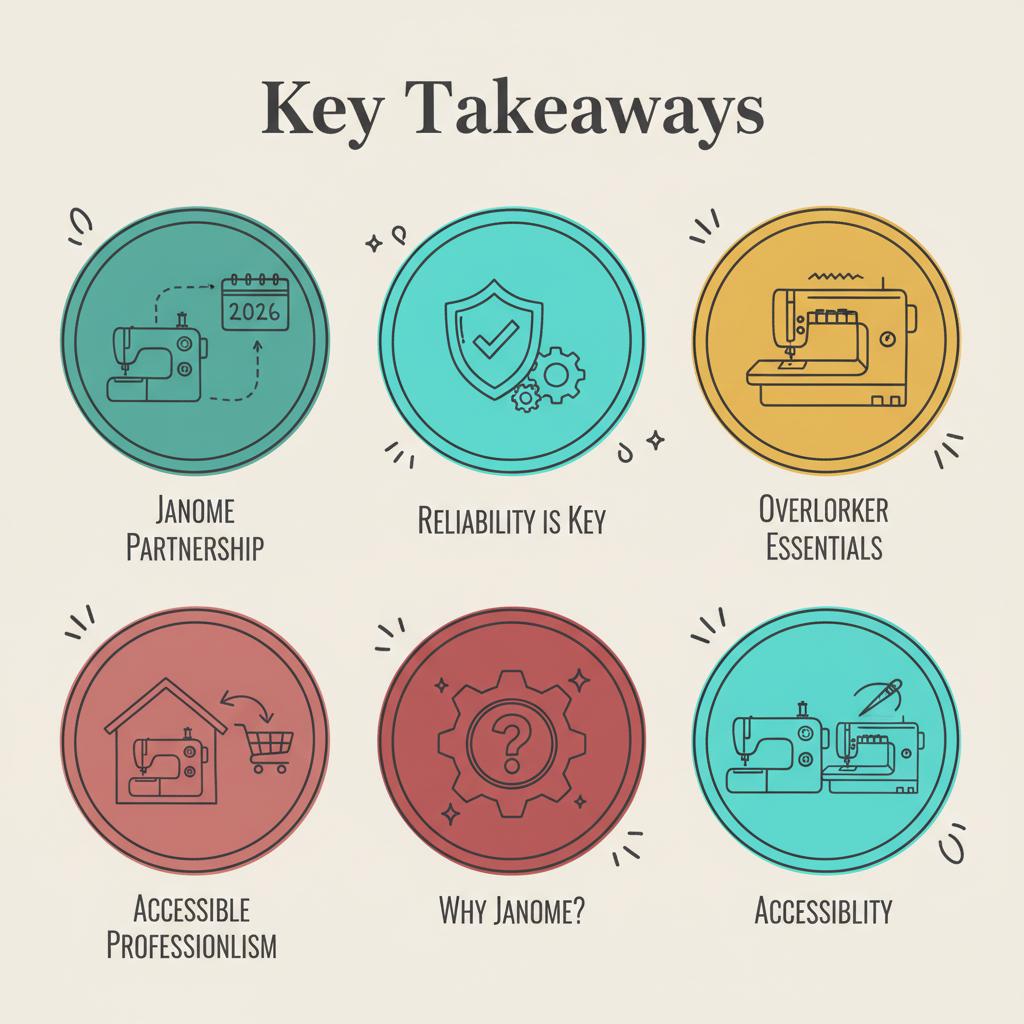
    • Janome Partnership: For the 2026 series, the show continues its long-standing relationship with Janome, featuring the Janome 525S and the computerised DKS30 models.
    • Reliability is Key: These machines are chosen for their “jam-proof” top-loading bobbins and robust build, essential for high-pressure television filming.
    • Overlocker Essentials: The Janome 6234XL is the standard tool used for achieving professional, clean interior seams on the show.
    • Accessible Professionalism: All models featured on the program are domestic machines, meaning viewers can purchase the exact same tools for their own home studios.
    Blog featured image for what sewing machine do they use on sewing bee 2026 what machines are used on sewing bee

    The Great British Sewing Bee is more than just a competition; it is a celebration of British craftsmanship that inspires thousands to pick up a needle for the first time. If you have found yourself captivated by the transformation of raw fabric into wearable art, you have likely wondered exactly what sewing machine do they use on Sewing Bee 2026 to achieve such precise results.

    Choosing the right equipment is like choosing a creative partner. In the high-stakes environment of the Bee’s haberdashery, the contestants need machines that are not only versatile but unfailingly reliable. Understanding these tools can help you bridge the gap between being a viewer and becoming a maker.

    Infographic about what sewing machine do they use on sewing bee 2026 for London Sewing Courses

    The Heart of the Haberdashery: Why Janome?

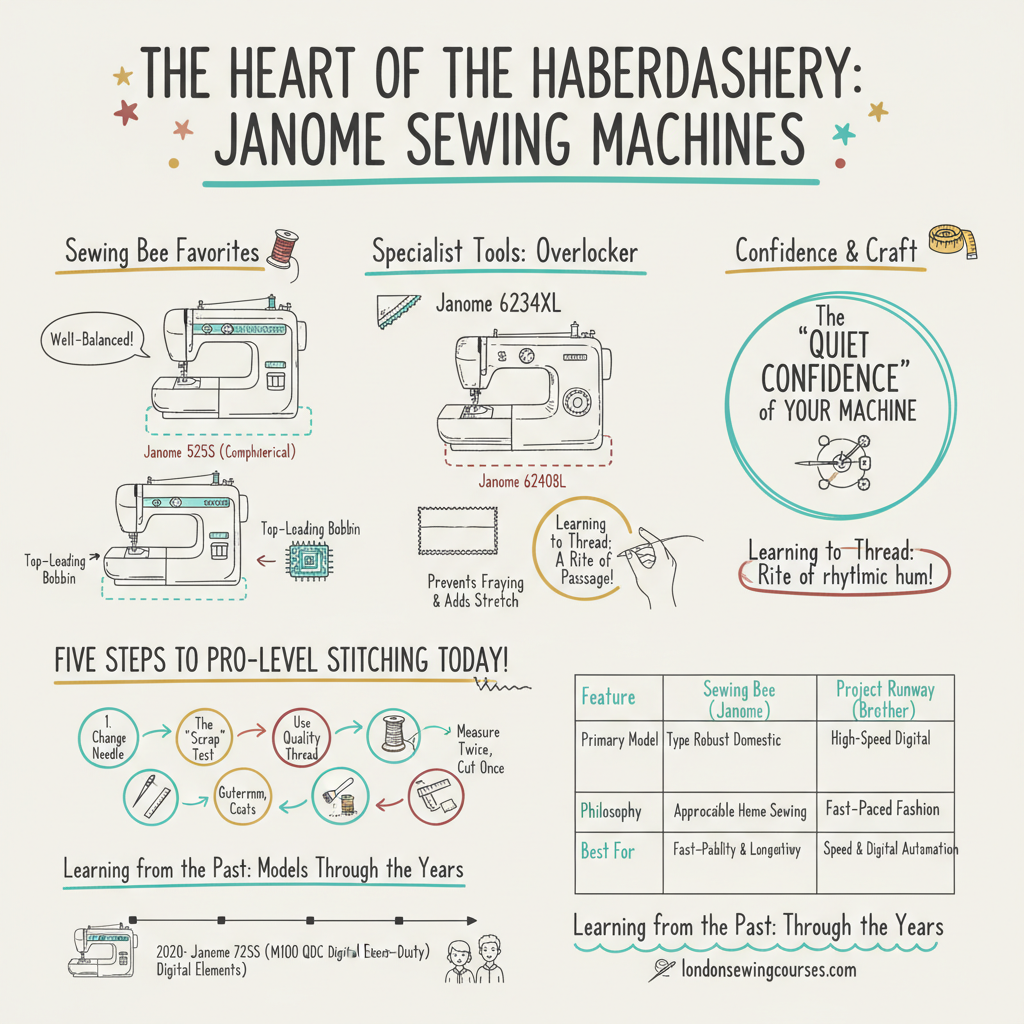
    Since its inception, the show has maintained a consistent partnership with Janome. When we look at what machines are used on Sewing Bee, we see a selection of domestic models that balance advanced features with user-friendly interfaces. In 2026, the primary mechanical workhorse remains the Janome 525S.

    This model is a favourite among tutors because of its “well-balanced” nature. It features a top-loading bobbin with a transparent cover, allowing sewists to monitor their thread levels—a vital feature when you are racing against a clock. For those interested in more decorative or complex projects, the computerised Janome DKS30 provides a digital precision that ensures every stitch is uniform, regardless of the fabric thickness.

    Specialist Tools: Overlockers and the Professional Finish

    While the sewing machine handles the construction, the professional “store-bought” look of the garments often comes from the overlocker. On the Bee, you will see the Janome 6234XL being used frequently. This machine trims the fabric and finishes the edge in one step, preventing fraying and providing the stretch needed for jersey garments.

    For enthusiasts looking to master these specific tools, joining sewing classes London for beginners can provide the hands-on experience needed to feel confident. Learning to thread an overlocker is a rite of passage for any budding seamstress, and having a patient tutor guide you through the process makes all the difference.

    Our Unique Insight: The “Quiet Confidence” of Your Machine

    At London Sewing Courses, we often tell our students that the best machine is the one you feel most confident using. Our unique insight into the “Sewing Bee effect” is that while high-end machines offer many bells and whistles, the contestants who succeed are those who have mastered the fundamentals of machine tension.

    A machine is a mechanical extension of your hands. Whether you are using a top-of-the-line Janome or a vintage inherited model, the secret to a perfect seam lies in the harmony between the needle, the thread, and the tension settings. We encourage our students to spend time “listening” to their machines. A well-timed machine has a rhythmic, confident hum; any deviation often signals that a simple re-threading or a fresh needle is required.

    Actionable Strategy: Five Steps to Pro-Level Stitching Today

    You do not need to be on a television set to produce high-quality work. Here are five actionable steps you can take today to improve your sewing:

    1. Change Your Needle Regularly: A dull needle causes skipped stitches and fabric pulls. Replace your needle every 8 hours of sewing time.
    2. The “Scrap Test”: Always sew a 10cm test line on a scrap of the actual fabric you are using for your project to check tension before starting.
    3. Use Quality Thread: Budget threads can leave lint in your machine’s bobbin race, leading to jams. Stick to reputable brands like Gutermann or Coats.
    4. Clean the Bobbin Case: After every project, use a small brush to remove lint from around the bobbin area to keep the “jam-proof” system working perfectly.
    5. Measure Twice, Cut Once: Like the contestants on the show, precision starts at the cutting table. Ensure your grainlines are perfectly straight before you ever touch the sewing machine.

    Comparing the Stars: Sewing Bee vs. Project Runway

    A common question from our international students is “what sewing machine is used on Project Runway” in comparison to our UK favourite. While the Bee leans into the domestic reliability of Janome, the US-based Project Runway has historically featured Brother machines.

    FeatureSewing Bee (Janome)Project Runway (Brother)
    Primary Model TypeRobust Domestic (Mechanical & Computerised)High-Speed Digital / Commercial Hybrid
    PhilosophyApproachable home sewing and craftFast-paced high-fashion design
    Best ForReliability and longevitySpeed and digital automation

    Both brands are exceptional, but Janome’s presence on the Bee highlights a focus on the “slow fashion” movement and the joy of home dressmaking.

    Learning from the Past: Models Through the Years

    If you are watching older episodes on catch-up, you might wonder what sewing machine is used on Sewing Bee 2020 or what sewing machine is used on Sewing Bee 2022. While the models have evolved slightly, the core technology remains similar.

    In 2020, the Janome 725S was a prominent fixture, celebrated for its heavy-duty feel. By 2022, the show introduced more digital elements with the Janome M100 QDC. These historical shifts show that even as technology progresses, the basic requirement—a clean, straight stitch—remains the foundation of all good sewing. For those who want to learn to use a sewing machine with a nod to these classic techniques, our studio provides a range of models to practice on.

    The Importance of Structured Learning

    Having the right machine is only half the battle. The contestants on the show often have years of experience or have attended intensive seamstress courses to hone their craft. If you are based in the capital, finding sewing classes North London can help you transition from simple repairs to how to sew full garments.

    A structured environment allows you to ask questions in real-time, just as a contestant might lean on the expertise of the judges. Whether you are looking for sewing classes London for adults to start a new hobby or London sewing courses for adults to refine intermediate skills, the right guidance is invaluable.

    Frequently Asked Questions (FAQ)

    Is a computerised machine better than a mechanical one?

    Neither is inherently “better,” as it depends on your sewing style. Mechanical machines, like the Janome 525S used on the show, are prized for their durability and “hands-on” feel. Computerised machines, like the DKS30, offer features like automatic needle threading, speed control, and a wider variety of decorative stitches. For a beginner, a mechanical machine is often less intimidating, while an intermediate sewist may appreciate the precision of a digital model.

    How do I know which Janome model is right for me?

    Think about the fabrics you intend to sew. If you plan on making heavy coats or denim jeans, look for a model with a high presser foot lift and a powerful motor. If you are more interested in delicate dressmaking, a machine with adjustable presser foot pressure is essential. We recommend visiting our Sewing blog for detailed reviews on specific models tailored to different skill levels.

    Can I achieve the same results without an overlocker?

    Yes, you certainly can! Most modern sewing machines have an “overcast stitch” which, when used with a specific overcast foot, can mimic the look of an overlocker. It takes a little longer, but it is a perfectly valid way to finish your seams. However, once you try an overlocker for jersey fabrics, you may find it hard to go back!

    Where can I get one-on-one help with my specific machine?

    Many people find large classes overwhelming when they have a specific machine they want to master. In these cases, private sewing lessons London are the best option. A tutor can walk you through the specific settings of your own machine, helping you troubleshoot tension issues and learn the hidden features of your specific model.

    Conclusion

    The sewing machines used on The Great British Sewing Bee are chosen for their ability to bring a designer’s vision to life with reliability and grace. Whether it is the stalwart Janome 525S or a specialist overlocker, these tools are the silent partners in every masterpiece created on screen.

    Remember, every expert was once a beginner who was brave enough to thread their first bobbin. By choosing a machine that suits your needs and investing in your education, you are setting yourself up for a lifetime of creative fulfilment. We look forward to seeing what you create in your own “sewing room” very soon.

    About the Author: Grace, Founder of London Sewing Courses

    Grace is the heart and hands behind London Sewing Courses. A passionate and experienced sewing instructor, she founded the studio with a unique mission: to create a calm, friendly space for adults to learn and connect, while using the profits to fund free sewing classes for local children in need. Her personal expertise and commitment to community building are at the core of every class and every stitch.

    Sources

  • What is a Low Shank Sewing Machine? A Guide to Shank Heights

    What is a Low Shank Sewing Machine? A Guide to Shank Heights

    Key Takeaways

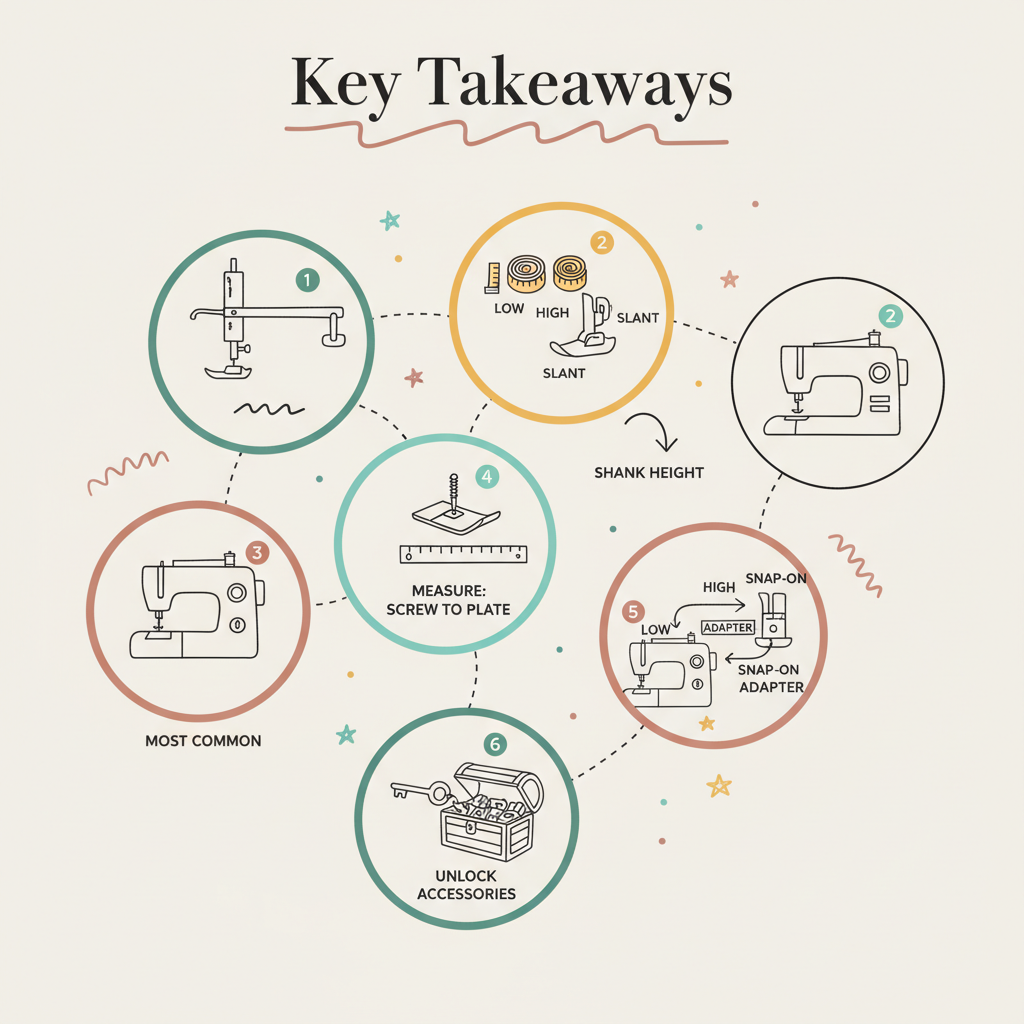
    • The Shank’s Role: The shank is the metal bar on your sewing machine where the presser foot attaches1.
    • Defining the Shank Height: Shank height determines which accessories—specifically presser feet—you can use2. The terms low shank, high shank, and slant shank refer to the length of this metal bar3.
    • Low Shank is Standard: A low shank sewing machine is the most common type for modern domestic models4. Most general-purpose accessories are made to fit this size.
    • The Measurement Test: To determine your machine’s shank height, measure the distance from the bottom of the presser foot screw to the needle plate (when the presser foot is removed)55.
    • Adapter Solutions: If your machine is a low shank model, but you want to use a high shank foot, you will need a low shank adapter6. Conversely, if you have a high shank machine, you would need a high shank adapter for certain snap-on feet.

    The world of sewing accessories is vast and exciting, but before you can unlock all the clever presser feet and specialised attachments, there’s one fundamental piece of knowledge you need: the height of your sewing machine’s shank.

    As your skilled sewing tutor, I want to empower you to choose the right tools for your creative journey. The term “what is a low shank sewing machine” might sound technical, but it’s simply a measurement that dictates which feet your machine can effortlessly connect with. Understanding this small difference is the key to expanding your machine’s capabilities and ensuring your accessories fit perfectly every time.

    what is a low shank sewing machine

    🧵 What Does Low Shank Mean on a Sewing Machine?

    The shank is the immovable metal piece that descends from the needle bar and holds the presser foot assembly. It is secured to the machine by a single, removable screw7.

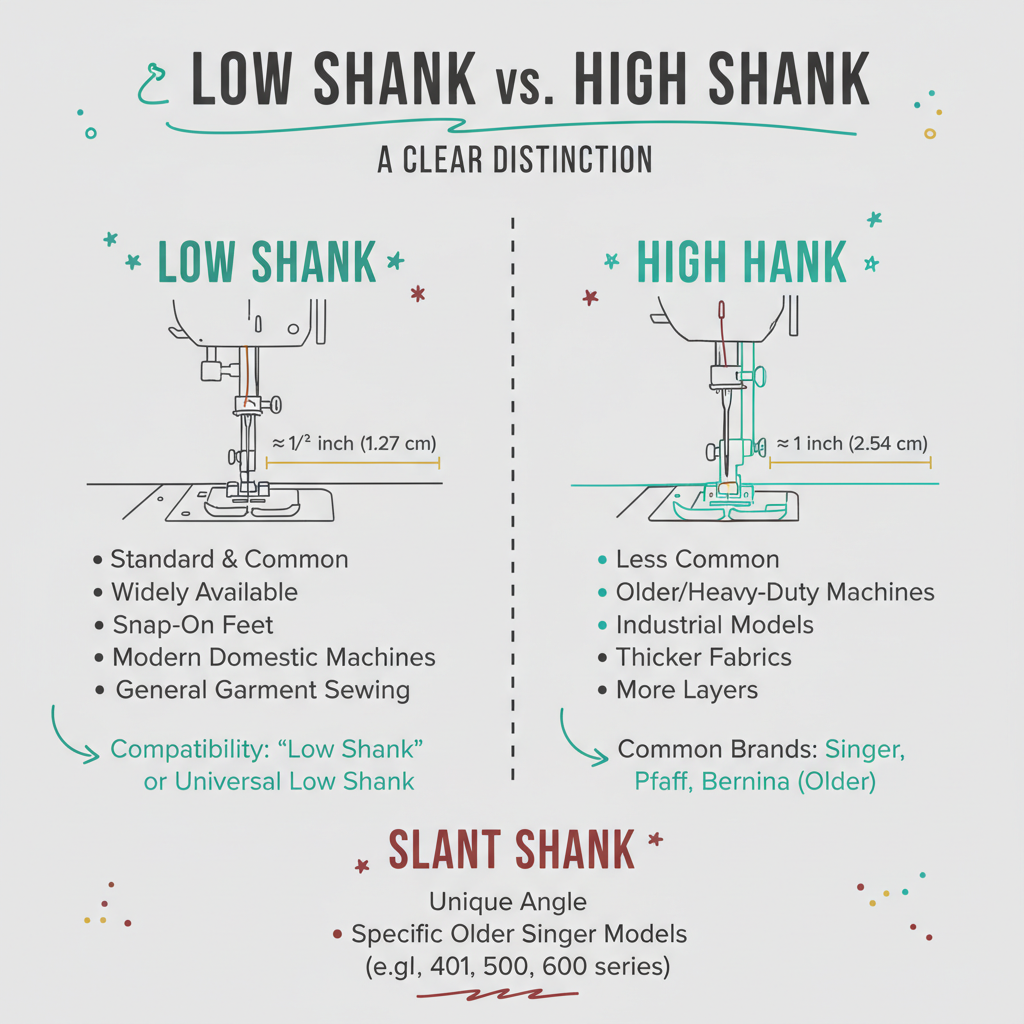
    The term low shank doesn’t mean the machine is short; it refers to the standard, shorter length of that metal bar compared to a “high shank” machine8.

    Measuring Your Machine’s Shank Height

    If you’re unsure what type of machine you have, you can easily find out with a ruler.

    1. Remove the Presser Foot: Unscrew and take off the existing presser foot and any attached adapter9.
    2. Lower the Shank: Drop the presser bar lever (the small metal lever behind the shank) so the shank is in its lowest position10.
    3. Measure the Distance: Measure the distance from the bottom of the screw hole (the hole where the foot screw goes) down to the needle plate (the flat metal plate below)1111.
    • Low Shank: This measurement is typically around 1/2 inch (1.27 cm)1212.
    • High Shank: This measurement is typically around 1 inch (2.54 cm)1313.

    Most modern domestic sewing machines, especially those bought in the last 20–30 years, are low shank sewing machines14.

    📏 Low Shank vs. High Shank: A Clear Distinction

    The difference between a low shank and a high shank sewing machine determines the vertical distance between the needle and the surface of your fabric. This distance is vital because the presser foot needs a specific amount of space to move the fabric correctly.

    The Low Shank Presser Foot

    A low shank presser foot is designed with a shorter neck or attachment point, positioning the working surface of the foot closer to the fabric feed dogs.

    • The Standard: As the most common type, low shank feet are widely available and generally less expensive than high shank alternatives15.
    • Compatibility: If you have a low shank machine, you should look for feet specifically labelled ‘low shank’ or ‘universal low shank’16. Many snap-on feet sold in generic accessory kits are designed for this low shank standard.

    What is a High Shank Sewing Machine?

    High shank sewing machines are less common in general domestic settings today but are often found on older, heavy-duty machines and professional, industrial, or semi-industrial models17.

    • The Benefit: The increased distance allows for thicker fabrics, more layers of wadding, and heavy-duty tasks that require a greater clearance under the foot18.
    • Common Brands: Older Singer, Pfaff, and Bernina models often feature high shanks. If you’ve inherited a vintage machine, it’s worth checking the shank height.
    Shank TypeMeasurement (Screw Hole to Plate)Typical Use Case
    Low Shank$\approx 1/2$ inch ($1.27$ cm)Modern domestic machines, general garment sewing
    High Shank$\approx 1$ inch ($2.54$ cm)Older, heavy-duty, or semi-industrial machines
    Slant ShankUnique AngleSpecific older Singer models (e.g., Singer 401, 500, 600 series)

    🛠️ Navigating Accessories: Adapters and Solutions

    Once you know your machine is a low shank sewing machine, buying accessories becomes straightforward. However, sometimes you might find a fantastic foot that is designed for a different shank height. That’s where adapters come in!

    What is a Low Shank Adapter?

    A low shank adapter is a small attachment that allows a low shank machine to use high shank presser feet, or more commonly, to convert a machine to use a snap-on system19.

    • Functionality: Many modern presser feet are designed to be “snap-on,” meaning they have a small bar that quickly snaps onto a single adapter piece20. This adapter piece is then permanently screwed onto the low shank.
    • Low Shank to High Shank: Less commonly, if you have a low shank machine and wish to use a specific, specialised high shank foot, you may need a high shank conversion adapter to extend the reach of your low shank. Be cautious with this, as it can occasionally affect the needle alignment.

    Why the Shank Height Matters for Sewing Success

    Getting the shank height wrong can have immediate and frustrating consequences for your projects, especially if you are working through an Intermediate London Sewing Courses for Adults.

    • Too Low (High Shank Foot on a Low Shank Machine): The foot will likely sit too low or drag on the fabric, preventing the feed dogs from advancing the material correctly. The foot may not even fit under the shank bar properly.
    • Too High (Low Shank Foot on a High Shank Machine): The foot will hover too far above the fabric. It won’t hold the fabric down firmly, leading to skipped stitches, uneven feeding, and poor tension.

    When selecting a foot—whether it’s a piping foot, a zipper foot, or a walking foot—always confirm it’s compatible with your low shank machine. This small check saves hours of frustration!

    💡 Practical Advice for the Low Shank Sewist

    If you have a low shank sewing machine (which is highly likely), here are a few practical tips for maintaining and expanding your accessory collection:

    • Start with the Basics: Ensure you have the core low shank feet for all essential tasks: an all-purpose foot, a zipper foot, a blind hem foot, and a buttonhole foot.
    • Snap-on Simplicity: The snap-on presser foot adapter is your best friend. It allows you to rapidly switch between the hundreds of available snap-on feet with ease. You’ll often find this adapter included with your machine.
    • Check Before You Buy: When purchasing specialised feet online or in a shop, always read the description carefully to ensure it explicitly states ‘low shank’ compatibility. A simple search for “low shank presser foot” will filter your options effectively.

    Understanding the difference between low shank and high shank machines gives you the confidence to truly master your equipment and explore all the creative possibilities offered by the vast array of sewing accessories21. Happy sewing!

    About the Author: Grace, Founder of London Sewing Courses

    Grace is the heart and hands behind London Sewing Courses. A passionate and experienced sewing instructor, she founded the studio with a unique mission: to create a calm, friendly space for adults to learn and connect, while using the profits to fund free sewing classes for local children in need. Her personal expertise and commitment to community building are at the core of every class and every stitch.

    Sources

    Is Your Sewing Machine Low or High Shank? (https://quiltadvice.com/blog/is-your-sewing-machine-low-or-high-shank/)

    Sewing Machine Feet Guide (https://www.sewingbeefabrics.co.uk/sewing-machine-feet-guide/) What is a Low Shank Sewing Machine (https://www.linenbeauty.com/blog/what-is-a-low-shank-sewing-machine)

    Explain Different Shank Lengths (https://www.singermachines.co.uk/faq/explain-different-shank-lenghts.html)