Tag: DIY fashion

  • The Machines of the Screen: What Sewing Machines are Used on ‘The Great British Sewing Bee’?

    The Machines of the Screen: What Sewing Machines are Used on ‘The Great British Sewing Bee’?

    Key Takeaways

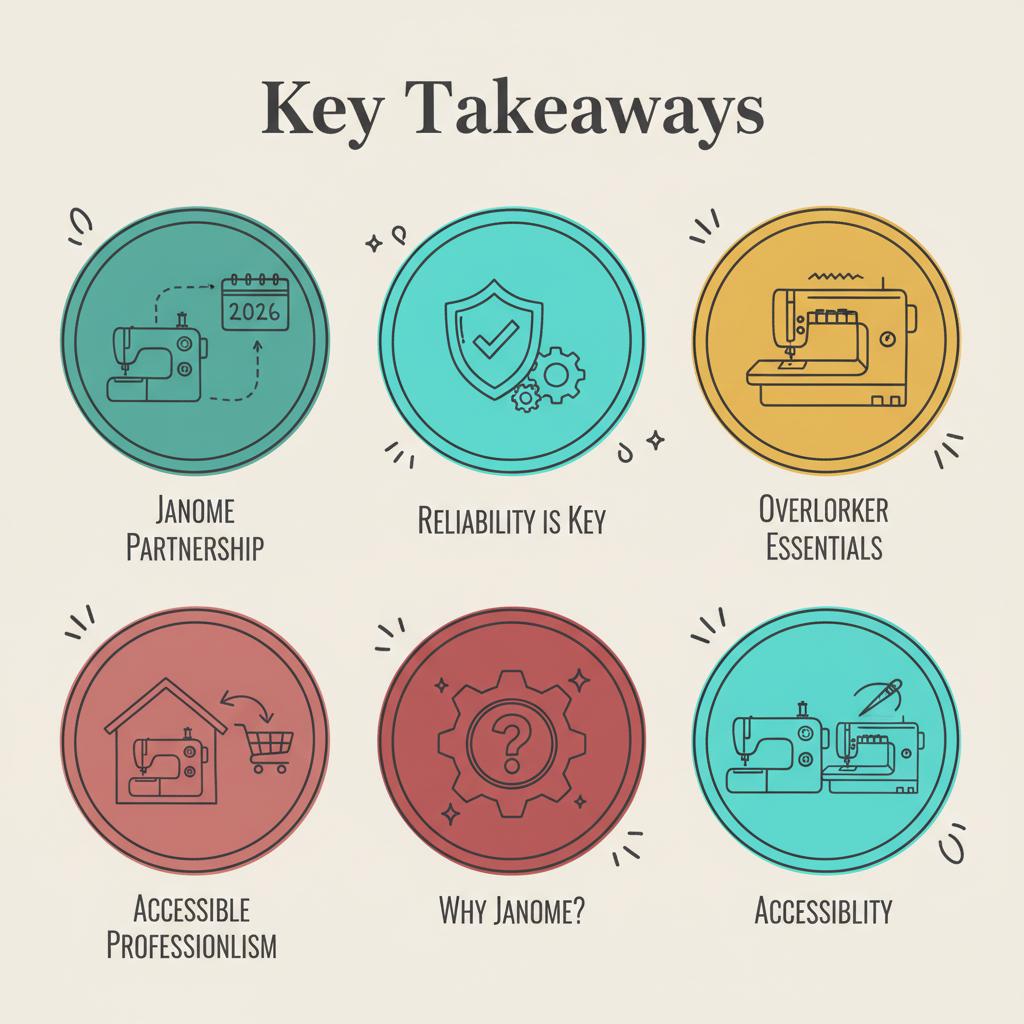
    • Janome Partnership: For the 2026 series, the show continues its long-standing relationship with Janome, featuring the Janome 525S and the computerised DKS30 models.
    • Reliability is Key: These machines are chosen for their “jam-proof” top-loading bobbins and robust build, essential for high-pressure television filming.
    • Overlocker Essentials: The Janome 6234XL is the standard tool used for achieving professional, clean interior seams on the show.
    • Accessible Professionalism: All models featured on the program are domestic machines, meaning viewers can purchase the exact same tools for their own home studios.
    Blog featured image for what sewing machine do they use on sewing bee 2026 what machines are used on sewing bee

    The Great British Sewing Bee is more than just a competition; it is a celebration of British craftsmanship that inspires thousands to pick up a needle for the first time. If you have found yourself captivated by the transformation of raw fabric into wearable art, you have likely wondered exactly what sewing machine do they use on Sewing Bee 2026 to achieve such precise results.

    Choosing the right equipment is like choosing a creative partner. In the high-stakes environment of the Bee’s haberdashery, the contestants need machines that are not only versatile but unfailingly reliable. Understanding these tools can help you bridge the gap between being a viewer and becoming a maker.

    Infographic about what sewing machine do they use on sewing bee 2026 for London Sewing Courses

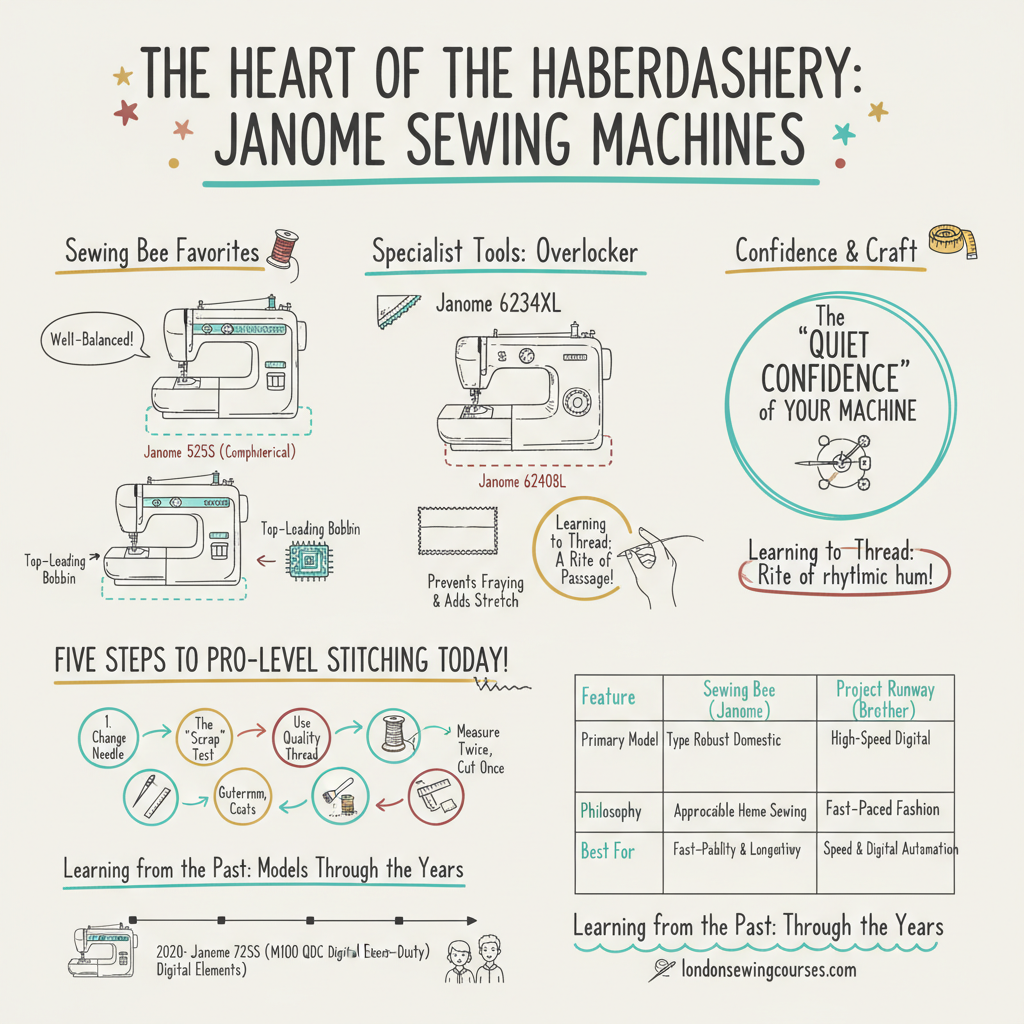
    The Heart of the Haberdashery: Why Janome?

    Since its inception, the show has maintained a consistent partnership with Janome. When we look at what machines are used on Sewing Bee, we see a selection of domestic models that balance advanced features with user-friendly interfaces. In 2026, the primary mechanical workhorse remains the Janome 525S.

    This model is a favourite among tutors because of its “well-balanced” nature. It features a top-loading bobbin with a transparent cover, allowing sewists to monitor their thread levels—a vital feature when you are racing against a clock. For those interested in more decorative or complex projects, the computerised Janome DKS30 provides a digital precision that ensures every stitch is uniform, regardless of the fabric thickness.

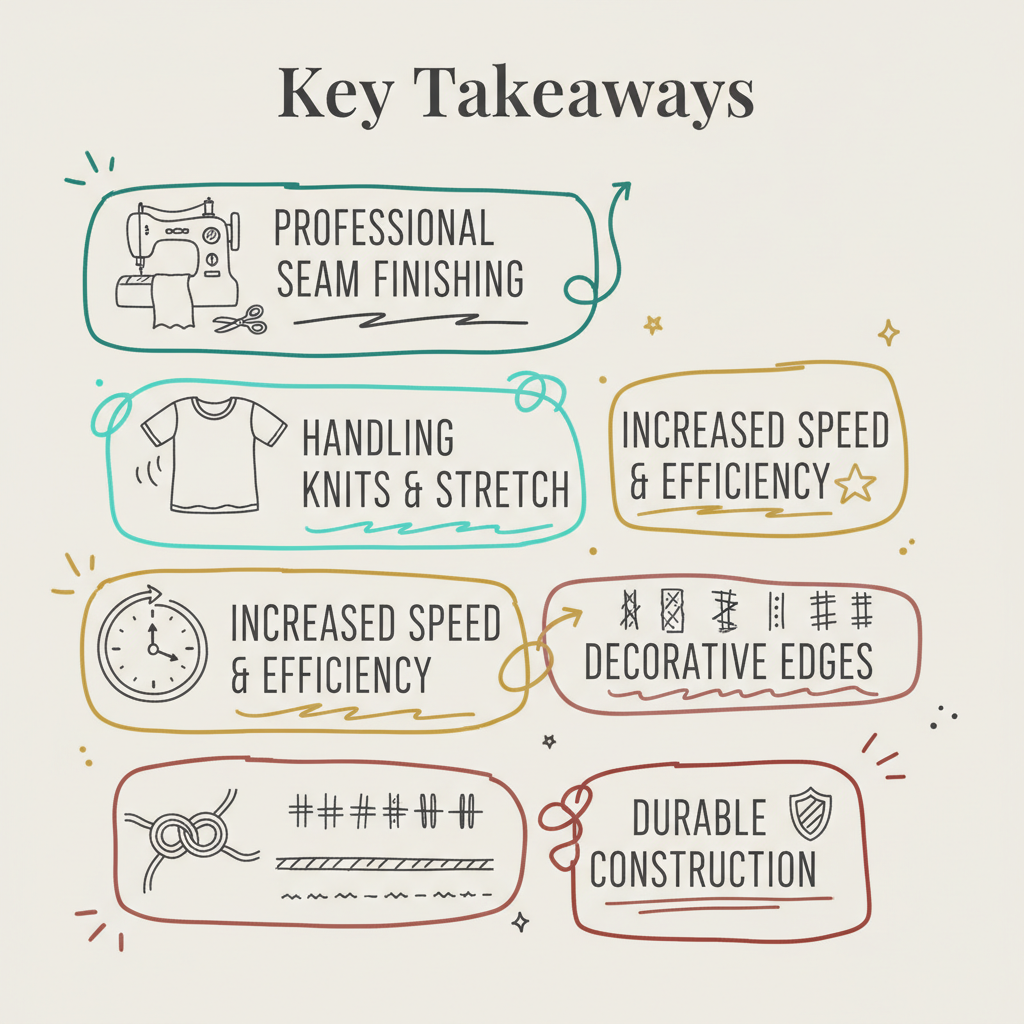
    Specialist Tools: Overlockers and the Professional Finish

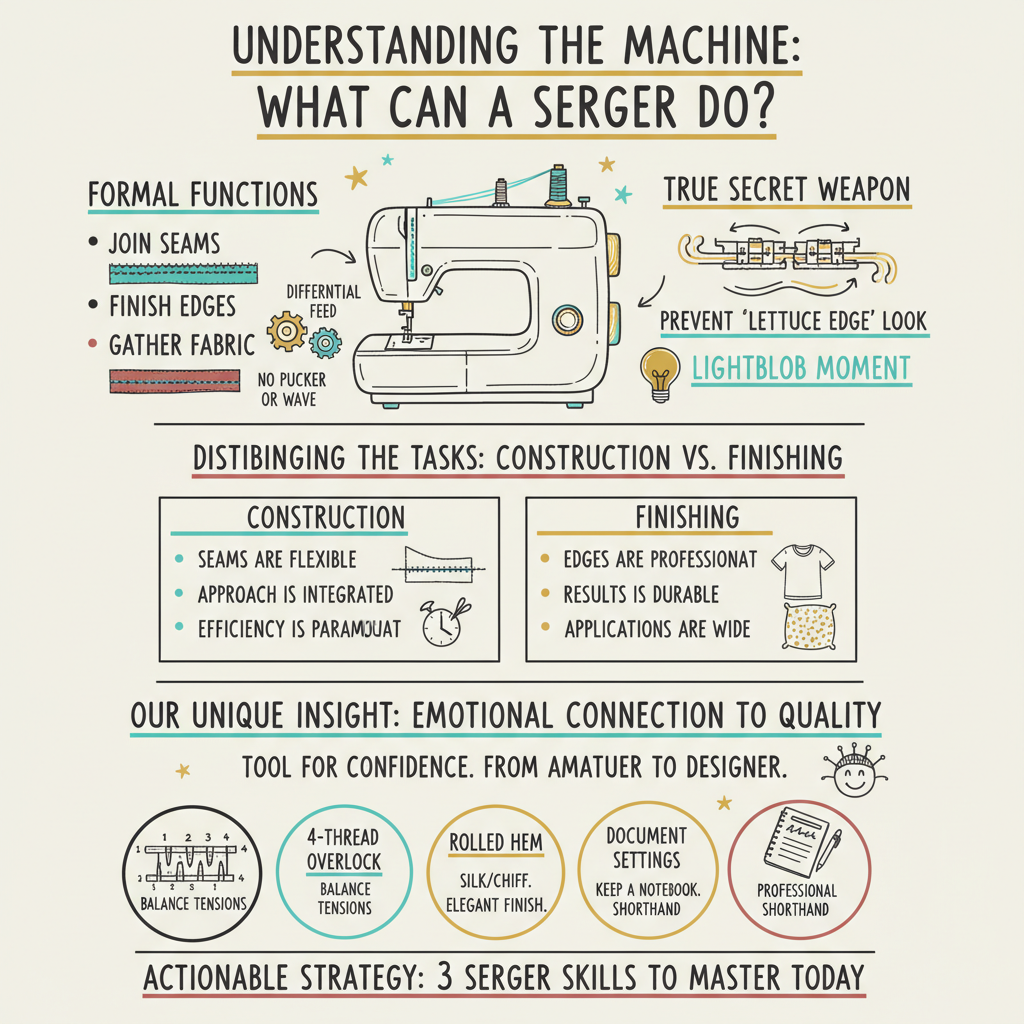
    While the sewing machine handles the construction, the professional “store-bought” look of the garments often comes from the overlocker. On the Bee, you will see the Janome 6234XL being used frequently. This machine trims the fabric and finishes the edge in one step, preventing fraying and providing the stretch needed for jersey garments.

    For enthusiasts looking to master these specific tools, joining sewing classes London for beginners can provide the hands-on experience needed to feel confident. Learning to thread an overlocker is a rite of passage for any budding seamstress, and having a patient tutor guide you through the process makes all the difference.

    Our Unique Insight: The “Quiet Confidence” of Your Machine

    At London Sewing Courses, we often tell our students that the best machine is the one you feel most confident using. Our unique insight into the “Sewing Bee effect” is that while high-end machines offer many bells and whistles, the contestants who succeed are those who have mastered the fundamentals of machine tension.

    A machine is a mechanical extension of your hands. Whether you are using a top-of-the-line Janome or a vintage inherited model, the secret to a perfect seam lies in the harmony between the needle, the thread, and the tension settings. We encourage our students to spend time “listening” to their machines. A well-timed machine has a rhythmic, confident hum; any deviation often signals that a simple re-threading or a fresh needle is required.

    Actionable Strategy: Five Steps to Pro-Level Stitching Today

    You do not need to be on a television set to produce high-quality work. Here are five actionable steps you can take today to improve your sewing:

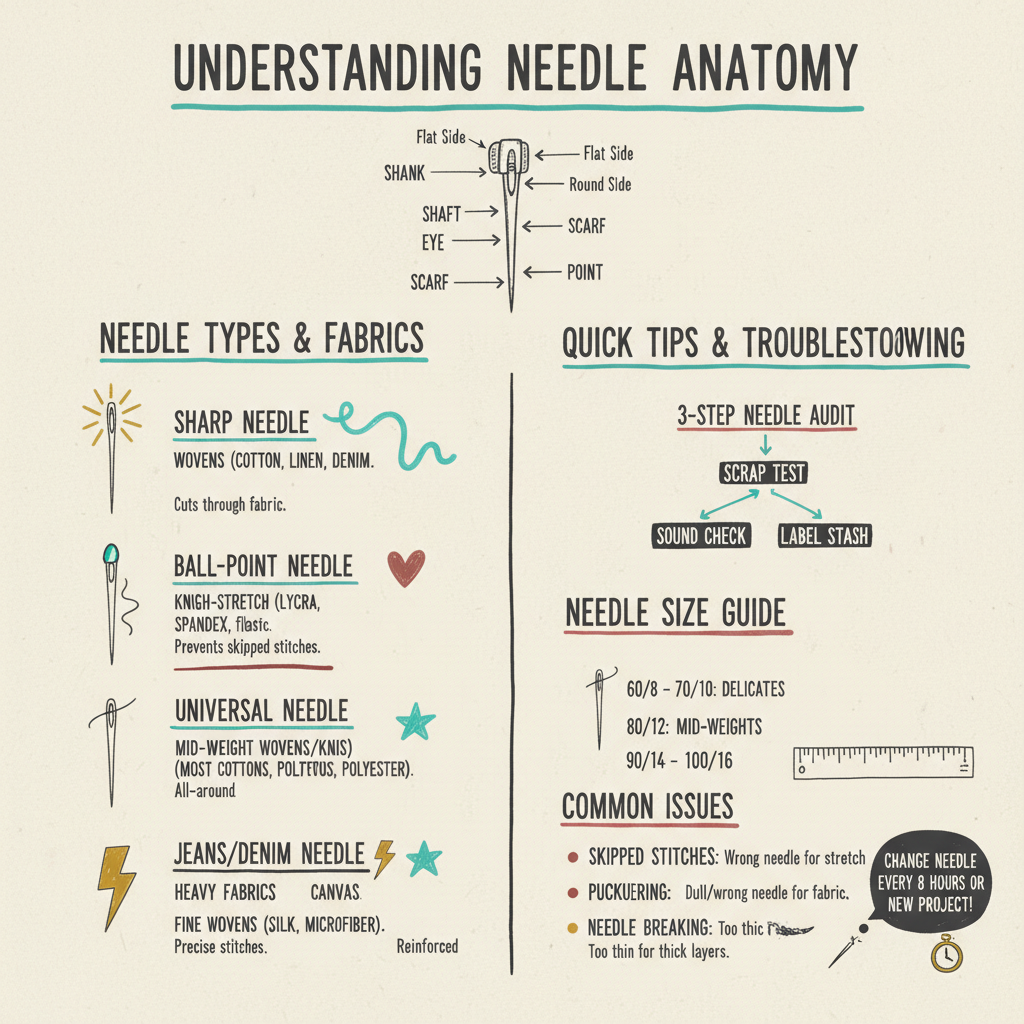
    1. Change Your Needle Regularly: A dull needle causes skipped stitches and fabric pulls. Replace your needle every 8 hours of sewing time.
    2. The “Scrap Test”: Always sew a 10cm test line on a scrap of the actual fabric you are using for your project to check tension before starting.
    3. Use Quality Thread: Budget threads can leave lint in your machine’s bobbin race, leading to jams. Stick to reputable brands like Gutermann or Coats.
    4. Clean the Bobbin Case: After every project, use a small brush to remove lint from around the bobbin area to keep the “jam-proof” system working perfectly.
    5. Measure Twice, Cut Once: Like the contestants on the show, precision starts at the cutting table. Ensure your grainlines are perfectly straight before you ever touch the sewing machine.

    Comparing the Stars: Sewing Bee vs. Project Runway

    A common question from our international students is “what sewing machine is used on Project Runway” in comparison to our UK favourite. While the Bee leans into the domestic reliability of Janome, the US-based Project Runway has historically featured Brother machines.

    FeatureSewing Bee (Janome)Project Runway (Brother)
    Primary Model TypeRobust Domestic (Mechanical & Computerised)High-Speed Digital / Commercial Hybrid
    PhilosophyApproachable home sewing and craftFast-paced high-fashion design
    Best ForReliability and longevitySpeed and digital automation

    Both brands are exceptional, but Janome’s presence on the Bee highlights a focus on the “slow fashion” movement and the joy of home dressmaking.

    Learning from the Past: Models Through the Years

    If you are watching older episodes on catch-up, you might wonder what sewing machine is used on Sewing Bee 2020 or what sewing machine is used on Sewing Bee 2022. While the models have evolved slightly, the core technology remains similar.

    In 2020, the Janome 725S was a prominent fixture, celebrated for its heavy-duty feel. By 2022, the show introduced more digital elements with the Janome M100 QDC. These historical shifts show that even as technology progresses, the basic requirement—a clean, straight stitch—remains the foundation of all good sewing. For those who want to learn to use a sewing machine with a nod to these classic techniques, our studio provides a range of models to practice on.

    The Importance of Structured Learning

    Having the right machine is only half the battle. The contestants on the show often have years of experience or have attended intensive seamstress courses to hone their craft. If you are based in the capital, finding sewing classes North London can help you transition from simple repairs to how to sew full garments.

    A structured environment allows you to ask questions in real-time, just as a contestant might lean on the expertise of the judges. Whether you are looking for sewing classes London for adults to start a new hobby or London sewing courses for adults to refine intermediate skills, the right guidance is invaluable.

    Frequently Asked Questions (FAQ)

    Is a computerised machine better than a mechanical one?

    Neither is inherently “better,” as it depends on your sewing style. Mechanical machines, like the Janome 525S used on the show, are prized for their durability and “hands-on” feel. Computerised machines, like the DKS30, offer features like automatic needle threading, speed control, and a wider variety of decorative stitches. For a beginner, a mechanical machine is often less intimidating, while an intermediate sewist may appreciate the precision of a digital model.

    How do I know which Janome model is right for me?

    Think about the fabrics you intend to sew. If you plan on making heavy coats or denim jeans, look for a model with a high presser foot lift and a powerful motor. If you are more interested in delicate dressmaking, a machine with adjustable presser foot pressure is essential. We recommend visiting our Sewing blog for detailed reviews on specific models tailored to different skill levels.

    Can I achieve the same results without an overlocker?

    Yes, you certainly can! Most modern sewing machines have an “overcast stitch” which, when used with a specific overcast foot, can mimic the look of an overlocker. It takes a little longer, but it is a perfectly valid way to finish your seams. However, once you try an overlocker for jersey fabrics, you may find it hard to go back!

    Where can I get one-on-one help with my specific machine?

    Many people find large classes overwhelming when they have a specific machine they want to master. In these cases, private sewing lessons London are the best option. A tutor can walk you through the specific settings of your own machine, helping you troubleshoot tension issues and learn the hidden features of your specific model.

    Conclusion

    The sewing machines used on The Great British Sewing Bee are chosen for their ability to bring a designer’s vision to life with reliability and grace. Whether it is the stalwart Janome 525S or a specialist overlocker, these tools are the silent partners in every masterpiece created on screen.

    Remember, every expert was once a beginner who was brave enough to thread their first bobbin. By choosing a machine that suits your needs and investing in your education, you are setting yourself up for a lifetime of creative fulfilment. We look forward to seeing what you create in your own “sewing room” very soon.

    About the Author: Grace, Founder of London Sewing Courses

    Grace is the heart and hands behind London Sewing Courses. A passionate and experienced sewing instructor, she founded the studio with a unique mission: to create a calm, friendly space for adults to learn and connect, while using the profits to fund free sewing classes for local children in need. Her personal expertise and commitment to community building are at the core of every class and every stitch.

    Sources

  • Heavy-Duty Needles & Feet: Sewing Denim, Leather, and Canvas

    Heavy-Duty Needles & Feet: Sewing Denim, Leather, and Canvas

    Key Takeaways

    • Leather Requires Cutting Points: Unlike fabric needles, leather needles have a wedge-shaped point to slice through hide.
    • Denim Needs Reinforcement: Heavy fabrics like denim require a thick, strong shaft and a very sharp point to prevent bending.
    • Size Correlation: Use larger needle sizes (90/14 to 110/18) for heavy-duty materials to ensure the needle doesn’t snap.
    • Specialised Presser Feet: Using a walking foot or Teflon foot is essential for helping thick or “sticky” materials glide through.
    • Maintenance: Change needles frequently when sewing tough materials as they dull much faster than when sewing cotton.
    Key takeaways infographic for what type of needle for leather hat needle to use for jeans, what type of needle for denim

    Starting a project with heavy-duty materials like denim or leather is an exciting milestone in any sewist’s life. It signifies a move toward more structured, professional-grade garments and accessories. However, the most common question I hear in our studio is: what type of needle for leather is actually safe for my machine? Transitioning from soft cottons to tough hides or thick twills requires more than just a bit of extra muscle; it requires a specific understanding of needle geometry. Using the wrong tool won’t just result in poor stitches; it can actually damage your machine’s timing or break your internal components. Whether you are upcycling a pair of vintage jeans or crafting a bespoke leather clutch, your choice of needle is the most critical technical decision you will make.

    Infographic about what type of needle for leather for London Sewing Courses

    The Science of the Slice: What Type of Needle for Leather?

    Leather is not a woven fabric; it is a dense, non-fibrous material. This means that a standard needle, which is designed to push threads aside, will simply struggle and fail to penetrate the surface cleanly. When asking what needle do you use to sew leather, the answer is always a “Leather Needle” (often marked as LL). [cite_start]These needles feature a unique wedge-shaped cutting point that actually slices a small hole as it enters the material[cite: 3].

    Because leather does not “heal” like fabric, every hole is permanent. This is why having the correct cutting point is so vital; it ensures the hole is exactly the right size for the thread to pass through without tearing the surrounding hide. If you are joining us for private sewing lessons London, we always emphasise that you must never use a leather needle on woven fabrics, as the wedge point will cut the yarns and cause the fabric to unravel.

    Conquering Canvas and Twill: What Type of Needle for Denim?

    Denim is a tightly woven, heavy-duty cotton twill that presents a different challenge. While it is a woven fabric, its density and thickness—especially at the seams—can easily snap a standard needle. When considering what type of needle for denim, you must look for a “Jeans” or “Denim” needle. [cite_start]These are specifically engineered with a reinforced shaft to reduce needle deflection (bending) and a very sharp, slim point[cite: 1, 4].

    The sharp point is designed to pierce through the dense weave without pushing the fabric down into the needle plate. If you have ever wondered what type of sewing needle for denim provides those iconic, straight topstitching lines, it is this combination of a sharp tip and a strong body. For those in our sewing classes London for beginners, we recommend starting with a 90/14 Jeans needle for standard denim and moving up to a 100/16 or 110/18 for heavy-duty projects like jackets or bags.

    Our Unique Insight: The “Memory” of Heavy Materials

    At London Sewing Courses, we teach our students that heavy-duty sewing is as much about psychology as it is about hardware. Unlike lightweight silk, materials like leather and heavy denim have a “memory.” If you make a mistake and have to unpick a seam in leather, the holes remain forever. This can create a sense of “perfectionist paralysis” in many students.

    Our insight is this: treat your first few heavy-duty projects as a dialogue with the material. Instead of fearing the permanent nature of the stitch, use it to your advantage by being more intentional with your prep. Use clips instead of pins (which leave holes) and take the time to hand-crank your machine over thick intersections. This slower, more mindful approach doesn’t just protect your needle; it builds a deeper connection between your hands and the craft, resulting in a garment that feels truly “built” rather than just “sewn.”

    Actionable Strategy: Handling the Bulk with the Right Foot

    Even with the perfect needle, thick fabrics can get “stuck” under the presser foot. When asking what sewing machine needle to use for thick fabric, you must also ask what presser foot to use for thick fabric. To ensure smooth sailing, implement these three tool strategies:

    1. The Walking Foot: This is essential for denim and canvas. It has its own set of feed dogs on the top, ensuring that all layers of fabric move through the machine at the exact same speed, preventing the dreaded “shifting” of seams.
    2. The Teflon (Non-Stick) Foot: This is the secret weapon for leather and vinyl. Standard metal feet can “stick” to the surface of leather, causing the machine to skip stitches. A Teflon foot glides right over the surface.
    3. The Hump Jumper: When sewing over the flat-felled seams of jeans, use a “clearance plate” or hump jumper. This keeps the presser foot level as it climbs over the bulk, preventing the needle from snapping.

    Choosing the Right Gauge: What Needle to Use for Jeans

    Weight matters just as much as type. When deciding what needle to use for jeans, you must match the size (the number) to the weight of your denim. Standard retail jeans are usually around 10–12oz, which pairs perfectly with a 90/14 Jeans needle. [cite_start]However, if you are working with “raw” or heavyweight selvedge denim (14oz and above), you must move to a 100/16 or even 110/18[cite: 1, 4].

    A needle that is too small for the thread or the fabric will struggle to create a clean stitch loop, leading to the thread shredding or the needle breaking. If you are progressing through intermediate sewing courses London adults often attend, you will find that having a variety of Jeans needles in your kit is essential for tackling the diverse range of denims available today.

    Actionable Strategy: The Heavy-Duty Setup Checklist

    Before you drop the needle into your leather or denim, run through this 60-second checklist to ensure a perfect result:

    • Freshness Check: Have you used a brand-new needle? Heavy fabrics dull tips instantly.
    • Thread Match: Are you using heavy-duty polyester or topstitching thread? Standard cotton thread is often too weak for these materials.
    • Stitch Length: Have you increased your stitch length? For leather and denim, a longer stitch (3.0mm to 4.0mm) looks more professional and prevents the fabric from being “perforated” like a postage stamp.
    • Tension Test: Have you tested your tension on a scrap? You will likely need to slightly increase your top tension to pull the heavier thread through the thick layers.

    Understanding the “LL” and “R” Markings

    When shopping for leather needles, you might see letters like “LL” or “R”. The “LL” stands for “Leather Left,” referring to the specific angle of the cutting point. [cite_start]This creates a slightly slanted stitch that is traditionally associated with high-end leatherwork[cite: 3]. Understanding these nuances is part of what we cover in our seamstress courses, helping you move from amateur hobbyist to someone with a professional technical vocabulary.

    Custom Learning: Mastering the Machine for Heavy Fabrics

    Modern domestic sewing machines are surprisingly capable, but they have their limits. If you find your machine “groaning” or struggling, it might not be your skill—it might be the machine’s motor. This is where private sewing lessons London can be invaluable. A tutor can show you how to “help” your machine through thick sections using the handwheel and how to adjust the presser foot pressure—a hidden setting on many machines that can make sewing thick fabric significantly easier.

    Frequently Asked Questions (FAQ)

    Can I use a denim needle for leather?

    While it may seem tempting because both are “strong” needles, you should generally not use a denim needle for leather. [cite_start]A denim needle has a sharp, round point designed to pierce fabric, whereas leather needs a wedge-shaped point to slice through the material[cite: 3]. Using a denim needle on leather can cause the machine to struggle, resulting in uneven stitches or the needle getting “stuck” in the hide. For the best results and to protect your machine’s motor, always use the dedicated needle type for the material.

    What is the best size needle for sewing thick upholstery fabric?

    [cite_start]For thick upholstery fabrics like heavy canvas or tapestry, a size 100/16 or 110/18 Universal or Jeans needle is typically best[cite: 1, 4]. These fabrics are often very dense, and a thicker needle shaft is required to prevent the needle from bending as it enters the material. Additionally, these larger sizes have a bigger “eye,” which is necessary if you are using the thicker, stronger threads often required for upholstery projects to ensure the seams don’t rip under pressure.

    How do I stop my machine from skipping stitches on leather?

    Skipped stitches on leather are usually caused by the needle “sticking” to the material as it tries to rise, which prevents the thread loop from forming correctly for the bobbin to catch. [cite_start]To fix this, first ensure you are using a dedicated leather needle[cite: 3]. Secondly, switch to a Teflon or non-stick presser foot, or place a small piece of “magic tape” on the bottom of your standard foot to help it glide. Finally, try increasing your stitch length, as short stitches can cause the leather to bunch.

    Why does my thread keep snapping when I sew denim?

    Thread snapping on denim is often caused by a “size mismatch” between the thread and the needle. If you are using thick topstitching thread with a needle that has a small eye, the thread will shred as it passes through. [cite_start]Ensure you are using a Jeans needle, which has a larger eye designed for heavier threads[cite: 1, 4]. Also, check that your needle isn’t slightly bent or burred; even a tiny nick on the needle can catch and break the thread as you sew through tough layers.

    Conclusion

    Mastering heavy-duty sewing is a badge of honour for any sewist. By understanding what type of needle for leather you need and identifying the best sewing machine needle to use for thick fabric, you open up a world of creative possibilities—from rugged outdoor gear to sophisticated leather accessories. Remember that your sewing machine is a partner in this process; give it the right tools, and it will reward you with beautiful, durable results. Whether you are learning at our sewing blog or joining us for sewing classes North London, the key is to stay curious, keep testing, and always have a fresh pack of needles ready for your next big adventure.

    About the Author: Grace, Founder of London Sewing Courses

    Grace is the heart and hands behind London Sewing Courses. A passionate and experienced sewing instructor, she founded the studio with a unique mission: to create a calm, friendly space for adults to learn and connect, while using the profits to fund free sewing classes for local children in need. Her personal expertise and commitment to community building are at the core of every class and every stitch.

    Sources

  • What Needle Should I Use for Stretch Fabric and Beyond?

    What Needle Should I Use for Stretch Fabric and Beyond?

    Key Takeaways

    • Stretch and Knit Fabrics: Always use a Ball Point or Stretch needle to prevent skipped stitches and fabric damage.
    • Woven Cottons: A Sharp or Universal needle works best for stable, natural fibres like cotton.
    • Synthetic Polyesters: Universal needles are suitable, but Microtex needles offer superior precision for fine synthetics.
    • Needle Size Matters: Match the needle size to the fabric weight—finer needles for silks, thicker for denim.
    • Regular Replacement: Change your needle every 8 hours of sewing to maintain stitch quality and protect your machine.

    Choosing the right tool is the first step in any creative journey. When you sit down at your machine, the question of what needle should I use for stretch fabric often arises as soon as you touch a piece of jersey or Lycra. It is a vital question because the wrong choice can lead to frustrating skipped stitches or, worse, tiny holes in your beautiful material. For many beginners, the world of sewing machine needles feels like a secret language, but once you understand the “why” behind the needle tip, your confidence will grow. Whether you are sewing a simple cotton tote or a complex stretch garment, your needle is the bridge between your skill and a professional finish.

    Infographic about what needle should i use for stretch fabric for London Sewing Courses

    Understanding Needle Anatomy and Why It Matters

    Before we dive into specific fabric types, it is helpful to understand that not all needles are created equal. A sewing machine needle is an engineered tool designed to pass through fibres in very specific ways. If you use a needle designed to pierce through tough denim on a delicate knit, you will likely tear the fibres. Conversely, a blunt needle used on heavy cotton will struggle to penetrate, potentially timing out your machine.

    The “point” of the needle is the most critical factor. Sharp needles are meant to cut through the weave of woven fabrics. Ball-point needles are designed to push the yarns of a knit fabric aside rather than cutting them. This subtle difference is the key to preventing “runs” in your fabric, much like a ladder in a pair of tights.

    What Needle to Use for Lycra Fabric and Elastics

    When working with highly elastic materials, the specific question of what needle to use for lycra fabric becomes paramount. Lycra, Spandex, and other high-stretch synthetics require a “Stretch Needle.” While a standard ball-point needle is often okay for basic t-shirt jersey, Lycra has a high elastic content that can cling to the needle, causing the thread to skip.

    Stretch needles have a specially designed scarf (the indentation above the eye) that allows the bobbin hook to catch the thread more easily, even when the fabric is being pulled or compressed. If you are learning how to sew swimwear or activewear, this needle is your best friend. Similarly, when considering what needle to use for elastic, the stretch needle remains the champion. It prevents the needle from “chewing” the rubber or latex strands inside the elastic, ensuring the waistband or cuff remains durable and functional.

    The Versatile World of Cottons: Which Needle Wins?

    Cotton is the backbone of the sewing world, loved for its breathability and ease of use. However, because cotton comes in so many weights—from airy lawn to heavy canvas—you might wonder what needle should I use for cotton. For most mid-weight woven cottons, a Universal needle is perfectly adequate. It has a slightly rounded tip that is sharp enough to pierce the weave but won’t damage the fibres.

    If you are working with very fine, high-thread-count cottons, you might find that what needle to use for cotton shifts toward a “Sharp” or Microtex needle. These have a very slim, acute point that creates perfectly straight stitches. For those just starting their journey with sewing classes London for beginners, sticking to a 70/10 or 80/12 Universal needle for your first few cotton projects is a safe and reliable choice.

    What Sewing Machine Needle to Use for Cotton Quilting

    Quilting involves sewing through multiple layers—the quilt top, the batting, and the backing. Therefore, what sewing machine needle to use for cotton in a quilting context requires a bit more strength. Quilting needles are reinforced to handle the bulk without bending. They have a tapered point that can pass through several layers of cotton and wadding while maintaining a straight line. If you are exploring seamstress courses that involve patchwork, investing in a dedicated quilting needle will make the process much smoother and prevent the needle from deflecting as it hits thicker seams.

    Mastering Synthetics: What Needle to Use for Polyester

    Polyester is a modern marvel, found in everything from silky blouses to sturdy upholstery. When deciding what needle to use for polyester, you must consider the structure of the fabric. If it is a polyester knit (like many sports tops), refer back to the stretch needle. However, for woven polyester, a Universal needle is usually the standard.

    Polyester fibres are incredibly strong and can sometimes dull a needle faster than natural fibres. If you notice your machine making a “thumping” sound, it is time to change the needle. For very fine or densely woven polyesters, a Microtex needle is often the secret to success, providing the sharpest point possible to avoid puckering the seams.

    Our Unique Insight: The Psychology of the “Perfect Stitch”

    At our London sewing courses for adults, we often observe that a student’s frustration isn’t due to a lack of talent, but a mismatch of tools. We believe the needle is the “unsung hero” of the sewing room. Most sewists wait until a needle breaks to replace it, but we suggest viewing the needle as a consumable, much like thread.

    A fresh needle doesn’t just prevent damage; it changes the way the machine feels. It reduces noise, vibration, and resistance. By matching your needle precisely to your fabric, you aren’t just following a rule—you are removing a barrier between your intention and the finished garment. This small act of mindfulness at the start of a project sets the tone for a calm, successful sewing session.

    Actionable Strategy: The 3-Step Needle Audit

    To ensure you never struggle with the wrong tools again, try this simple strategy before starting your next project:

    1. The Scrap Test: Never start on your actual garment. Take a scrap of your project fabric and sew a few inches. If you see skipped stitches or “puckering,” change your needle type immediately.
    2. The Sound Check: Listen to your machine. A dull needle makes a distinct “pop” or “thump” as it enters the fabric. A sharp, correct needle should be almost silent.
    3. Label Your Stash: Use a small piece of washi tape or a pin cushion with sections to mark which needle is currently in your machine. There is nothing more confusing than forgetting if you have a Stretch or Universal needle loaded!

    Exploring Advanced Options for Specialists

    As you progress through intermediate sewing courses London adults enjoy, you might encounter more niche needles. Denim needles, for example, have a very thick, strong shaft to prevent breakage when sewing through multiple layers of heavy twill. Topstitching needles have an extra-large eye to accommodate thicker decorative threads, which is essential for that professional “jeans” look. Leather needles have a “cutting” point shaped like a wedge to slice through hide. Understanding these variations ensures that as your skills grow, your toolkit grows with you.

    Actionable Strategy: How to Build a “Core” Needle Library

    You don’t need every needle ever made, but having a “Core Library” will save you from midnight runs to the haberdashery. We recommend stocking:

    • Universal (Sizes 70, 80, 90): For almost all woven projects.
    • Stretch (Sizes 75, 90): For jersey, Lycra, and leggings.
    • Microtex (Size 70): For silks, microfibres, and delicate synthetics.
    • Jeans (Size 100): For repairs and heavy-duty bags.

    Having these on hand means you can pivot from making a cotton cushion to a jersey top without any technical delays.

    The Importance of Needle Size (Numbers Explained)

    You will notice two numbers on a needle pack, such as 80/12. The first number (80) is the European metric size, and the second (12) is the American size. Essentially, the smaller the number, the finer the needle.

    • 60/8 to 70/10: Use for very lightweight fabrics like chiffon or organza.
    • 80/12: The “goldilocks” size for most mid-weight fabrics.
    • 90/14 to 100/16: Use for heavy fabrics like denim or curtain material.

    Using a needle that is too thick for a fabric will leave visible holes, while a needle that is too thin might snap. If you are unsure, our sewing classes North London team is always happy to offer a quick bit of advice on matching your project to the right gauge.

    Custom Learning: Why One-on-One Guidance Helps

    Sometimes, reading about needles isn’t enough; you need to feel the difference in the machine. Private sewing lessons London are a fantastic way to troubleshoot specific issues you might be having. Whether you are struggling with a specific brand of sewing machine or a particularly tricky fabric like velvet, a tutor can show you the subtle nuances of tension and needle choice that make all the difference. This personalised approach often helps students overcome “machine fear” and start enjoying the creative process much faster.

    Frequently Asked Questions (FAQ)

    What happens if I use a universal needle on stretch fabric?

    Using a universal needle on stretch fabric often results in skipped stitches because the needle cannot properly catch the bobbin thread as the fabric stretches. Furthermore, the universal tip may nick the elastic fibres, leading to small holes or “ladders” that appear after the garment has been worn or washed. It is always better to switch to a dedicated ball-point or stretch needle to ensure the longevity and professional finish of your knitwear.

    How often should I actually change my sewing machine needle?

    A general rule of thumb followed by professionals is to change your needle after every 8 hours of actual sewing time or at the start of every new project. Over time, the tip of the needle becomes microscopicly dull or hooked, which can snag fabric and cause uneven tension. If you hear a “thumping” sound or notice your stitches looking irregular, it is a clear sign that your needle has reached the end of its life.

    Can I use the same needle for both cotton and polyester?

    Yes, you can often use a Universal needle for both woven cotton and woven polyester, provided the fabric weights are similar. However, if the polyester is a fine synthetic or the cotton is a heavy denim, you should adjust the needle size accordingly. Always perform a test stitch on a scrap of the fabric you intend to use to check that the needle isn’t causing puckering or leaving excessively large holes in the material before proceeding.

    Why does my needle keep breaking when I sew thick seams?

    Needle breakage on thick seams usually happens because the needle is too thin for the task or it is “deflecting” (bending) as it hits the bulk, causing it to strike the throat plate. To prevent this, switch to a larger needle size, such as a 90/14 or 100/16, or use a specific “Jeans” needle. Additionally, try slowing down your sewing speed and using a “hump jumper” tool to keep the presser foot level as you cross thick intersections.

    Conclusion

    The journey from a beginner to a confident sewist is paved with small, technical realisations. Answering the question of what needle should I use for stretch fabric is one of those “lightbulb moments” that instantly improves your results. By respecting the relationship between the needle, the thread, and the fibre, you unlock the ability to work with any material you desire. Whether you are visiting a sewing blog for inspiration or attending sewing classes london for adults to refine your technique, remember that the smallest part of your machine is often the most important. Keep your needles fresh, your tension balanced, and your creativity will have no bounds.

    About the Author: Grace, Founder of London Sewing Courses

    Grace is the heart and hands behind London Sewing Courses. A passionate and experienced sewing instructor, she founded the studio with a unique mission: to create a calm, friendly space for adults to learn and connect, while using the profits to fund free sewing classes for local children in need. Her personal expertise and commitment to community building are at the core of every class and every stitch.

    Sources

  • Coverstitch Mastery: What Is a Coverstitch Machine Used For?

    Coverstitch Mastery: What Is a Coverstitch Machine Used For?

    Key Takeaways

    • The Professional Hem: A coverstitch machine creates the twin-needle look seen on store-bought t-shirts, but with far superior elasticity.
    • Stretch is Key: Understanding what is a coverstitch helps you realise why your standard sewing machine hems snap on activewear, while coverstitch hems do not.
    • Not an Overlocker: Distinguishing what does coverstitch machine do versus a serger is vital; one finishes edges, the other hems and decorates.
    • Versatility in Design: Learning what is a coverstitch used for opens doors to binding necklines, attaching elastic, and creating decorative chainstitches.
    • Hybrids Exist: Knowing what is a coverstitch on a serger helps you decide between buying two separate machines or one “combi” machine.
    what is a coverstitch machine used for

    The Quest for the Perfect Finish

    There is a familiar milestone in every dressmaker’s journey. You have successfully sewn a beautiful jersey dress or a pair of leggings using your overlocker (serger). The seams are neat, the fit is perfect, and you feel a swell of pride. Then, you reach the hem. You switch to your standard sewing machine, perhaps using a twin needle, and carefully stitch the bottom edge.

    It looks fine—until you stretch it. Snap. Or perhaps you wash it once, and the hem starts to tunnel, creating a ridge that looks distinctly “homemade.”

    This is the moment many of my students in our sewing classes North London ask me: “Grace, how do I get that shop-bought finish?” The answer lies in a specific, often misunderstood piece of equipment. If you want to elevate your garments from “crafted” to “couture,” you need to understand exactly what is a coverstitch machine used for. It is the secret weapon of the professional seamstress, designed to handle the modern wardrobe’s reliance on stretch fabrics with elegance and durability.

    what is a coverstitch machine used for

    What is a Coverstitch?

    Before we look at the machine, we must understand the stitch itself. So, what is a coverstitch?

    If you look at the hem of the t-shirt you are wearing right now, you will likely see two (or sometimes three) perfectly parallel rows of straight stitching on the outside. This looks deceptively simple, like a standard twin-needle stitch. However, if you turn the hem inside out, you will see a complex grid of interlocking thread that looks like a ladder or a chain.

    This is the looper thread. Unlike a lockstitch made by a domestic machine, which ties a top thread to a bobbin thread in a rigid knot, a coverstitch loops the threads together. This looping action gives the stitch an incredible amount of “slack.” It allows the fabric to stretch significantly without breaking the thread, snapping back into shape perfectly when released.

    Unpacking the Tool: What Does Coverstitch Machine Do?

    To the uninitiated, this machine looks remarkably like an overlocker. It has multiple thread cones (usually three or four) and looks “industrial.” But what does coverstitch machine do that makes it so unique?

    The primary function of a coverstitch machine is to hem knit fabrics while retaining their stretch. It covers the raw edge of the fabric on the underside (inside the hem) with that looper thread, protecting it from fraying, while simultaneously creating a topstitch on the outside.

    In my sewing classes London for beginners, I often explain it this way: An overlocker constructs the garment (seams), but a coverstitch finishes it (hems). It does not have a cutting blade like an overlocker, meaning you can stitch in the middle of a fabric piece without fear of slicing a hole in your work. This capability is what makes it indispensable for professional-looking activewear, swimwear, and lingerie.

    Beyond Hemming: What is a Coverstitch Used For?

    Once you have mastered the basic hem, you might wonder what is a coverstitch used for regarding creative design. It is far more than just a “hemmer.”

    • Binding Necklines: With a binder attachment, you can fold and stitch a strip of fabric over a raw neckline edge in one smooth pass. This is the standard finish for bodysuits and vest tops.
    • Attaching Elastic: You can sew elastic directly onto fabric (like a waistband) using a coverstitch. The stitch stretches with the elastic, preventing that tight, restricting feeling you often get with rigid stitching.
    • Decorative Chainstitching: If you use only one needle, the machine produces a strong, beautiful chainstitch. This is often used for decorative jeans stitching or for basting (temporarily holding fabric together) because it is very secure but easy to unravel if you pull the correct thread tail.
    • Flat Seams: You can create flat, athletic-style seams (often seen on yoga pants) by stitching over a seam allowance to flatten it, reducing bulk and friction against the skin.

    Hybrid Machines: What is a Coverstitch on a Serger?

    This is where terminology can get a little “fuzzy” for students looking to buy their first machine. You might see machines advertised as “Combi” or “Hybrid” models. So, what is a coverstitch on a serger?

    Some manufacturers combine both functions into one unit. These machines can be converted from an overlocker (which cuts and seams) to a coverstitch (which hems). You typically have to deactivate the cutting blade, change the needle plate, and re-thread the entire machine.

    While these save space, I often advise students in our London sewing courses for adults to be cautious. The conversion process can be fiddly and time-consuming. If you are switching back and forth five times during one project, it can kill your “sewing mojo.” However, for those with limited space in their London flats, a high-quality combination machine is a powerful solution.

    Clarifying Terminology: What is a Coverstitch Serger?

    You may hear the term “coverstitch serger” thrown around in forums or online shops. Strictly speaking, what is a coverstitch serger? It is often a misnomer or a shorthand for the combination machines mentioned above.

    In the industry, we keep them distinct:

    • Serger (Overlocker): Cuts and seams edges. Uses 2 loopers.
    • Coverstitch: Hems and topstitches. Uses 1 looper (usually).

    If you see a machine labelled as a “Coverstitch Serger,” it is almost certainly a combination machine. Always check the specifications to see if it requires a conversion process.

    Our Unique Insight: The “End-of-Stitch” Dance

    The most common frustration I see during private sewing lessons London is removing the fabric from the machine. Unlike a regular sewing machine, you cannot just pull the fabric to the back and cut. If you do, the stitches will unravel instantly.

    I teach a specific “dance” to end your coverstitch cleanly:

    1. Raise the needles to their highest position.
    2. Lift the presser foot.
    3. Sweep tool: Take a thin tool (like tweezers or an allen key) and sweep it behind the needle threads, pulling them forward towards you to create slack.
    4. Cut the top threads: Snip these loops you have pulled forward.
    5. Pull back: Firmly pull the fabric straight back behind the machine. This action pulls the cut top threads through to the underside and locks them with the looper thread.

    Mastering this small manoeuvre is the difference between a secure hem and one that unravels in the wash.

    Actionable Strategy: The “Test Drive” Protocol

    Before you invest in a coverstitch machine, or if you have one gathering dust, try this strategy to build confidence.

    1. Fabric Match: Gather scraps of jersey, fleece, and Lycra.
    2. The Differential Feed: Locate the differential feed dial on the machine. This controls how the feed dogs move.
      • Set it to 1.0 for standard fabric.
      • Set it to 1.5 or higher if your fabric is stretching out and looking “wavy” (common with thin knits).
      • Set it to 0.7 if you want to create a “lettuce edge” ruffle effect.
    3. The Twin Needle Comparison: Sew a hem on a scrap with your sewing machine’s twin needle, and another with the coverstitch. Stretch them both to their limit. You will instantly feel the difference in resistance. The coverstitch will yield; the twin needle will likely “lock” or snap.

    Frequently Asked Questions (FAQ)

    Is a coverstitch machine difficult to thread?

    It can be intimidating at first because of the looper system, which requires a specific path. However, unlike an overlocker, the looper on a coverstitch machine is much easier to access. Most modern machines have colour-coded guides. Once you have done it three times, it becomes muscle memory. I always recommend tying your new thread to the old thread and pulling it through to save time.

    Can I just use a twin needle instead?

    You can, and for woven fabrics or loose knits, a twin needle is perfectly adequate. However, for high-stretch garments like gym leggings or swimwear, a twin needle stitch often lacks the necessary elasticity. It is also more prone to “tunnelling,” where the fabric creates a raised ridge between the stitches. A coverstitch machine solves both of these mechanical issues.

    Does a coverstitch machine cut the fabric?

    No, it does not. This is the primary difference between it and a serger (overlocker). Because it has no blade, you can use it in the middle of a garment for decorative stitching or pocket attachment. If you are hemming, you usually fold the hem up, stitch, and then trim away any excess fabric on the underside afterwards with sharp scissors.

    Do I need special thread for a coverstitch machine?

    You can use standard sewing thread in the needles, but for the looper (the bottom thread), many professional seamstresses recommend “woollie nylon” or textured nylon thread. This thread spreads out like yarn, providing even better coverage and softness against the skin, which is particularly nice for children’s clothing or underwear.

    Conclusion

    Deciding to introduce a coverstitch machine into your studio is a significant step. It signals a move from “making clothes” to “engineering garments.” By understanding exactly what is a coverstitch machine used for, you empower yourself to tackle fabrics that might have previously intimidated you.

    Whether you are looking to master these skills in our London sewing courses for adults or are simply reading our sewing blog to refine your technique, remember that every machine is just a tool waiting for your creativity to guide it. The coverstitch might seem complex, but its purpose is simple: to give your hard work the professional, durable finish it deserves.

    About the Author

    Grace Barrett is the founder and lead tutor at London Sewing Courses. With a background in professional tailoring and a passion for teaching, Grace specialises in demystifying complex sewing techniques for her students. From her welcoming studio in North London, she runs everything from sewing classes London for beginners to advanced seamstress courses. She believes that with the right patience and the right tools, anyone can how to sew and alter clothes to a professional standard.

    Sources

  • What Can a Serger Be Used For?

    What Can a Serger Be Used For?


    Key Takeaways

    • Professional Seam Finishing: A serger trims, stitches, and overcasts edges simultaneously for a factory-quality finish.
    • Handling Knits and Stretch: The differential feed makes it the superior choice for sewing jerseys, spandex, and activewear.
    • Increased Speed and Efficiency: Sergers operate at much higher speeds than standard machines, making them ideal for long seams.
    • Decorative Edges: Beyond utility, they create beautiful rolled hems and flatlock seams for unique garment details.
    • Durable Construction: The multi-thread overlock stitch provides extra strength and flexibility to seams under tension.
    what is a good serger for beginners

    The question of what can a serger be used for often marks a turning point in a sewist’s journey. For many, the answer is a gateway to professional-looking garments that look as good on the inside as they do on the outside. A serger, often called an overlocker in the UK, is one of the most rewarding tools to master once you have found your feet with a domestic machine.

    It is an opportunity to elevate your craft—to refine your technical skills from a curious hobbyist into a confident maker. Unlike a traditional sewing machine, a serger starts with a unique mechanism: it uses multiple threads and a built-in blade to trim and wrap fabric edges in one fluid motion. The result is a clean, secure finish that school systems or basic DIY kits simply cannot match.

    If you have a deep passion for textiles and a desire to create durable, high-wear clothing, you are already halfway there. You do not need a background in industrial manufacturing to successfully use a serger; you need patience, practice, and a willingness to explore new techniques. The subsequent sections will guide you through everything from basic seam finishing to advanced decorative applications.

    The Simple Answer: Speed and Professionalism

    The simple truth that often surprises beginners is that a serger is not a replacement for a sewing machine, but rather a powerful partner. While a standard machine handles topstitching and buttonholes, the serger excels at the “heavy lifting” of seam construction. This means a hobbyist can produce a t-shirt in under an hour, or a tailor can finish the interior of a linen jacket with exquisite precision—all without a single frayed edge.

    The sewing world naturally rewards those who invest in the right tools for the job. The makers who succeed are those whose finished pieces possess that crisp, store-bought quality that only a multi-thread overlock can provide.

    what is a good serger for beginners

    Understanding the Machine: What Can a Serger Do?

    The real question isn’t just what do sergers do but rather, how can they improve your specific workflow?. The magic lies in the loopers and the differential feed, which allow for a level of fabric manipulation that a standard straight-stitch machine cannot achieve.

    Formal Functions: What the Technology Says

    As mentioned, a serger uses between two and eight threads to create a variety of stitches. This versatility is reflected in its ability to join seams, finish edges, and even gather fabric in a single pass. If you are working with delicate fabrics or high-performance athletic wear, having the ability to adjust the feed dogs is generally expected to ensure the fabric does not pucker or wave.

    Differential Feed: The True Secret Weapon

    The single most effective feature you can master is the differential feed. This allows you to adjust the speed of the front feed dogs relative to the back ones. If you are sewing a stretch knit, your professional results will depend on preventing the “lettuce edge” look. For instance, those who attend London sewing courses for adults often find this discovery to be their “lightbulb moment”; the authority of a well-made garment comes from real-world technical control.

    Distinguishing the Tasks: Construction vs. Finishing

    The project you choose to create dictates the specific settings and thread count you must adopt. This is a key professional distinction in the world of high-end sewing.

    Construction with a Serger

    When using a serger for construction:

    • Seams are Flexible: The looped nature of the stitch allows it to stretch with the fabric, which is why it is essential for sewing classes london for beginners focusing on jersey wear.
    • The Approach is Integrated: You act as both tailor and finisher, cutting away the seam allowance as you sew.
    • Efficiency is Paramount: This work requires a steady hand and a clear plan, as once the fabric is trimmed, there is no going back.

    Finishing with a Serger

    When using a serger for finishing:

    • Edges are Overcast: The focus shifts to preventing fraying on woven fabrics like cotton or wool.
    • The Style is Professional: You act as a meticulous craftsman.
    • Results are Durable: The learner creates items that can withstand dozens of washes without the interior seams coming apart.
    • Applications are Wide: This dynamic is perfect for home decor, such as cushions and curtains, requiring a tidy internal finish.

    Our Unique Insight: The Emotional Connection to Quality

    If you’re wondering, is investing in a serger worth the effort for the long term, the answer is yes—provided you approach it as a skill to be nurtured. Beyond the technical utility, there is a profound psychological shift that happens when you start using an overlocker. It is not just a tool for speed; it is a tool for confidence.

    When you know your seams are as strong and tidy as those found in a high-end boutique, your relationship with your wardrobe changes. You stop feeling like an “amateur” and start seeing yourself as a designer. This shift in mindset is what makes mastering the serger so deeply satisfying for many of our students.

    Actionable Strategy: 3 Serger Skills to Master Today

    To bridge the gap between “what can I sew” and “how do I sew it well,” focus on these three things today:

    • Perfect the 4-Thread Overlock: Don’t just thread the machine; learn to balance the tensions until the “ladder” of the stitch sits perfectly on the fabric edge.
    • Practice the Rolled Hem: Use a scrap of silk or chiffon. Removing the stitch finger allows for a tiny, elegant finish perfect for scarves or evening wear.
    • Document Your Settings: Keep a small notebook of your tension settings for different fabrics (e.g., “Denim Finishing” vs. “Silk Rolled Hem”). These records are your professional shorthand.

    The Practical Path: What Can I Sew With a Serger?

    If you’ve decided this is the path for you, you need to know what can a serger machine do across different categories of projects. This path is straightforward but requires attention to fabric choice and machine threading.

    Essential Garment Projects

    • Jersey T-Shirts and Leggings: The most common use. The serger handles the stretch without snapping threads.
    • Linen Trousers: Serging the raw edges before assembly ensures the garment lasts for years.
    • Sweatshirts and Hoodies: The 4-thread stitch is strong enough to hold heavy fleece together.

    Home Decor and Beyond

    • Table Linens: A 3-thread rolled hem creates a beautiful, dainty finish for napkins and tablecloths.
    • Bedding: Finishes long seams on duvet covers quickly and securely.
    • Cushion Covers: Overlocking the edges prevents the fabric from shedding inside the cover.

    Actionable Strategy: Building Your Sewing Routine

    Most sewists assume their complex work must happen exclusively on a standard machine. However, you can deliberately structure your workflow by integrating the serger into different stages of your project:

    • Pre-Construction: Overlock all your raw fabric pieces before you start the main assembly to keep your workspace tidy.
    • Bulk Sewing: If you are making multiple items, use the serger for all the long, straight side seams in one session.
    • Final Flourishes: Save the rolled hems for the very end to give your project a delicate, professional touch.

    How to Find the Right Training

    Once you’ve established your interest and decided to explore how to sew more professionally, the next hurdle is finding the right guidance. The challenge isn’t usually the machine itself; it’s connecting with a mentor who can demystify the threading process.

    Starting with Local Classes

    Your first few hours with a serger are often the most daunting, but they are the most important for building muscle memory.

    Exploring National Resources

    While local help is invaluable, broader seamstress courses offer a ready-made curriculum for those wanting to learn to use a sewing machine alongside an overlocker. These structured paths provide a guaranteed way to master the London sewing courses curriculum.

    Addressing the Investment: Is a Serger Worth It?

    From a maker’s perspective, the question of “is it worth it” is purely about the balance of quality and time: will the investment of money yield better garments and a more enjoyable process?. The answer, supported by the experiences of countless hobbyists, is generally yes, but the quality of your instruction is the differentiating factor.

    The Maker’s Perspective: Speed vs. Skill

    The ultimate gauge of a serger’s value balances the initial learning curve against the student’s eventual confidence and outcomes.

    • The Learning Curve: Research and feedback show that threading remains the biggest barrier, which is why modern air-threading models are becoming so popular.
    • The Confidence Boost: Sewists frequently report that even before they master complex settings, the ability to finish a seam properly leads to a dramatic increase in their self-esteem. This boost in confidence is often cited as the primary benefit and justifies the expense for many.

    Frequently Asked Questions (FAQ)

    Beyond standard seam finishing, you can use a serger for decorative tasks like creating a “lettuce” edge on knits, flatlocking for athletic wear, and even attaching elastic or beads with specialised feet. It is an incredibly versatile tool for gathering fabric—especially long ruffles for skirts or curtains—because the differential feed can be adjusted to pull the fabric in as it stitches.

    Deciding whether a beginner should use a serger depends on their safety awareness and foundational skills. While it is not usually the first machine a child learns on due to the sharp cutting blade, it is an excellent second step once they understand basic machine operation. A good tutor acts as a dedicated coach, ensuring they respect the blade while enjoying the speed and professional results.

    Yes, for all practical purposes, an overlocker and a serger are the same machine. “Overlocker” is the term more commonly used in the UK, Europe, and Australia, while “Serger” is the preferred term in North America. Both machines perform the same function: trimming fabric and wrapping the edge with multiple threads to prevent fraying and provide a professional, stretchy finish.

    Conclusion

    The answer to the initial question—what can you use a serger for—is a resounding “nearly everything that involves a seam”. The world of modern sewing is defined by skill, expertise, and a commitment to quality finishes. This creative path offers exceptional flexibility and intrinsic reward for those who combine their design ideas with the right technical tools.

    Whether you are an adult entrepreneur starting a small clothing line or a hobbyist making gifts for family, your greatest asset is your ability to use the right tool for the right job. If you have the passion and the right approach, the world of professional finishing is wide open for your creativity to take root and flourish.

    About the Author: Grace, Founder of London Sewing Courses

    Grace is the heart and hands behind London Sewing Courses. A passionate and experienced sewing instructor, she founded the studio with a unique mission: to create a calm, friendly space for adults to learn and connect, while using the profits to fund free sewing classes for local children in need. Her personal expertise and commitment to community building are at the core of every class and every stitch.

    Sources